


In today’s competitive real estate market, static photos are no longer enough. Buyers expect dynamic, engaging content that brings properties to life. Enter Reptov, a powerful new platform that transforms ordinary listing photos into professional marke ...


As an Amazon Associate we earn from qualifying purchases.
Lightroom speeds up the editing process of real estate photographers. However, it can get messy and disorganized as you store and retouch thousands of images. In this article, I'm sharing tips on how to organize Lightroom, so you can have an efficient post-production workflow and spend more time taking photos.
Quick Navigation
The key to organizing Lightroom is using a pictures folder, creating a Lightroom catalog, editing catalog settings, and using collections. You can also organize photos in Lightroom by renaming files, applying presets rating photos, and deleting unwanted images.
Lightroom is an exceptionally valuable tool for post-production. However, among its amazing abilities is file management. For this article, let's go over the step-by-step guide and tips on how to organize your photos in Lightroom to ensure you can locate files immediately and focus on photo editing.


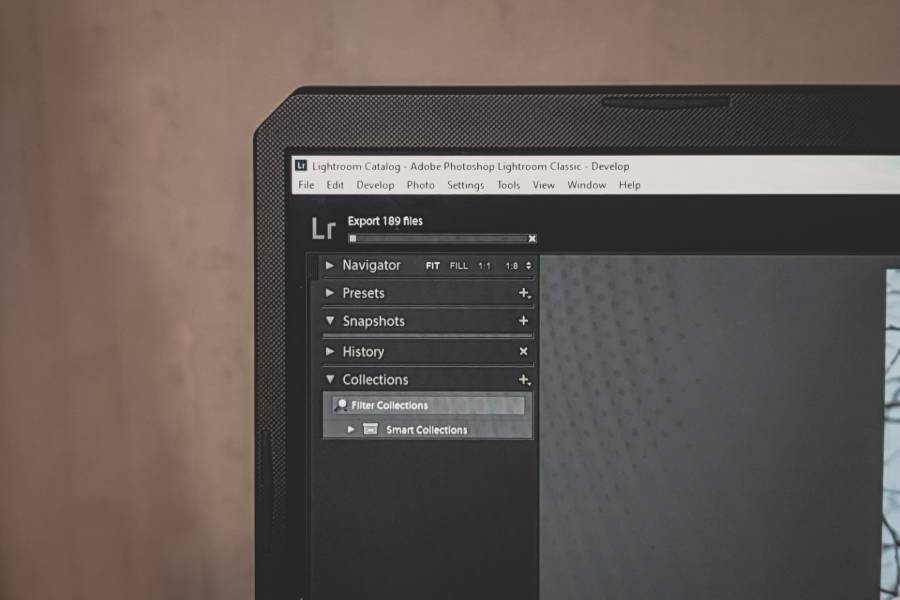
Years of using Lightroom liberally can result in a cluttered interface. Even if you're just learning real estate
Separating real estate images after transferring them to your laptop is the first step to an organized photo importation. To do this, create one folder called 'Real Estate Photos', where you would store all of your work-related property images or other types of
You can then create folders per year or any other desired property. For example, you will store all of your California bookings in Photos\December\California. You can then think of subcategories such as Sacramento residential properties or Irvine apartments.

After sorting photos on your laptop or computer, the next step is to create a new Lightroom Catalog by going to File then clicking New Catalog.
The next best way to optimize the software is to modify the Lightroom Catalog settings. This also applies whether you're learning how to use Lightroom 5 or Lightroom Classic.
Once you have a catalog, you can work on lots of real estate photos by giving the same effect to all of them. You can achieve this by simply copying the edits in multiple images.

If you can create catalogs, you can definitely delete a Lightroom catalog you won't use anymore. As some of the properties you photographed get sold or renovated, you probably won't have any use in some of the images.
After deleting, you can relaunch Lightroom to create a new catalog.
In one survey, photographers spend 28% of their time retouching photos and other computer-related tasks. However, you can shorten your time when you have file organization in Lightroom.
Lightroom provides a default setting when creating a new catalog. While you can still change them later, it's best to organize your photos through references right away.


When scrolling through photos on your mobile phone, you probably have a preference in viewing them. Do you select all pictures, recently added, or favorites? The same applies in Lightroom, as the software offers different options for viewing images.
To view the grid to the right, go to In the My Photos, then choose from any of the following: All Photos, Recently Added, By Date, People, or Albums. You can then see the images from the Sharing panel, including those Shared for Connections or Shared to Web.
After that, specify how you want to display pictures in the Grid.
When working in the real estate
Advertisements prompt 90% of people to purchase something. For agents, real estate
Another way to have an organized Lightroom Catalog is to manage Preferences in the Library module, especially when using multiple catalogs.
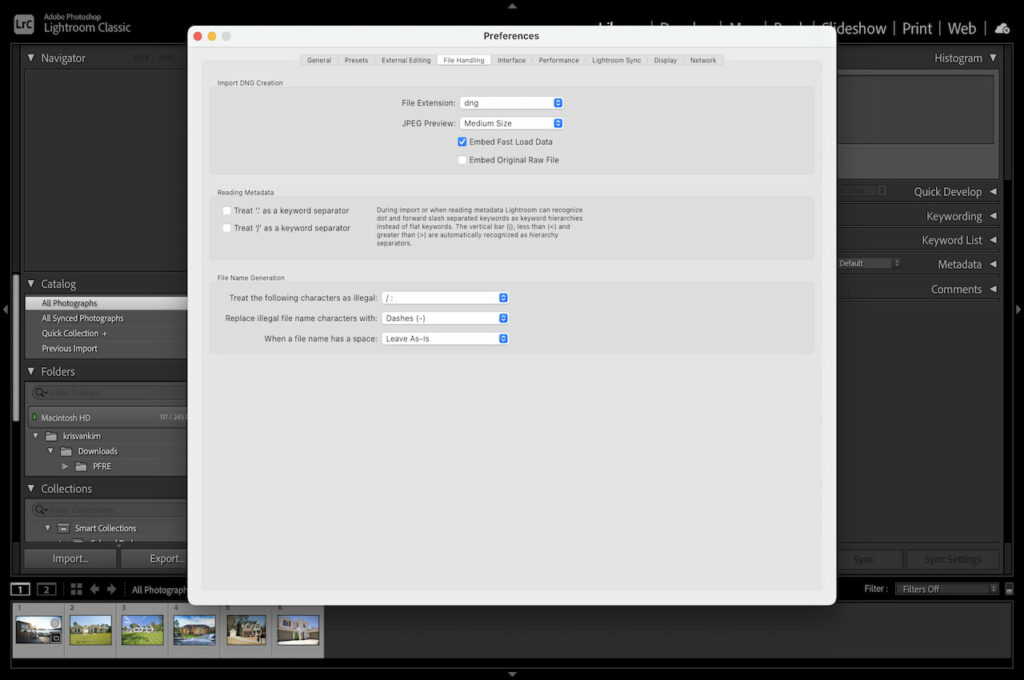
The way you import photos using catalogs deeply affects how smooth your post-production will become. To ensure that, launch the import catalog by going to File, then click on Import Photos. After that, you should see an import screen.
The left portion is where you can grab files. The right part provides the destination and import settings, while the middle section displays the photos you will import.
This part of managing photos in Lightroom also helps the program determine whether you're using permanent storage, your device, or a memory card reader.
Lightroom has lots of organizational tools, even when you're just simply importing photos. Make sure to update your Lightroom regularly, so you can get all the options for bringing photos into your Lightroom catalog for object removal.
File renaming is another good way to sort out Lightroom data. It's typical to see photos with names like DSC_0001.DNG. However, random letters and numbers can look confusing when you're sorting through thousands of images. Besides, this may eventually create duplicates.
To solve this, you can rename your pictures in a different format or develop a sequence number. You can try using: YYYYMMDD-Property or Client's Name-Place. Make sure to include dashes in between for a clear distinction of the words.
Given this format, you can rename photos like 20210902-XXXX real estate apartment-Naples Florida. This is just an example, and you can change it to a format that makes it easier to distinguish files.

About 45% of brokers say the most complex challenge agents experience involves keeping up with technology. Among those is the use of digital images. To attract clients with your real estate
However, storing images in random folders is among the common mistakes photographers and editors make when managing Lightroom. Fortunately, Lightroom lets you identify the location of where the import process will store files.

Houses with high-quality images sell 32% faster than other properties. File organization plays a role in ensuring you work with your best shots during post-production.
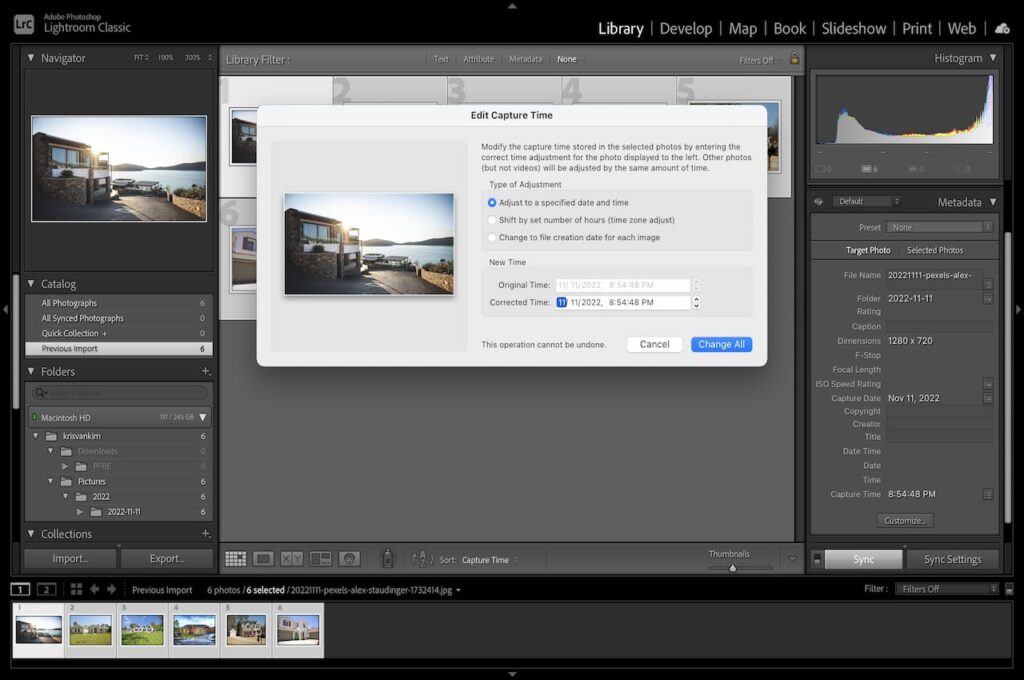
One of the great things about using Lightroom is that you can change the date and time of photos. You may experience this when you're a traveling real estate photographer, and you weren't able to change the camera's setting according to the location's timezone.
Listings with professional images get a 139% increase in clicks than similar listings. As an editor, you need the best real estate photography presets to enhance your images and make the colors pop. You can even install filters that add snow, preset brushes, or VSCO presets on Lightroom.
Adding presets in Lightroom enables you to change the look of photos with a click. However, part of having a systemized Lightroom is managing presets in various ways.
Successful professionals working in the real estate photography industry prepare for the unexpected. Having a backup of filters ensures you don't misplace them, and you can access them quickly when post-processing or if you want to sell Lightroom presets.
Lightroom offers numerous default presets that you can apply to multiple photos. Eventually, you will learn how to make your own presets or save new filters in Lightroom. In time, all of the filters can clog up the program.
To hide filters you rarely use or don't plan on using anytime soon, right-click on the preset folders in the Presets panel. Once you select Manage Presets, a dialog box will show all of the filters. Uncheck the ones you want to hide, then click on Save.
In this way, you can save time managing filters, especially when you need to export Lightroom presets.
Learning how to use Lightroom presets for post-production is pretty straightforward. However, it can sometimes be confusing when you can't use some filters on both Lightroom and Lightroom Classic.
When syncing Lightroom presents to mobile, the first option is to launch the program. Click on File, then select Import Presets. After that, go to the location where you want to store the presets. Choose the location, then click on Import.
Another option is to navigate the User Presets section, then right-click on the particular preset you want to sync.

Real estate is among the top industries that hire photo editors. To increase your chances of earning a high income as an editor, it's crucial that you use Lightroom efficiently.
Conducting a post-import check is another way of handling photos. Make sure to change the name of the photos folder, as well as the Keywords and Custom Text fields upon importing.
If you imported files with the incorrect setting, you can simply select the imported photos, then change the keywords and rename the folders. You can also create a sequence number for easier identification.
One of the best ways to organize your photos in Lightroom is to store images on the root folders of your laptop or computer's hard drive. The software doesn't back up images, yet it can back up Lightroom catalogs. However, there's still the risk of losing crucial photos.
Furthermore, overstuffing Lightroom with files may cause the program to slow down. While you can reset Lightroom in case of bugs or technical issues, you can prevent such mishaps by doing a full backup.
If you have more budget, you can also use a storage array unit that uses multiple drives for storing a massive amount of information. When a single drive fails, you can replace it, and the system will sync and go back to regular operational mode.
To use Lightroom efficiently, it's important that you take time to manage your
Using a keyword allows you to filter pictures, especially when your files become a complete mess. You can start with a general category and then narrow it down into subcategories.
For instance, the main keyword is 'Connecticut Residential Homes'. From there, you can break it down into subcategories such as Danbury Apartments, Glastonbury Luxury Homes, or Bridgeport Townhouses.
In this way, you can effortlessly search for images using keywords. Click the Help icon from the screen's upper-right corner. Then, enter the keyword that is relevant to what you're looking for in the software.
When you import photos into Lightroom, decluttering a catalog is another way to organize your photos. One of the best ways to do that is to use the software's image stacking feature.
Learning how to stack photos in Lightroom lets you gather several pictures in a single place on the Grid or a collection.
To do this, pick multiple photos either from the Photo Grid, Square Grid, or Detail. Click on the selection and choose Group Into Stack.

One of the great things about Lightroom is that it uses Collections to organize photos. Think of a collection as a digital photo album. You can create as many Collections in Lightroom to serve as a virtual folder within the Lightroom Catalog.
From the Collections panel, click on the New Collection plus icon in the top right corner, and you can create any of these Collections.
You can even strategize to add collections of unsorted images. However, keep in mind that a collection can't move or duplicate images, as it can only help you locate photos.
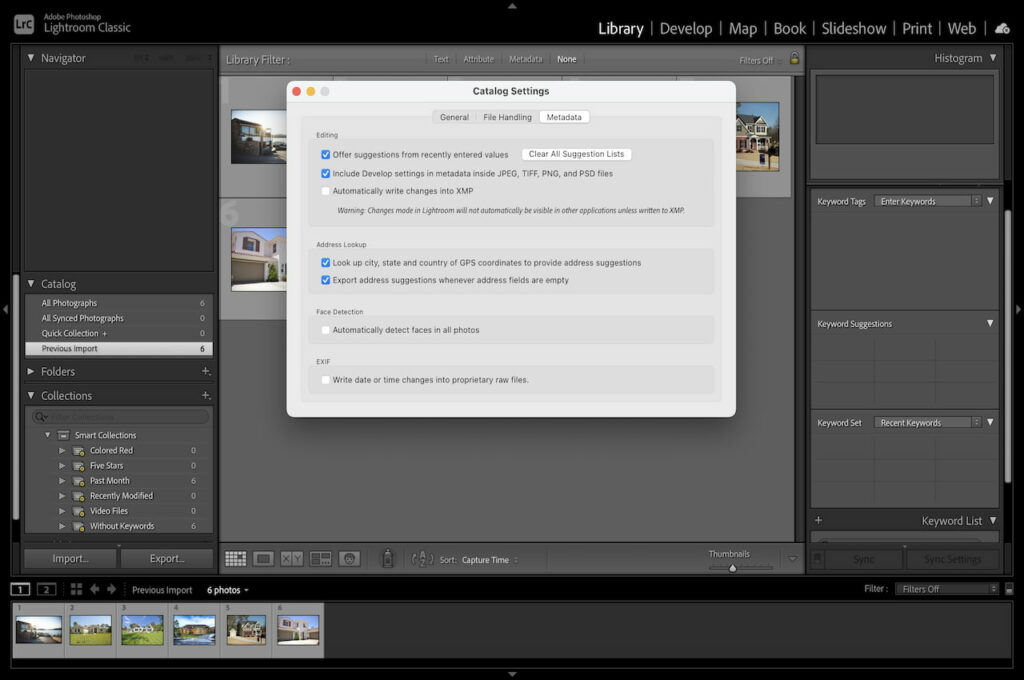
The main advantage of metadata is that the details help identify you as the owner of the photo. Such information also enables you to search for images on Lightroom easily.
With this, you can search for particular pictures containing certain elements. For example, if an agent wants photos showing living rooms, you will search by the word 'living room' or 'guest room' for the software to locate these images.
To imbed such information, go to Edit > Catalog Settings. Click the Metadata tab to write adjustments. You can also use the software to add a watermark.
People are increasingly looking for digital floor plans, with 63% wanting to see photos to help determine if a property is right for them.
Producing stunning real estate photos doesn't end at removing shadows, changing the background color, or fixing out-of-focus images. It's vital for photo editors to have a clear process on how to choose which images to fix.
Much like having varying styles in post-production, every photographer also has their preferred way of rating photos in Lightroom. Setting a labeling process saves you time during the culling or initial selection of real estate photos. The ideal structure depends on the number of images you need to retouch.
Real estate marketplace company Zillow recommends an average of 22 to 27 photos for property selling. When you have a fast rating system, you can easily select the best shots for post-production and deliver them on time.
After working on photos in a collection, you need to save photos from Lightroom for later use or sharing. Learning how to export all images from Lightroom is part of having an organized system.
The best way to do so is to follow the selection method. This simply involves choosing all the necessary photos, prompting the export command and then exporting your work.
The cache acts as a storage area for instructions and data to make Lightroom work faster. As the program uses too much cache, which consumes space, this can cause errors and disrupt your editing workflow.
With that said, it's important that you know how to clear Lightroom cache to free up space and ensure everything runs smoothly.
The Camera RAW cache helps display images quickly, especially when converting from RAW to JPEG. If you tend to shoot RAW and store thousands of RAW photos in Lightroom, the cache can clog up disk space easily.
To clear the cache, go to Edit and click on Preferences. Open the Performance tab, then click on Purge Cache.
Lightroom uses Previews to show your photos in the Library module. On the other hand, Smart Previews display a low resolution yet fully editable version of a RAW image.
Another way of optimizing the Library module performance is by deleting the Previews and Smart Previews cache. Look for the corresponding files through Finder on Mac or Explorer on Windows. Make sure to close the software before deleting these files.
You will accumulate thousands of images as you venture into the world of interior and exterior
Much like cleaning out your camera bag, getting rid of clutter can lighten the load. Thus, you can also organize your photos in Lightroom by deleting unusable images.
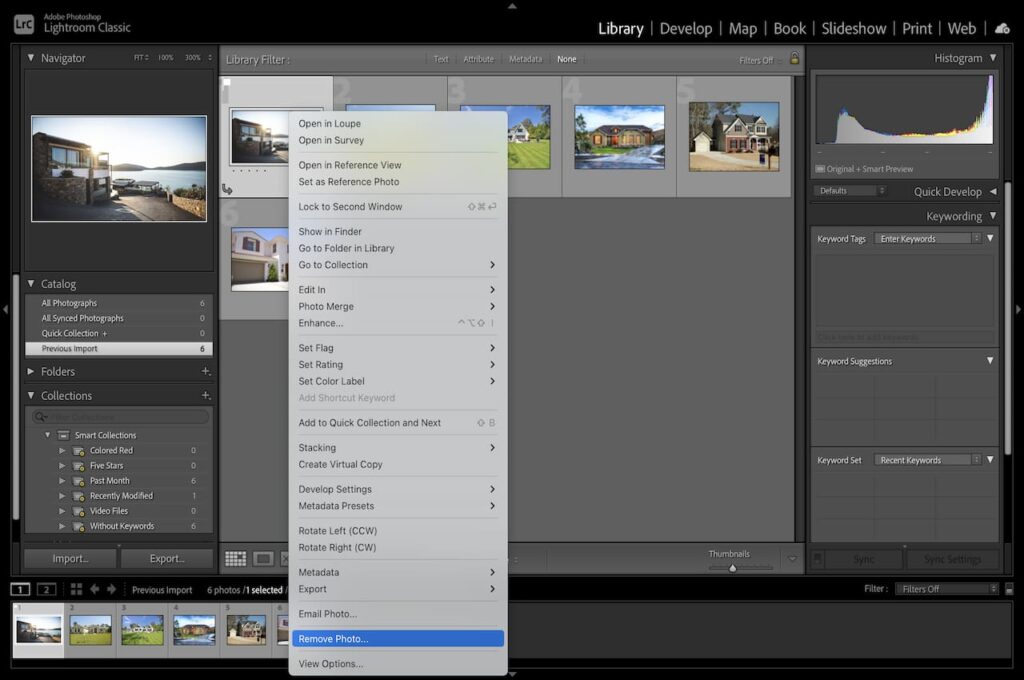
A simple system to clean and organize photos in Lightroom is to right-click on a picture in the filmstrip, then select Remove Photos. The program will give you an option whether you want to delete the photos from Lightroom or an external hard drive.
The Develop Module is the part where you can blur the image background, work on image layers, stitch stacked photos, or remove glare on photos. Having an organized Develop Module lets you see all the photos clearly and make adjustments seamlessly.
Among the best ways to enhance your real estate shots in Lightroom is to change the image background or make the background black. Additionally, the software can dehaze shots to ensure viewers won't lose focus on the subject. You can also work on flipped images for a more eye-catching effect.
An organized Lightroom helps real estate photographers and photo editors become more efficient in post-processing. I hope this article can help manage your pictures folder, catalogs, ratings, and collections for a time-saving process. In this way, you can edit in Lightroom like a pro and have more time for


