


In today’s competitive real estate market, static photos are no longer enough. Buyers expect dynamic, engaging content that brings properties to life. Enter Reptov, a powerful new platform that transforms ordinary listing photos into professional marke ...


As an Amazon Associate we earn from qualifying purchases.
Lightroom allows you to keep your images in one place. However, managing thousands of real estate photos can be a struggle, especially when you need to filter them for editing. Learning how to view only flagged photos in Lightroom can make your workflow much simpler and more efficient.
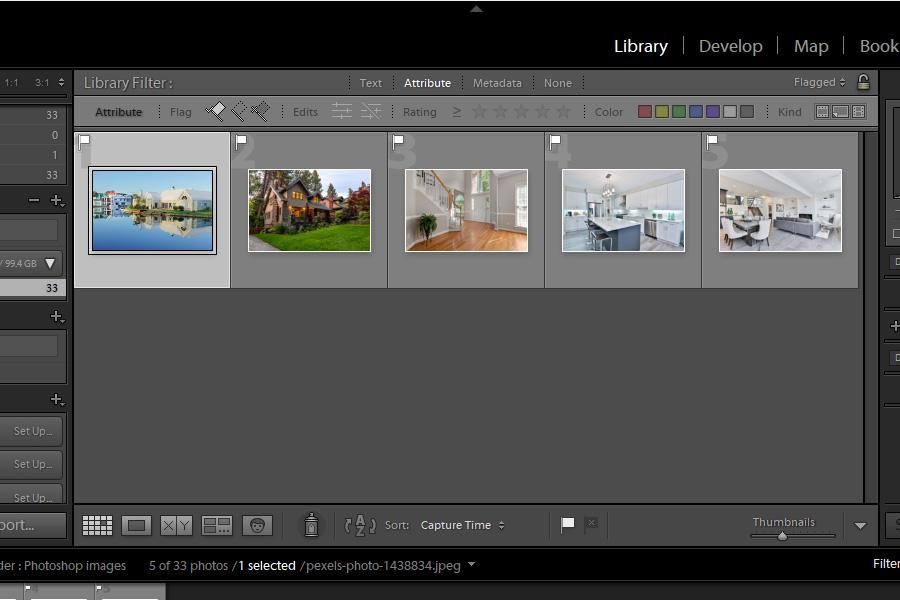
To see only the flagged images in Lightroom, go to the Library Module's Attribute setting and select the white flag to reveal your "selected" pictures for editing. When using the Develop Module, you can also expand the filter options to choose the Flagged option.
By flagging your real estate images, you can keep them organized and separated into different categories. This makes accessing and working on them much easier and quicker. For this reason, learning to view flagged images in Lightroom can speed up how you retain pictures for post-processing.

The flagging feature in Lightroom is one of the basic methods of image organization in Lightroom. A flag in Lightroom is a criterion the software uses to recognize the interior or exterior images you choose to keep and the low-quality ones you plan to delete.
Lightroom is a photo organization application where you can import photos directly from your camera, hard drive, external SD card, or even shoot tethered. It also allows you to add flags and categorize pictures. This lets you remember the photos you plan to delete or keep instead of deleting them outrightly.
There are two different types of flags in Lightroom. You can use them as per your requirements.
Picked flags are for images you want to include in your Lightroom workflow. A white flag indicates the selected images. You can use the flags to highlight your favorite photos within the Lightroom application.
Reject flags are the opposite of picked flags. They indicate unwanted or unneeded photos within your Lightroom collection. A black-colored flag shows the images with reject flags.
This feature helps your Lightroom workflow by not disturbing you with unwanted images.
The flags are valuable tools for organizing real estate images in Lightroom. You can then use them to filter your pictures so only the flagged images will appear.
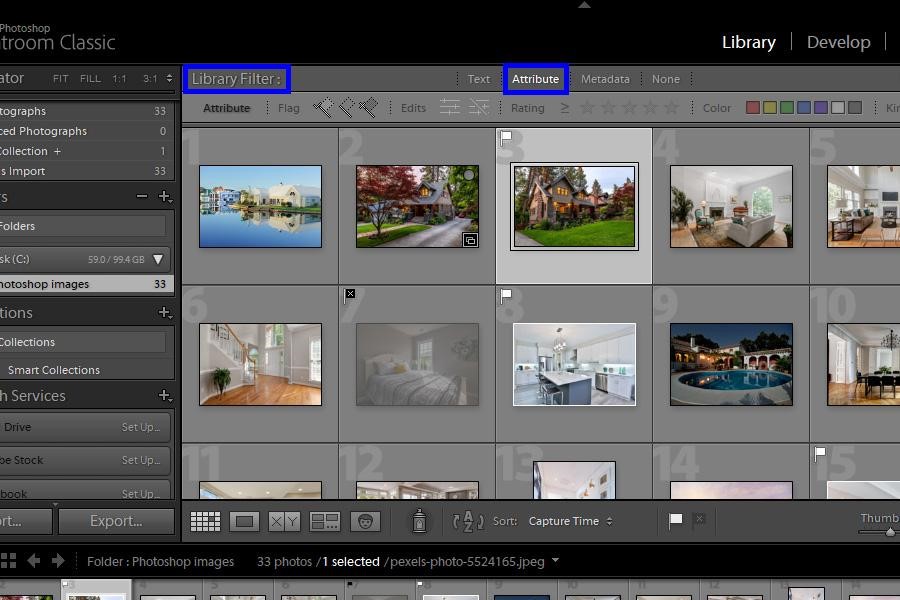
As a result, your workspace will remain tidier and easy to use. Here is how you can view only the flagged images in the Grid view.
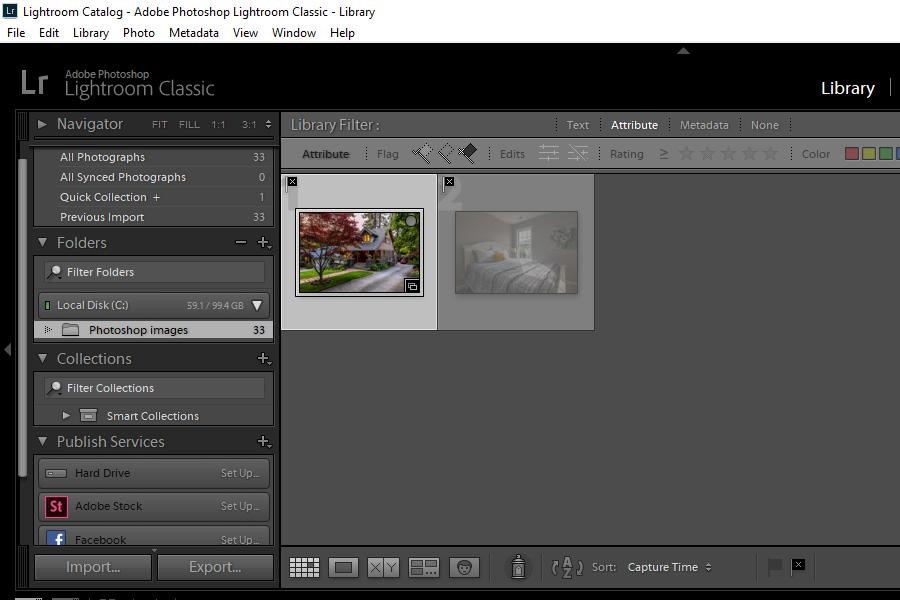
You may also edit your real estate images in Develop Module or set the workspace to Loupe View. You can open and view the flagged images using the following steps.
When working with an extensive collection of real estate photos, it can be challenging to decide outrightly whether to delete or keep a low-quality or blurry photo. The Lightroom flags allow you to group the images you think you might delete in the future.

Flagging helps eliminate low-quality photos from your Lightroom workflow while keeping them as a backup in case you need them for further editing. This keeps your workflow tidy and speeds up Lightroom.
However, flagging only prevents unwanted photos from appearing in the workspace. Thus, the image files will still be on your hard drive. You must permanently delete them to free up hard drive space.
After importing your real estate images, press the P button to flag a photo in Lightroom. You can also go to the Photo menu and click on Set Flag.
View your flagged pictures first, right-click on the photo you want to unflag, and then select the Unflagged option. Alternatively, you can select multiple real estate images and press the U button on your keyboard.
Filter through your flagged photos and then unflag the pictures you want to delete first. Click on Remove from Lightroom to delete the pictures from the catalog while retaining the files on your hard drive. Select Delete from Disk to delete the images from the catalog and your hard disk.
You can choose the Attribute setting's white flag or the Develop Module's filter options to show only the flagged images in Lightroom. Lightroom flags will make your workflow much more managed, quicker, and efficient. Keep your real estate shots organized and categorized as per your requirements by using the Lightroom flags.


