PFRE-Logo-white-bg
Reading
blue-triangle-element

Articles

PFRE is the original online resource for real estate and interior photographers. Since 2006, it has been a community hub where like-minded professionals from around the world gather to share information with a common goal of improving their work and advancing their business. With thousands of articles, covering hundreds of topics, PFRE offers the most robust collection of educational material in our field. The history of real estate photography has been documented within these pages.
All Articles
blue-triangle-element

Latest

Image banner for the March 2024 PFRE Photographer of the Month Winner Alex Vincent, with a featured image of his winning photo titled "Kitchen."

Congratulations Alex Vincent, March 2024 PFRE Photographer of the Month! The theme this month was "Kitchen". Alex Vincent - #906 Yvonne Raaijmakers - #909 Peter Wingfield - #902 Here's what Alex has to say: Thank you for the award of Photographer of th ...

Contest
blue-triangle-element

OVERVIEW

For over a decade, photographers from around the world have participated in PFRE’s monthly photography contests, culminating in the year-end crowning of PFRE’s Photographer of the Year. With a new theme each month and commentary offered by some of the finest real estate & interior photographers anywhere, these contests offer a fun, competitive environment with rich learning opportunities. 

Contest Rules
blue-triangle-element

CURRENT CONTESTS

View / Submit
blue-triangle-element

PAST CONTESTS

View Archive
Resources
blue-triangle-element

Resources

PFRE prides itself on the depth and breadth of the information and professional development resources it makes available to our community. Our goal is to help real estate and interior photographers be successful while bringing the community together and elevating the industry as a whole.
blue-triangle-element

Conference News

No items found

How to Use Lightroom Presets

Published: 06/04/2021

As an Amazon Associate we earn from qualifying purchases.

Lightroom Presets are an easy way to alter your photos to a particular look that increases their aesthetic appeal. If you know how to use Lightroom presets, it will speed up your photo editing process. Besides, using presets will give wonderful effects to your photos which may be hard to get right if you haven’t mastered editing with Lightroom Classic CC yet.

How to Use Lightroom Presets

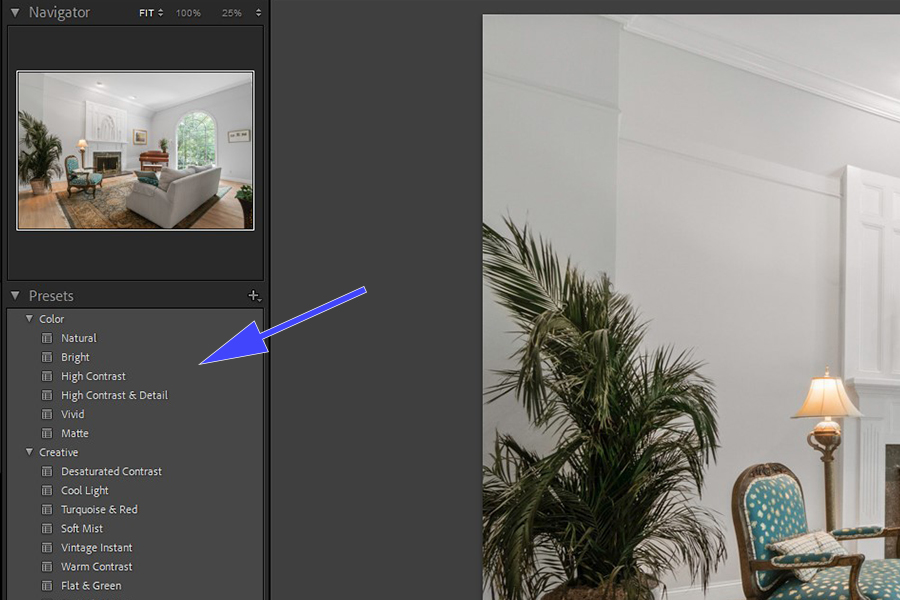
Applying a preset that is already uploaded in your Lightroom presets folder is a straightforward process. However, if you have just downloaded a free or paid preset, you need to add it to Lightroom first before using it. 

Applying Presets To Your Photos

Once you are done with uploading the presets into Lightroom that you want to use, using them on your photos is very easy.

  1. Launch Adobe Lightroom Classic and import the images you want to edit.
  2. Click on the Develop module.
  3. In the Navigator tab on the right, you will see the Presets dropdown menu.
  4. Click on the arrow to view all of the available presets.
Arrow pointing to default Lightroom presets
  1. All the default Presets of Lightroom will be present in the drop-down. Also, the presets that you made yourself or bought are also available here.
  2. Just by hovering the cursor over the presets, you will be able to see a preview of what they look like applied to your image.
Cursor hovering Lightroom preset to see preview
  1. Depending upon the look you wish to achieve with your preset, select the one that works best.
  2. View the before and after of what your image looks like with and without the preset by clicking on the Y button on your keyboard.
Preview of image before and after preset is applied

Saving Your Edited Photos

  1. Save your photo by exporting it from the Library.
  2. Click on the edited image (or select multiple images if you want to export more than one).
  3. Click on Export on the left-hand side.
Exporting image with preset in Lightroom
  1. A popup will appear where you can select where you need to export your image, rename it, and resize it.
  2. Once you’ve adjusted the export settings, click on Export. The image that you edited with the preset is now saved and can be used outside Lightroom.

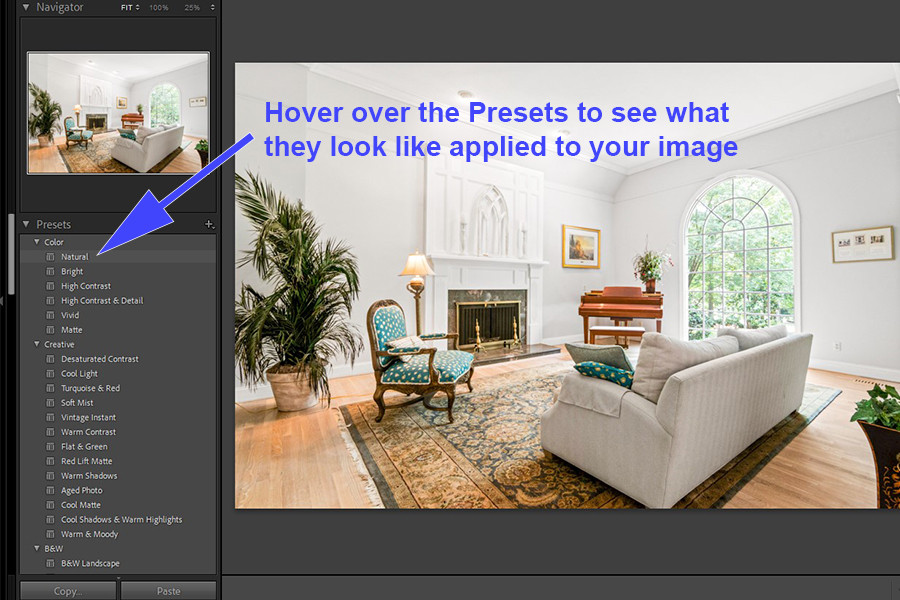
Remember that every preset might not work on every photo. Therefore, you can either:

  • Check which type of Lightroom preset is appropriate for each photo you’re editing.
  • Adjust the presets until you are satisfied with how your photos look.

Choosing the Ideal Lightroom Preset For Your Photos

There are thousands of presets available online, both free and paid options. To choose the best Lightroom preset, check its description and any sample images carefully before deciding to download any. Think about the style you want to achieve with your presets so that you can import the right ones into your catalogs.

The description of the preset usually describes what kind of tone the preset gives. For instance, a preset that gives a vibrant look with a sunshine effect could work great when editing a photo of the front of someone’s house. In contrast, a preset with a high saturation effect is great to apply to photos where you desire a dramatic look.

You can also use helpful tools like Compare Presets to compare various presets to help you decide further before buying presets.

Simple Ways To Adjust Presets

At times, you may feel that your Lightroom preset is adding too much of an effect on a photo. Don’t worry; you can always customize it by adjusting the editing tools and sliders found in the Develop module.

Adjusting Lightroom presets with Develop Module
  1. Use the Exposure slider if you wish to adjust the brightness of the image.
  2. Use the Temp slider if you wish to achieve a different color temperature.
  3. You can also alter the Tone Curve Panel if you want to add some contrast or add a matte effect to your image.
  4. Make some adjustments in the Split Toning panel if you need to tweak the color tones in Highlights or Shadows.
  5. Sometimes, the whole photo looks good with a preset, but some small areas need to get adjusted. Use the Adjustment Brush to make changes to small sections by masking them and adjusting the sliders after it.
  6. The Graduated Filter and the Radial Filter also come in handy to make customizations to a preset.

Why Use Presets in Lightroom?

Generally, photo editing is a time-consuming process involving adjustments to specific areas of the image with precision. Also, you need to get the hang of using the software to do editing professionally. 

This is where presets come in handy as a brilliant shortcut to edit the whole photo with a couple clicks. Rather than spending hours editing each image one-by-one, you can apply a preset to an entire set of images in just a few seconds. From there, you can go through and quickly make small adjustments to individual images as needed.

Lightroom presets are also very helpful if you want to achieve a particular look on your photos. The fixed adjustments of a preset give the desired effects much quicker. For instance, a preset with a color pop effect will intensify the colors and brightness of the image all over when applied to the image. 

Photo comparison of before and after applying Lightroom presets

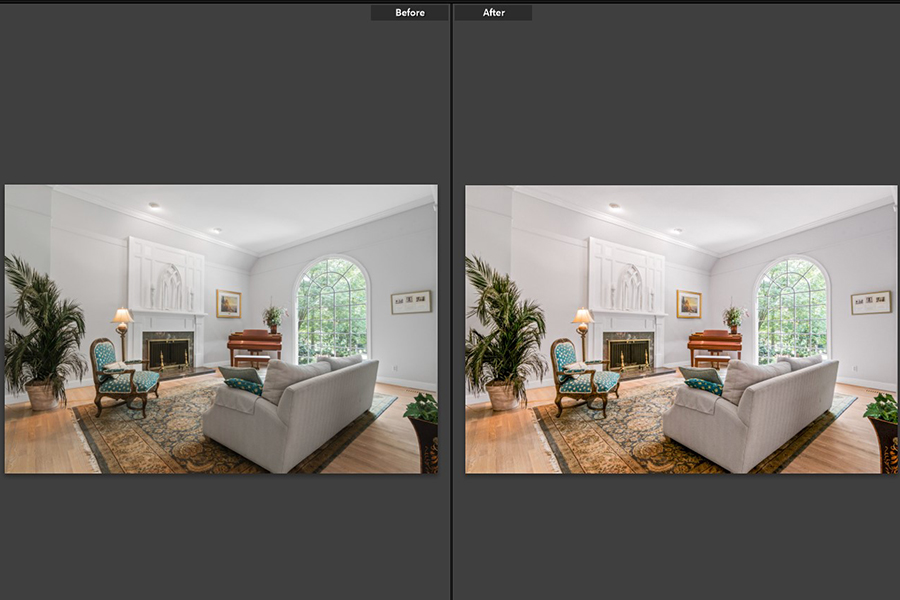
See how the application of a preset instantly uplifted the look of this living room by slightly increasing the exposure, adding some clarity, and increasing the temperature.

Takeaway

Whether you’re using presets to save you time or to achieve a cohesive and consistent look to all of your real estate images, they are very helpful tools to use in Lightroom. Using Lightroom presets for real estate photography is extremely easy, making it even more convenient to enhance an image. 

Vendors

Rela Logo
CS6 PSE Logo
HD Photo Hub Logo
FullFrame Logo

Learning Topics

.
magnifiercrossmenucross-circle