






In today’s competitive real estate market, static photos are no longer enough. Buyers expect dynamic, engaging content that brings properties to life. Enter Reptov, a powerful new platform that transforms ordinary listing photos into professional marke ...


As an Amazon Associate we earn from qualifying purchases.
An uncalibrated monitor may display an inaccurate representation of colors. After spending hours editing real estate photos, you wouldn't want the colors to look different on other devices or prints. Here are various ways how to calibrate your monitor for Lightroom.
The fastest way to calibrate monitors for Lightroom is to work on Mac's Display Calibrator Assistant or the Calibrate Display Color option in Windows. You may also use colorimeters such as X-Rite iDisplay Pro or SpyderX system. Alternatively, you can try online tools like Lagom, LCD Monitor Test Pages, Photo Friday, and W4ZT.
Editing in Lightroom or Photoshop relies heavily on the display device, that is, your monitor. If calibrated, the image's color contrast, saturation, and tones are shown accurately. Otherwise, the screen display will not be closer to reality, and the print of these images will be drastically different than you imagined.

Windows and Mac have built-in tools with features to conduct stepwise monitor calibration. The only issue with built-in calibration is that it will be limited according to the model and display type.
Monitor adjustment is not something that should intimidate you. It is a quick, hassle-free process and worth it if you want an enhanced image quality. There are three methods that you can use for calibration. However, you must care for a few things before starting any technique.
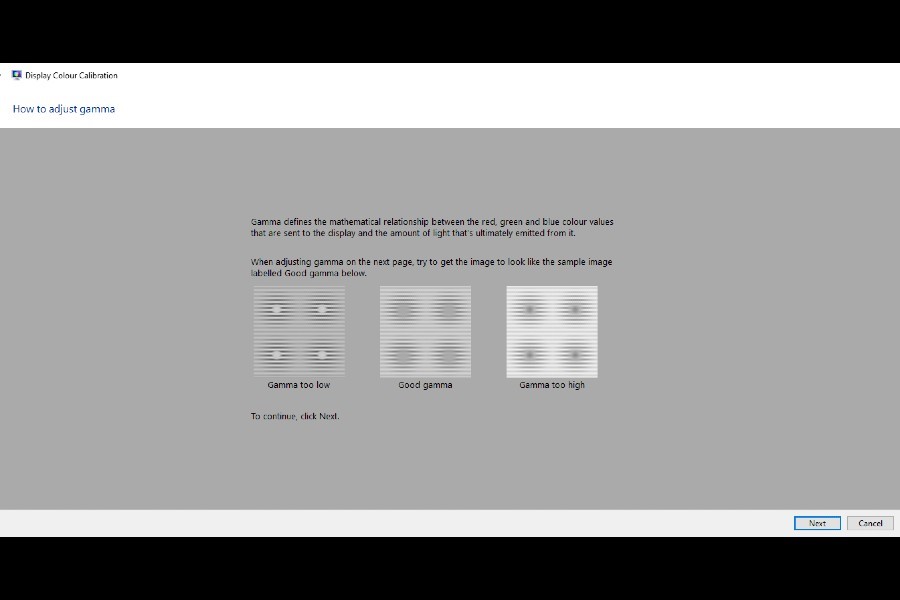
If you're a Windows user, follow these steps to calibrate your monitor.
Mac also has a built-in monitor calibration tool that you can utilize by following these steps.
Apple creates a profile for your calibration, which you can name accordingly. It asks whether you, as an admin, allow other users to access this profile. Once done with the settings, click on Done.
There are various online tools that you can use to calibrate your monitor. These tools run tests to adjust the screen's brightness, contrast, color range, gradient, and pixel mapping. Some highly reviewed ones are.
Lagom conducts various tests to check for contrast, brightness, sharpness, gradient, and gamma setting adjustments to get the best picture quality. It provides test pages to inspect your monitor for various things.
Besides online testing, Lagom also provides test images in a ZIP file. You can download this on a USB to take wherever you go.
Photo Friday is a comprehensive monitor calibration tool that ensures the black-and-white tone transition is easily distinguished. The tool’s landing page consists of shapes and tones with simple instructions to calibrate your monitor for optimum visuals.
To adjust your monitor’s color adjustments, gamma, or greyscale, you can use the W4ZT online tool. You will notice a significant improvement after using this reliable monitor calibration tool.

Hardware calibration provides a higher level of monitor calibration for professional
Using hardware for color calibration results in higher flexibility and control over image quality. Colorimeters offer a higher degree of accuracy, which results in color consistency. This is a prime requirement of highly creative photographers.
Devices like X-Rite iDisplay Pro or SpyderX system are compact devices that curb the need for manual calibration. As everyone’s perception of colors differs, hardware calibration provides better results than methods for which you have to use your own eyes.
To ensure a neutral white color without any shift, it is vital to calibrate your monitor. It is crucial to achieve accurate colors under ambient lighting for an improved representation of colors in an image. If you don’t calibrate your monitor, the white colors on your screen might seem light grey on another device.
If the print and the screen are not matching, it is a tell-tale sign of an uncalibrated monitor. Meanwhile, you can compare the shades of a color-checker card with the results on your screen to see whether they match or not.
Depending upon the level of your work, you can calibrate your monitor monthly or bi-monthly. Professional photographers who habitually work with thousands of images may need to calibrate their monitors even more frequently as the monitor degrades, resulting in changing colors with excessive use.
It is vital to adjust the monitor for editing software like Lightroom and printing purposes using any of the methods explained above. Although built-in system tools and online tools are good, you can also use colorimeter devices to obtain better monitor calibration settings.