


In today’s competitive real estate market, static photos are no longer enough. Buyers expect dynamic, engaging content that brings properties to life. Enter Reptov, a powerful new platform that transforms ordinary listing photos into professional marke ...


As an Amazon Associate we earn from qualifying purchases.
Real Estate photographers often have to shoot exterior views of properties in unfavorable weather conditions, which may result in hazy photographs. The dehaze tool in Lightroom (only available to the Creative Cloud subscribers) solves this issue. Learning how to dehaze in Lightroom 5 will also help you tackle hazy photos effectively.
Quick Navigation
Images with the source of light right behind the focus, mist, or fog cause sections in your photos to get hazy. Sometimes a slight haze looks absolutely beautiful, giving the photo an ethereal effect, something which a photographer would intentionally achieve. If the haziness is taking the effect of your photo up a notch, it is totally unobjectionable.
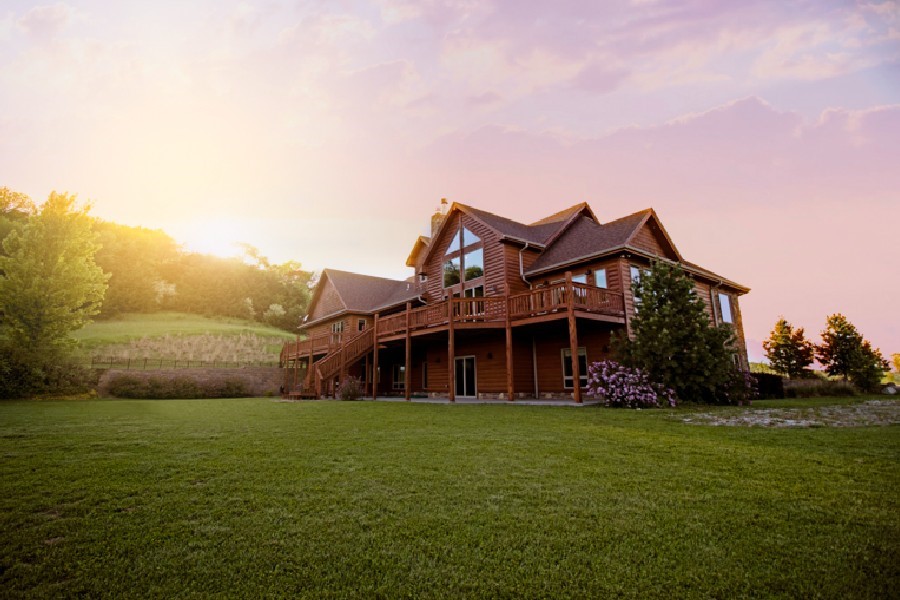
However, fog or haze often diverts attention from the focus, which becomes a problem. For instance, in the sample image that I have used below to demonstrate the dehaze process, the sun shines behind a section of this home, masking an area that should be clearly visible.

If you want to remove haze like this from images, you can easily do it in Lightroom Classic CC. Although the best way to do it is by using the dehaze slider, sadly, it isn’t available to Lightroom 5 users. Still, you can mimic the daze slider’s effect by using any of the three methods mentioned below.

Among the three methods for dehazing photos in the absence of the dehaze slider, this way gives the best results in the final image. You need to understand the impact of Basic Panel sliders in order to remove haze from your photo. When used correctly, these adjustments will enhance your photos, reducing haze effectively.
Note: if your image is in RAW format, you will be able to see the editing effects better than those on JPEG format images.
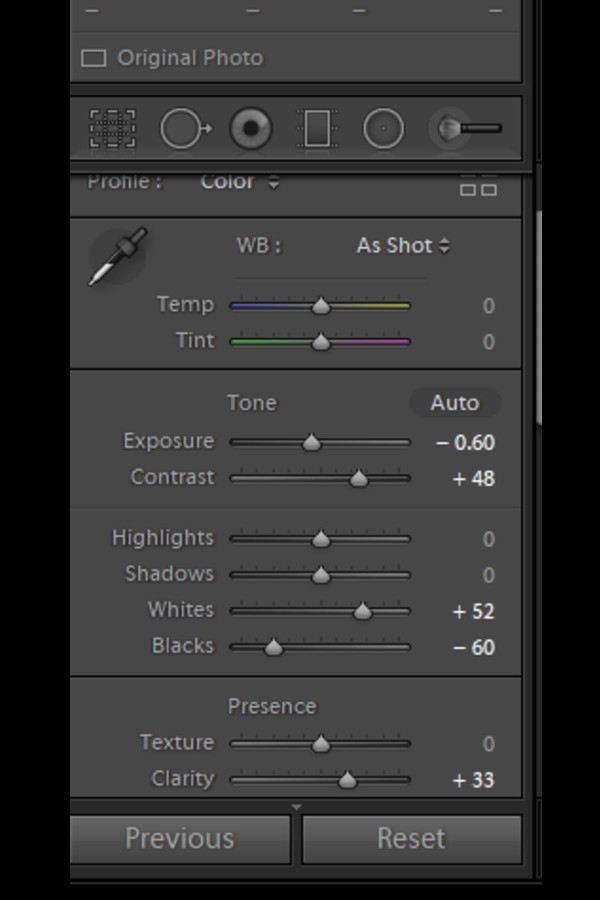
The first adjustment you need to make is to bring down the Exposure slightly without affecting the image quality. Depending upon the amount of haze in your image, reducing exposure will bring significant improvement as the brightness decreases. You can either increase the exposure by moving the slider to the left or input a value in numbers for a precise effect.
The lack of definition due to haziness can be rectified by increasing the Clarity of your image. Move the clarity slider to the right to increase it as required. As the increase in clarity makes the outlines of objects prominent, it will eradicate the haze to a significant limit.
Clarity alone brings back the verve in your images as it affects both the light and dark areas of the image. Unlike the hazy photo, which looks gloomy, your final image will look punchier due to this adjustment.
Next, you need to increase the Whites to improve the unclear parts in your image. To get the exact look you want, consider using this slider in combination with the Blacks and Contrast slider until you are satisfied.
The Blacks slider really helps to bring out the details in the image. Decrease the slider until you strike the right balance.
The contrast of the image will be impacted after you make the above adjustments. Bring back the contrast by moving the slider up until you see the haze gone. It will also make your highlights and shadows much more distinguished.
The alterations that I did above brought the desired changes quite effectively. This proves that not having the dehaze slider is not really a limitation in your image processing in Lightroom.


Another way to dehaze a photo in Lightroom is by using the Tone Curve. The tone curve panel intimidates newbies as they find it hard to master. However, it is a very useful and time-saving feature that allows quick editing.
Learning to use Tone Curve will add another feather to your cap to make you a Lightroom expert. Also, even if something goes wrong, you can always undo your settings.
The tone curve helps you adjust the light and dark areas in the image. If you are using a linear point curve, your adjustments will be more controlled. Switch to the custom tone curve by clicking on the button present on the right side below the adjustment sliders in the Tone Curve panel.
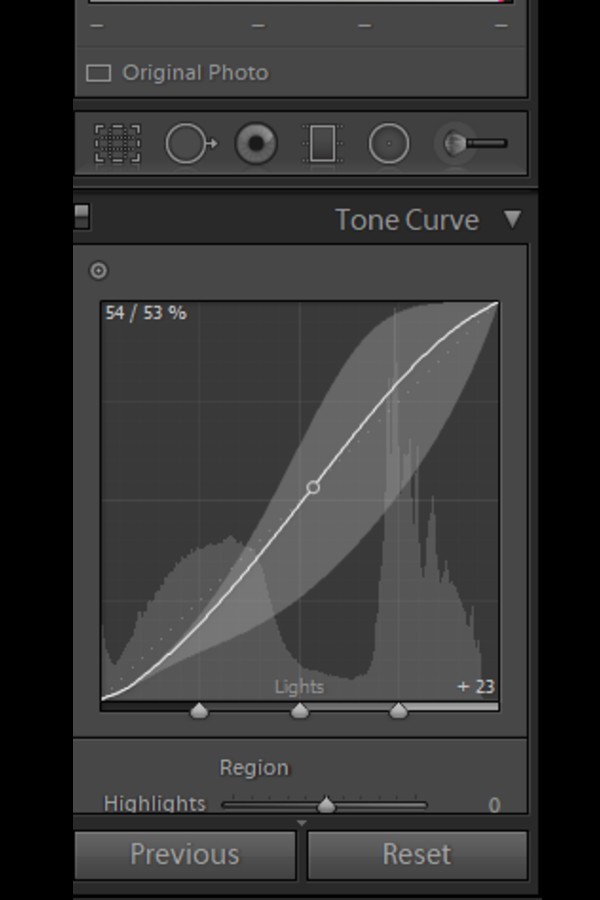
Here is how I adjusted the tone curve to decrease the haze in the photograph. You can see that the adjustments are made at three points, giving the curve an S shape.
Although the dehaze tool is not present in Lightroom 5, you can download dehaze presets available for free. Some of them do a pretty good job at removing haze from the images, just like the dehaze slider. The good thing is that you can dehaze multiple photos using these presets in a matter of seconds.
Whether you dehaze a photo using the Basic Panel, Tone Curve, or via a preset, there are some further adjustments you may need to make. As an outcome of these edits, your photo’s sharpness and noise may get impacted.
Under the Details panel in Develop module, you can see the section to adjust image sharpness. You can increase sharpness by bringing up the Radius slider slightly. It will add a lot of definition to your photo.
Dehazing often causes an increased noise in your image. However, refrain from reducing the noise too much by adjusting the slider accordingly.
Although the methods I described give satisfactory results to bring a hazy image alive. However, the dehaze slider that is available in Lightroom 6 and above is definitely a compelling feature for this purpose.
It is recommended to update your software to a newer version and subscribe to Creative Cloud to unlock this handy feature. Not only will it do a better job, but it also saves you the time you spend on balancing several adjustments.
If you have to edit images with a hazy effect in Lightroom 5, you can implement any of the methods mentioned above. Keep in mind that different images may require different values in adjustments. Just keep on experimenting with the settings until you successfully dehaze your image.


