PFRE-Logo-white-bg
Reading
blue-triangle-element

Articles

PFRE is the original online resource for real estate and interior photographers. Since 2006, it has been a community hub where like-minded professionals from around the world gather to share information with a common goal of improving their work and advancing their business. With thousands of articles, covering hundreds of topics, PFRE offers the most robust collection of educational material in our field. The history of real estate photography has been documented within these pages.
All Articles
blue-triangle-element

Latest

Image banner for the March 2024 PFRE Photographer of the Month Winner Alex Vincent, with a featured image of his winning photo titled "Kitchen."

Congratulations Alex Vincent, March 2024 PFRE Photographer of the Month! The theme this month was "Kitchen". Alex Vincent - #906 Yvonne Raaijmakers - #909 Peter Wingfield - #902 Here's what Alex has to say: Thank you for the award of Photographer of th ...

Contest
blue-triangle-element

OVERVIEW

For over a decade, photographers from around the world have participated in PFRE’s monthly photography contests, culminating in the year-end crowning of PFRE’s Photographer of the Year. With a new theme each month and commentary offered by some of the finest real estate & interior photographers anywhere, these contests offer a fun, competitive environment with rich learning opportunities. 

Contest Rules
blue-triangle-element

CURRENT CONTESTS

View / Submit
blue-triangle-element

PAST CONTESTS

View Archive
Resources
blue-triangle-element

Resources

PFRE prides itself on the depth and breadth of the information and professional development resources it makes available to our community. Our goal is to help real estate and interior photographers be successful while bringing the community together and elevating the industry as a whole.
blue-triangle-element

Conference News

No items found

How to Add Presets to Lightroom

Published: 05/04/2021

As an Amazon Associate we earn from qualifying purchases.

To save a lot of time editing your pictures, you can use presets in Lightroom Classic. It is an editing feature that applies stylized effects to the whole image. I are going to explain how to add presets to Lightroom.

How to Add Presets To Lightroom

Some of the presets are integrated into Lightroom by default. However, you can add as many presets as you like for added functionality. Several fantastic preset bundles are available for sale, plus you can also download the free ones by looking for them via a quick Google search.

Installing and using presets in Lightroom seems intimidating if you are doing it for the first time. Yet, it is one of the easiest processes and once you have them installed, it can save you hours of editing time. 

There are two different ways to add presets in the latest versions of Lightroom (7.3 or up): either by installing them or by uploading them into the program.

Method 1: Installing Lightroom Presets

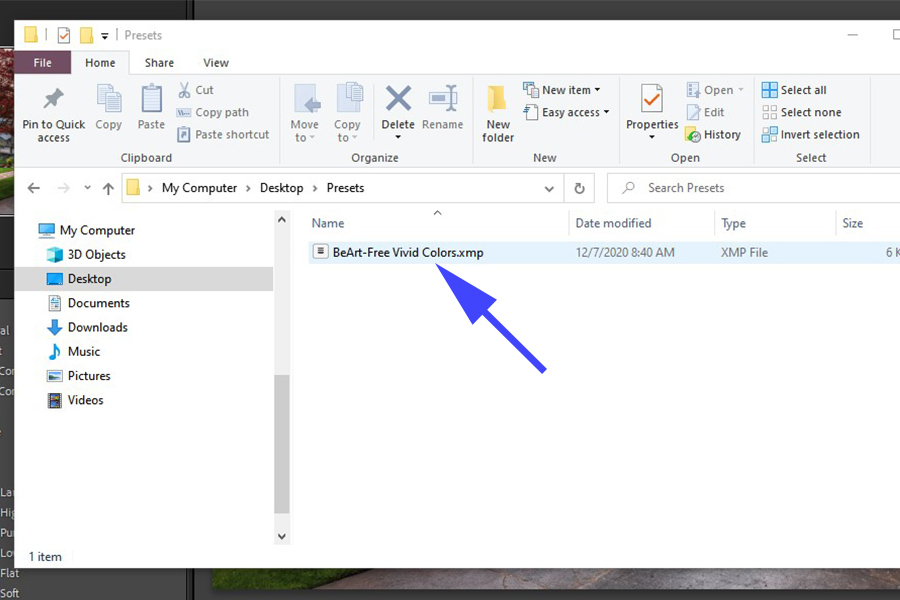
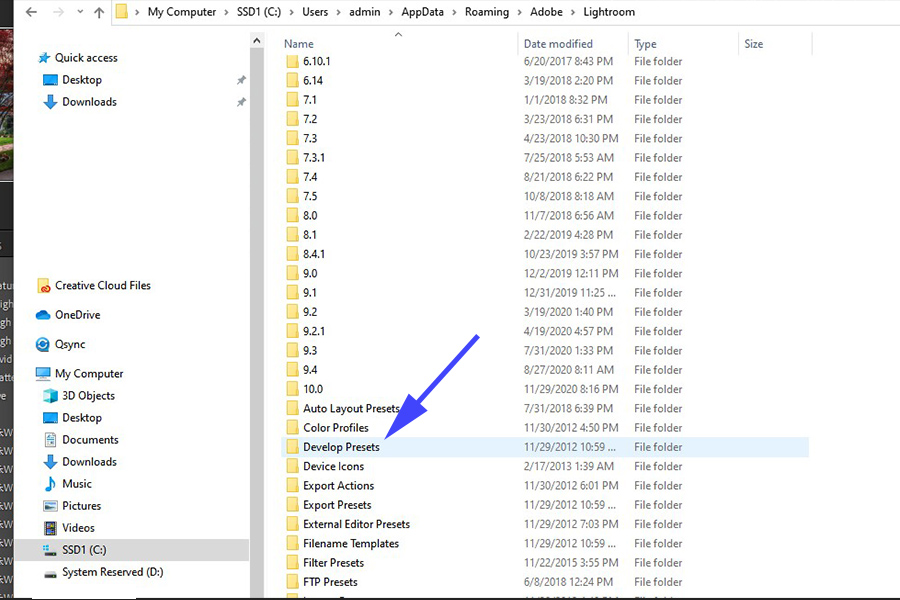
Whenever you download a free or paid preset in Lightroom, it comes in the form of a zip file. Before launching Lightroom Classic CC on your desktop, you need to extract these zip files in another folder on your computer.

  1. Go to the Downloads Folder.
  2. Right-click on the downloaded zip file of the preset you wish to install.
  3. Extract the file to any other folder on your computer.
Extracting file containing installed Lightroom presets

Once you are done extracting the preset file, open Lightroom Classic. 

  1. Open the Develop Module in Lightroom. On the left-hand side, under the navigation menu, you will see the Presets tab. 
  2. Open the Presets tab by clicking on the left side arrow.
  3. You will see some basic presets that come as a bundle in Lightroom. When you upload your presets, this is where you will find them. 
Basic presets that come in a bundle in Lightroom
  1. Click on the + icon beside the Preset tab, and click on Import Presets.
Arrow pointing to icon with option to import presets in Lightroom
  1. A window will open. Navigate to your preset(s) you want to import, and select them.
Selecting Lightroom preset to import
  1. Click on the Import Button to add them into Lightroom.

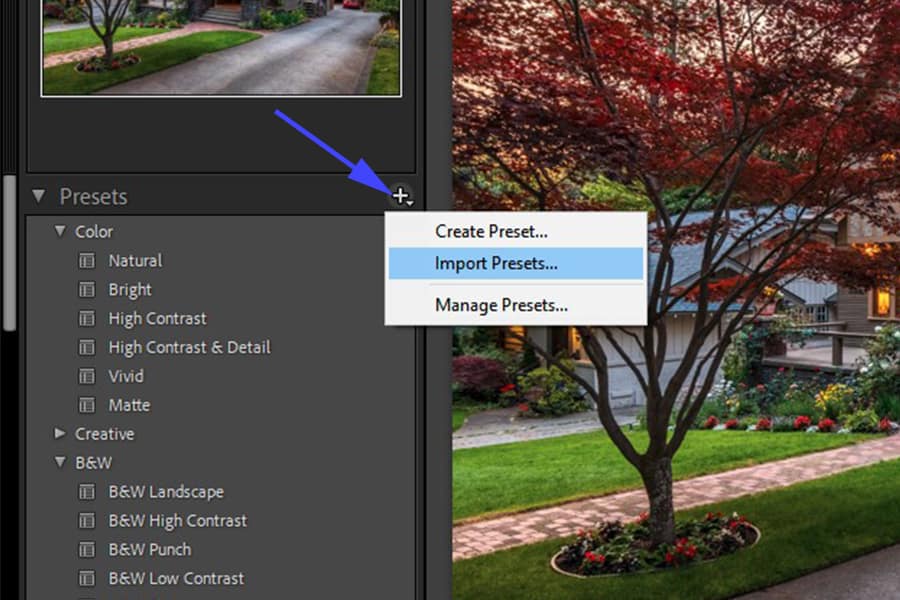
Your new Presets will now be visible under the Presets tab. 

Method 2: Importing Presets to Lightroom

The other way to get your presets into Adobe Lightroom is also very easy. 
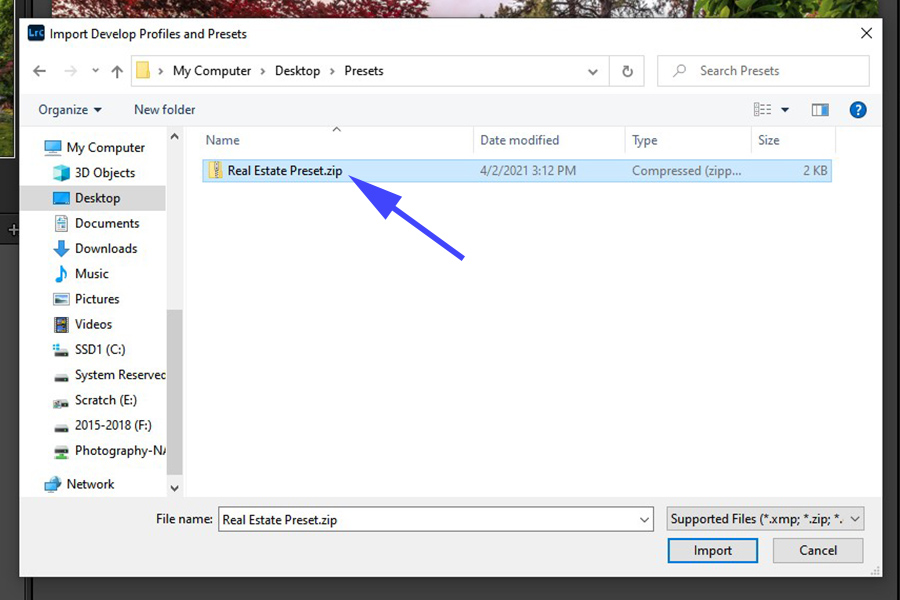
  1. Make sure you are in the Develop module of Lightroom.
  2. From the File option on the top left, select “Import Develop Profiles and Presets.”
Selecting Import Develop Profiles and Presets in File option
  1. Next, locate your preset files in the displayed popup. If you use this method, you can import the zipped files as well, rather than needing to unzip the files. 
Zip file of installed Lightroom presets
  1. Select the file and import it. You’ll then see the presets appear under the Presets section within Lightroom.

Simple, isn’t it? 

Method 3: Importing LRtemplate Files and Converting to XMP Files

One thing worth discussing here is the presets’ file format, which can sometimes be confusing. 

For many years, Adobe and people creating presets created them in the LRtemplate format. Now in the latest versions, the XMP file format is more commonly used. Installing the XMP files is more straightforward, but LRtemplates can still be added to Lightroom with a slightly different method. 

Most new presets are available in the XMP format. However, if you have downloaded presets in an LRtemplate format, you don’t need to worry. Follow these simple steps to import your LRtemplate files in Lightroom. 

  1. Launch Lightroom Classic CC. 
  2. Go to the Edits tab, and select Preferences from the menu.
  3. Select the Presets tab within the screen that pops up.
  4. Click on the option labeled “Show All Other Presets.”
Selecting Presets tab with Show All Other Presets option
  1. Select the “Lightroom” folder by double-clicking on it.
  2. Next, select the Develop Presets option.
Develop Presets folder in Lightroom
  1. Open a separate Finder window/ File Explorer Window and navigate to where your LRtemplate presets are located.
  2. Copy the LRtemplate files and paste them into the Develop Presets folder that you selected in Lightroom. 
Transferring LRtemplate presets into Develop Presets folder
  1. Click on Restart Lightroom.

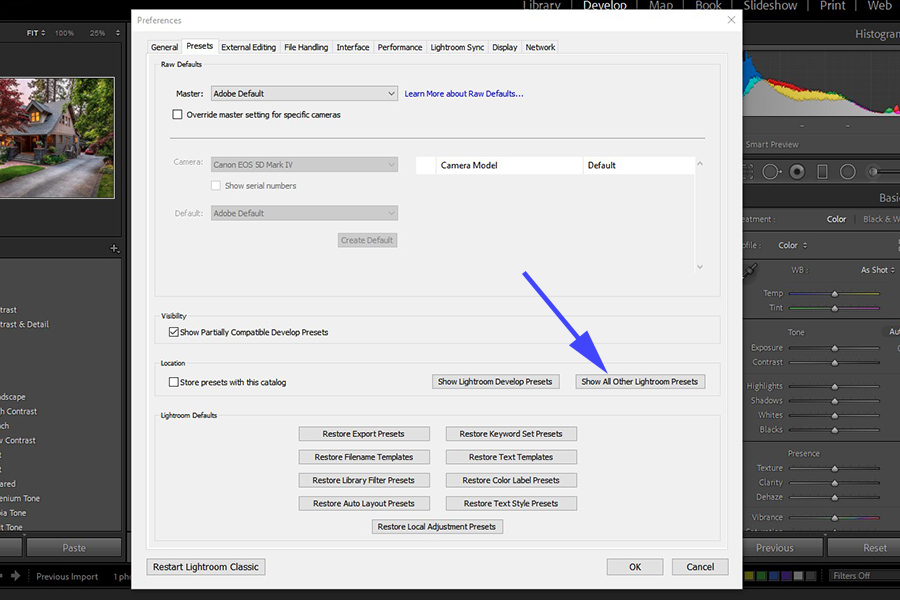
Once Lightroom Classic restarts, you will see that a popup displays that your LRtemplates are now converted into XMP files. 

At this point, you are ready to use and apply your presets to your images!

Conclusion

Lightroom Presets are very popular - people even make 6 figures selling their presets! People download them for free and even buy real estate presets in bundles as they give quick yet refined looks to their photos. Seasoned real estate photographers and newbies both love lightroom presets due to the simple editing that presets provide.

Vendors

Rela Logo
CS6 PSE Logo
HD Photo Hub Logo
FullFrame Logo

Learning Topics

.
magnifiercrossmenucross-circle