


In today’s competitive real estate market, static photos are no longer enough. Buyers expect dynamic, engaging content that brings properties to life. Enter Reptov, a powerful new platform that transforms ordinary listing photos into professional marke ...


As an Amazon Associate we earn from qualifying purchases.
As a photographer, adding effects to your photos during post-production is so much fun. In Lightroom Classic CC, you can create effects like sunshine, rain, snow, or other weather effects no matter in which season the photo was captured. Learn how to add snow in Lightroom to set a dreamy winter mood in your images.
Quick Navigation
Who thought adding realistic snow to photos would be so easy? Mostly, photographers show snowfall in an image using Photoshop overlays, but it is completely possible in Lightroom as well. Personally, I prefer the non-destructive editing in Lightroom. I frequently use it to add different kinds of weather effects on exterior real estate images for an enchanting look.
Comprehensive editing is a prominent part of Lightroom’s functionality. Not only it lets me unleash my creativity with its feature-rich Develop module, but there are many things you can do in other modules as well to transform your images.

Revamping an image to make it look like it was shot in snowfall is definitely a game-changer to add to its appeal. Using any of the three methods below, you can add an ethereal wintertime effect to the images. All you need is basic knowledge about the presets, local adjustments, and Print module settings.
Lightroom presets always give photographers a quick fix to process photos. The advantage of using presets is that they provide impressive effects, which can be hard to achieve if you struggle with the Basic panel sliders manually.
To create the snow effect, you can use presets. There are several free snow presets available online which you can download and use on your photos. Or, you can purchase a bundle pack of presets that create snow in different ways on the images.
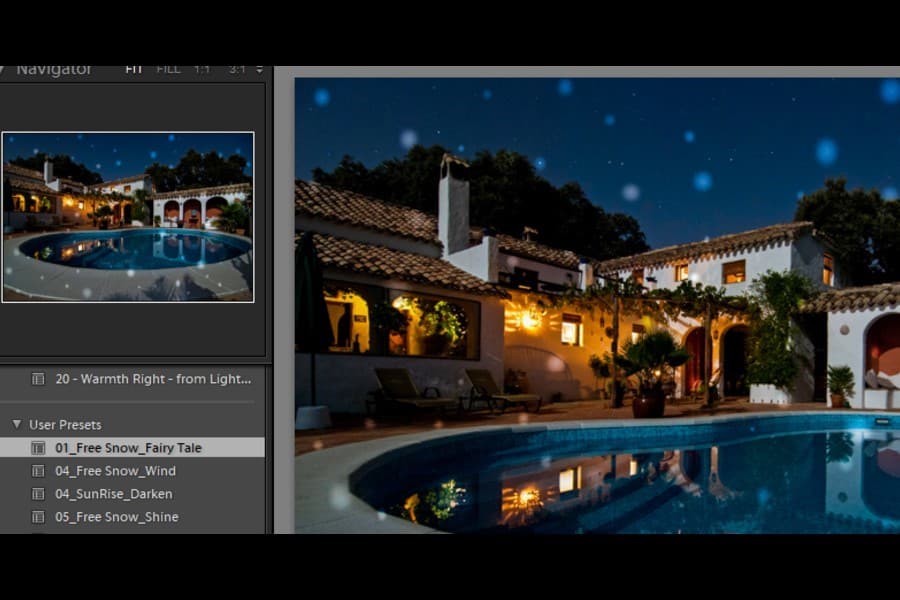
If using a preset, the snowflakes are added to the photo covering the whole image. If there is any snow obscuring a detail that should be clearly visible, it is very easy to tweak the settings.
This method may be a bit time consuming, but it is worth trying if you want better control over the snow effect on your photo.

There is one more method that you can use to give the snow effect to your image. For this, you will need a snow overlay downloaded on your computer. You can download some royalty-free snow overlays to use this method.

Once the image sizing is according to your requirements, it’s time to add the snow effect.


Your beautiful snowy image is ready for use. You can now click on Print to file and save your image on the drive on your computer. If you intend to make any more changes to the image, like increasing the exposure or contrast. You can import it into Lightroom and process it further in the Develop module.
Almost all photographers tweak their photos to give them a higher visual appeal. Adding snow to images, too, is one of the ways through which you can add a dream-like winter feel to them. I hope my in-depth guide to adding snow in Lightroom will help you create stunning winter photos with ease.


