PFRE is the original online resource for real estate and interior photographers. Since 2006, it has been a community hub where like-minded professionals from around the world gather to share information with a common goal of improving their work and advancing their business. With thousands of articles, covering hundreds of topics, PFRE offers the most robust collection of educational material in our field. The history of real estate photography has been documented within these pages.
In today’s competitive real estate market, static photos are no longer enough. Buyers expect dynamic, engaging content that brings properties to life. Enter Reptov, a powerful new platform that transforms ordinary listing photos into professional marke ...
For over a decade, photographers from around the world have participated in PFRE’s monthly photography contests, culminating in the year-end crowning of PFRE’s Photographer of the Year. With a new theme each month and commentary offered by some of the finest real estate & interior photographers anywhere, these contests offer a fun, competitive environment with rich learning opportunities.
PFRE prides itself on the depth and breadth of the information and professional development resources it makes available to our community. Our goal is to help real estate and interior photographers be successful while bringing the community together and elevating the industry as a whole.
As an Amazon Associate we earn from qualifying purchases.
Watermarking your photos is a way to promote your work and protect it from plagiarism by claiming its ownership. You can add a watermark to a photo via an easy process with Lightroom Classic CC. Learning how to add a watermark in Lightroom will enable you to add a text or graphic identity to the images you have taken.
The process of adding a watermark in Lightroom Classic CC begins when you are exporting an image from the catalog after editing it. There are two main ways to add watermarks to images through Lightroom:
Using a simple copyright watermark
Using a custom watermark
I'll walk through both options so you can decide which works best for you.
Adding a Simple Copyright Watermark
Inserting a simple copyright watermark is the default method in Lightroom and the easier of the two options. There is less customizability you have for what the watermark looks like.
In the Library module, navigate to the Metadata section on the right toolbar.
In the Copyright field, add in the text you want to use as the watermark on your image. This could be something like your name or your photography studio name.
Edit the images as desired.
Select the image(s) you want to watermark in the Library module. Click on Export.
Once the Export panel opens, scroll down to the Watermarking section.
Check the checkbox to enable Watermark.
From the dropdown, select Simple Copyright Watermark (I’ll go over how to edit custom watermarks down below).
Export the image or the set of images that you select. They will be exported with the watermark.
Adding a Custom Watermark
If you prefer to use a custom watermark, you will need to go to the Edit Watermark option to add it in.
In the Watermarking section of the Export module, click on Edit Watermarks…
Another panel will appear with various options for you to use to create or edit an existing watermark you have.
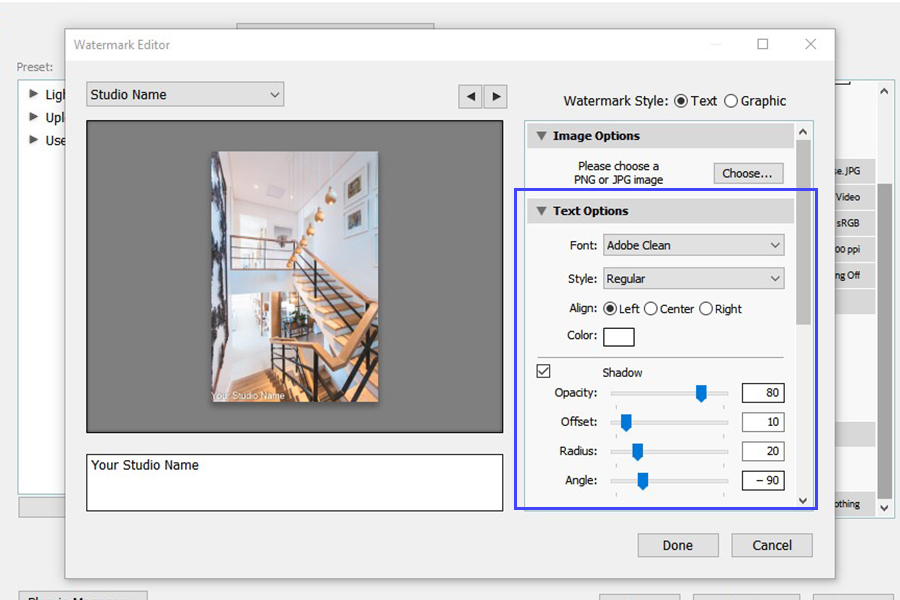
The first option you need to select from this panel is whether you wish to add a Text or a Graphic watermark.
If you have a logo design that you want to add as your watermark, select the Graphic option. Another screen will pop up, asking you to select your graphic file you want to upload from your computer. Once you’ve located it, click Choose.
If you don’t have a logo and want the watermark to be text, select the Text option. From there, add in the text you want to include in the watermark by writing it in the bottom left box.
Customize the Text Options panel if you chose a text watermark.
Font: Lightroom offers a wide range of fonts that you can select. If you’re not sure what to use, consider Times New Roman or a calligraphy font for your watermark to make it look professional as well as clear to understand. Such fonts serve the purpose of establishing ownership without affecting the visual appeal of your image.
Style, Alignment, and Color: Choose whether you would like your text to be bold, italic, or regular. You can select the alignment and color of the text watermark, based on what your image looks like.
Shadow: If you choose to turn on the shadow, it can make it easier to read your text, especially when the watermark is on a busier image.
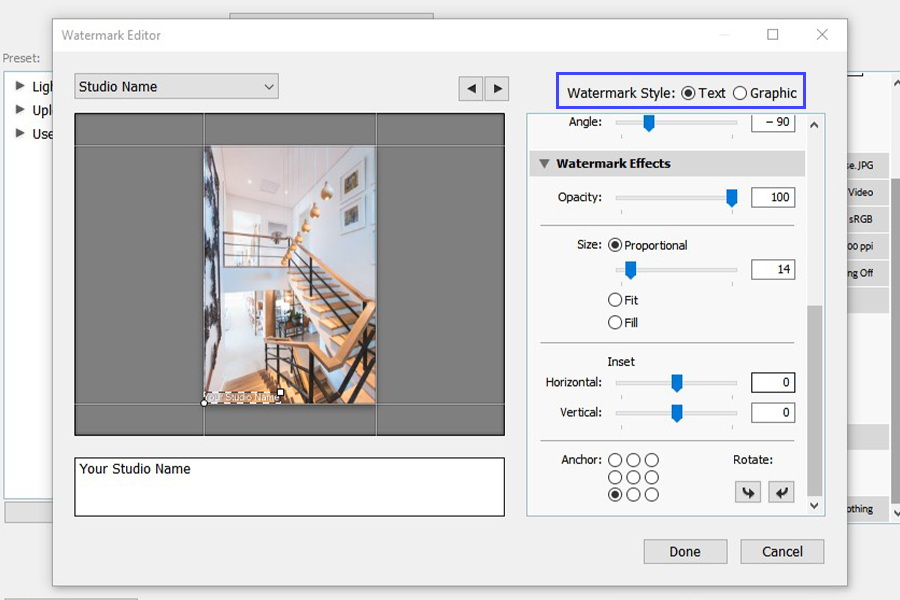
Adjust the settings in the Watermark Effects panel for both text and graphic watermarks.
7. Adjust the settings in the Watermark Effects panel for both text and graphic watermarks.
Opacity: Watermarks are usually opaque. This is to reduce the prominence while telling the viewers who took the photo in a subtle way. The opacity slider lets you make your watermark as much opaque as you want.
Size: Depending upon the use of your photo, you can select the size of your watermark. If you click on the Proportional option, Lightroom will automatically suggest the size in accordance with your photo.
Inset: The inset section has two sliders, horizontal and vertical. Both let you adjust the marginal position of your watermark on the image. There may be instances where your watermark either seems too cornered or blocks a certain element in your photo. The inset sliders come in handy in such situations.
Anchor: In Lightroom, you cannot just drag and drop your watermark and place it wherever you want on the image. However, the anchor allows you to place it on any one of the nine positions that are standard for a watermark. Those little circles of anchor determine the placement of your watermark. Click on any one of them to place your watermark. Note that different images may require logo placement at a different point.
Saving Your Custom Watermark
Once you are done with adjusting the appearance of your watermark, it’s time to save it. This step is an option for times when you want to use the same attributes on other photos as well.
On the top left corner, select Save Current Settings as a New Preset option.
Type a name for your new watermark preset.
Click on Create.
Click on Done.
You are now done with adding and saving the watermark. Next time when you wish to watermark your photo, the custom settings watermark will be available in the dropdown. From here, you can Export the photo and the watermark will be automatically applied.
Conclusion
Watermarking is an important step to protect your photos from being used in an unauthorized way. Plus, you can promote yourself or your brand by mentioning it in your work.