


In today’s competitive real estate market, static photos are no longer enough. Buyers expect dynamic, engaging content that brings properties to life. Enter Reptov, a powerful new platform that transforms ordinary listing photos into professional marke ...


As an Amazon Associate we earn from qualifying purchases.
Lightroom mobile and Lightroom presets are a quick and convenient solution to your post-processing needs. Using them together, you can easily transform your images within minutes. In order to keep presets updated on your Lightroom mobile app, you should know how to sync Lightroom presets to mobile.
Quick Navigation
Lightroom is currently one of the most popular image editing tools, especially for professionals. A vast number of creative experts love using Lightroom to accomplish their image editing goals. The user-friendly interface, the wide range of editing tools, and the ability to modify each and every parameter individually make it a very useful program.
In addition to all those benefits, Lightroom also offers convenience and mobility with its Lightroom mobile version. It allows you to edit your images on the go. Plus, when you add presets with the mobile version, your editing tasks become even easier and quicker. However, in order to use your desktop Lightroom presets on Lightroom mobile, you will have to sync them.

Nonetheless, there is no need to stress as the syncing procedure is quite simple and straightforward. With the following step-by-step tutorial, you will be able to use your desktop Lightroom presets on your Lightroom mobile in no time. Before starting with the tutorial, first, let’s learn the basics about Lightroom presets and the different versions of Lightroom.
Lightroom presets are preconfigured editing masks. With presets, you don't need to apply each editing tool independently. You only have to pick any preset that matches your editing requirements. As soon as you select a preset, it will be applied to your image. You will see that a variety of editing tools will be applied to your image with just one click.
There are two different types of presets that you can use on Lightroom. These include the default presets that come with the application, and the customized user presets that you create yourself. Both of these Lightroom presets can be used on your Lightroom mobile if you sync them in the correct manner.
If you want to sync your Lightroom presets with your Lightroom mobile, you can easily do that with just a few steps. However, there are a few important prerequisites that you must consider and take care of before being able to sync your different Lightroom versions.
The first thing is to know that there are three different versions of Lightroom, which include:
In order to be able to sync your presets to your mobile, you should have a subscription to Adobe Creative Cloud. This allows you to have all three versions of Lightroom. On the other hand, if you only have one of these versions, a non-cloud environment, you will be unable to sync the presets.
Therefore, you have to make sure that you have Lightroom Classic as well as Lightroom CC on your desktop. Plus, Lightroom mobile apps should also be installed on your mobile device. Once you have your hands on all three versions, syncing the presets becomes really easy. So, let’s take a look at the procedure of syncing Lightroom presets to mobile.
I usually create and use my presets on Lightroom Classic. However, I cannot sync my presets directly from Lightroom Classic to Lightroom mobile. That is the reason why I will have to use Lightroom CC as the linking bridge between Lightroom Classic and Lightroom mobile.
Lightroom CC is a cloud-based version of Lightroom. So, anything that becomes a part of Lightroom CC automatically gets sync with Lightroom mobile. Therefore, I will be using Lightroom CC as an intermediary for syncing Lightroom presets to mobile. Here are the steps for this procedure:
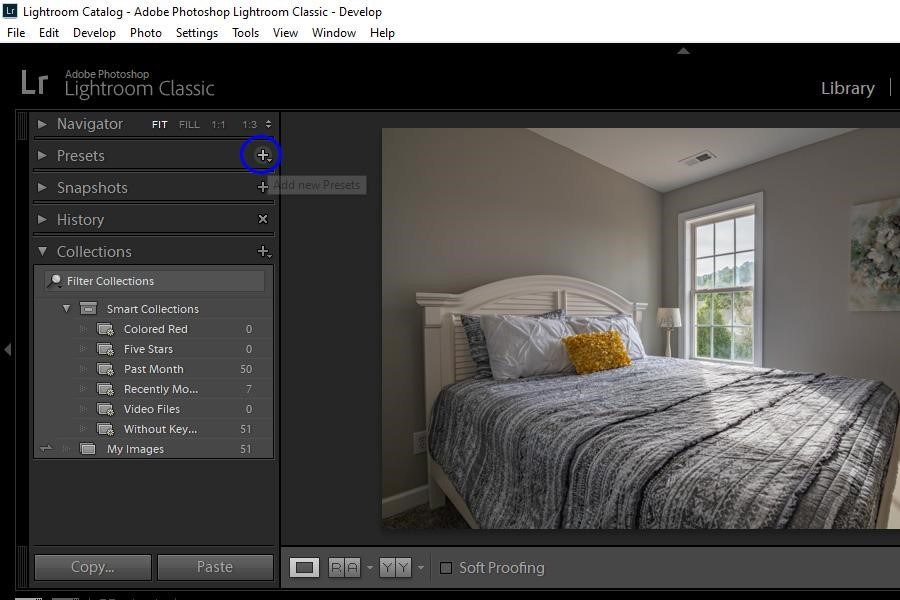
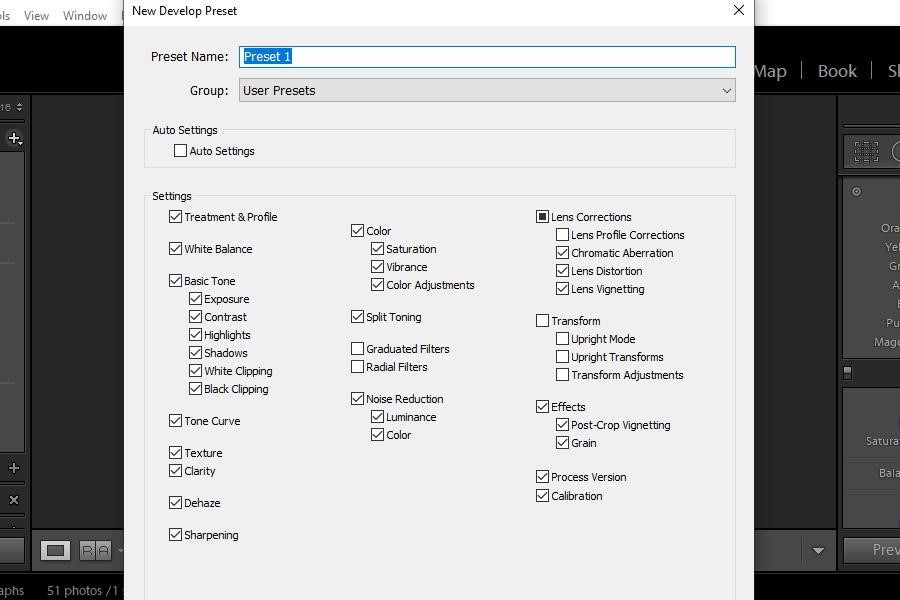
Firstly, I will be creating a Lightroom preset so that you know how to create one before syncing it with your Lightroom mobile. So, to create a Lightroom preset:


After your preset is created, it is time to start the syncing procedure with Lightroom mobile. The next and final step for syncing involves importing your Lightroom Classic presets into Lightroom CC. Once you import the presets on Lightroom CC, you will also be able to see and use them on your Lightroom mobile app.
Following are the two different methods through which you can do this. Just choose any one of the following ways to import your presets into Lightroom CC:
As you can see, the process of syncing your Lightroom presets to mobile is very simple. It may require a little effort, but the benefits of Lightroom presets on mobile are totally worth it. Learning this technique will allow you to edit your real estate images with lightroom presets a lot more conveniently, quickly, and seamlessly.


