PFRE-Logo-white-bg
Reading
blue-triangle-element

Articles

PFRE is the original online resource for real estate and interior photographers. Since 2006, it has been a community hub where like-minded professionals from around the world gather to share information with a common goal of improving their work and advancing their business. With thousands of articles, covering hundreds of topics, PFRE offers the most robust collection of educational material in our field. The history of real estate photography has been documented within these pages.
All Articles
blue-triangle-element

Latest

Image banner for the February 2024 PFRE Photographer of the Month Winner Art Ibewuike, with a featured image of his winning photo titled "Living Room or Family Room""

Congratulations to Art Ibewuike, February 2024 PFRE Photographer of the Month! The theme this month was "Living Room or Family Room". Art Ibewuike - #895 Paul-Dan Dragoman - #898 Peter Wingfield - #900 Here's what Art has to say: Thank you so much for ...

Contest
blue-triangle-element

OVERVIEW

For over a decade, photographers from around the world have participated in PFRE’s monthly photography contests, culminating in the year-end crowning of PFRE’s Photographer of the Year. With a new theme each month and commentary offered by some of the finest real estate & interior photographers anywhere, these contests offer a fun, competitive environment with rich learning opportunities. 

Contest Rules
blue-triangle-element

CURRENT CONTESTS

View / Submit
blue-triangle-element

PAST CONTESTS

View Archive
Resources
blue-triangle-element

Resources

PFRE prides itself on the depth and breadth of the information and professional development resources it makes available to our community. Our goal is to help real estate and interior photographers be successful while bringing the community together and elevating the industry as a whole.
blue-triangle-element

Conference News

No items found

How to Take Real Estate Photos With Your iPhone

Published: 05/04/2023

As an Amazon Associate we earn from qualifying purchases.

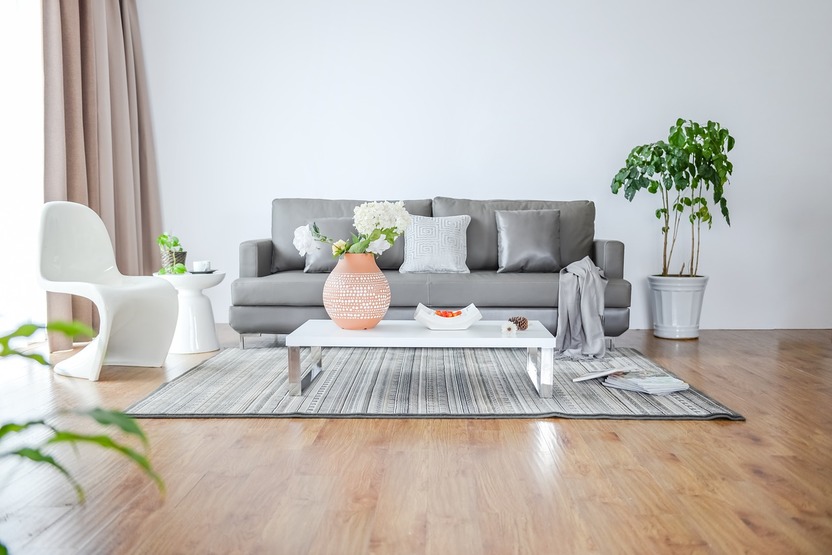
Professional real estate photography often requires using a DSLR. However, there may be instances where you can only use an iPhone. With that, I'm giving you a guide to iPhone real estate photography, so you can take quality photos as if you're using a DSLR.

iPhone Real Estate Photography

Photographing real estate using an iPhone is quite similar to using a DSLR, except that the setup is much simpler. With an iPhone's built-in shooting modes and lenses, you can still take high-quality real estate images. You also have to use basic photography and real estate shooting techniques.

While iPhone photography has some similarities in using a DSLR, there are still certain things you need to do and prepare. Now, bring out your iPhone and practice these tips at your home.

iPhone Real Estate Photography Tools

Although a simple tap on the iPhone screen can already let you take amazing real estate photos, there are also different accessories that can improve the shooting experience.

Person taking a photo of a house using an iPhone

iPhone

The older iPhone models may not work well with real estate photography as they have a limited field of views, much like using fixed prime lenses on DSLRs.

The newer models, starting with iPhone XS, now come with wide-angle and telephoto lenses. Additionally, they have a dual optical image stabilization that minimizes blur.

Tripod

A tripod ensures you can manually control the camera settings with the iPhone remaining in the right position. Likewise, a tripod helps prevent camera shake when using an external lens or shooting in low light.

In general, look for a sturdy, compact, and lightweight tripod. You may also want to opt for a tripod with bendable legs so that you can wrap them around railings or posts.

While some tripods come with an iPhone mount and wireless remote, make sure they are compatible with your iPhone model.

Attachable Wide-Angle Lens

When shooting with a DSLR, it's better to use 10mm to 35mm wide-angle lenses. However, this is not possible in some iPhones unless you use a clip-on wide-angle lens.

By attaching the lens on the back of the phone, you can get broader perspectives without distorting lines. If possible, use a lens with a wide range of focal lengths, so you can change perspectives without the need to bring several lenses.

External Light Source

While the iPhone's built-in flash can help, it typically results in harsh light since you can't modify the flash's power output.

Invest in a LED light or wireless flash system that would enable you to modify the light source's angle, control the light strength, and evenly distribute the light.

Accessories

While these accessories are not necessarily required, bringing them can make your shoots easier.

  • Charger and power bank: Using an iPhone for photography, communication, games, and other things can eat up battery life fast. To make sure you can finish your shoots, always bring a charger and power bank with you. You can also attach the power bank to the tripod then charge the iPhone while shooting.
  • Spirit or bubble level: Keeping the camera on the right shooting level is essential in taking high-quality real estate images. If your iPhone or tripod doesn't come with a leveling feature, you can use a mini spirit or bubble level to measure your level accurately.
  • Additional storage: About 45% of smartphone users run out of storage per year. Besides connecting to the Cloud, you can connect your phone to a dedicated external drive to directly save your real estate shots.

iPhone Camera Settings for Real Estate Photography

An iPhone's camera app won't let you control the exposure settings, unlike what you commonly do in DSLRs. The good thing is that the most recent iPhone versions come with HDR bracketing shooting mode.

The iPhone's HDR capability is quite good, especially on iPhone X and 11. With HDR on, you can take 2 or 3 shots with varying exposures. After that, you can stitch the pictures together to create an evenly-exposed final photo.

Aside from that, you can use the panoramic shooting setting to increase the field of view. However, be cautious as this may distort lines.

How to Take Real Estate Photos Using an iPhone

With 85% of digital photos taken using smartphones, it pays to learn the various shooting techniques to help you take real estate photos that can sell properties. Did you know that some companies like Inside Maps actually shoot virtual tours using an iPhone?

Woman using a phone in living room

Work with Natural Light

Light is a vital element in photography as it illuminates subjects and diffuses shadows. While you can use external lights, sunlight provides a natural glistening effect on surfaces, making interiors look cozier and more inviting.

There may be instances where ambient light can create blown-out highlights or underexposed shots. To fix this, you can adjust the iPhone camera's yellow exposure slider next to the focus square.

Plan Your Composition

Properties have different layouts and dimensions, so the composition also varies. This is why it's important that you do a 'walkthrough', so you can check the vantage points where you can best photograph an area.

  • iPhone lenses have a narrower field so view, so position your tripod and camera from the corners or angles that convey the space.
  • Shoot in landscape orientation to show as much of the room and details as you can in a single frame.
  • You can still shoot in the vertical orientation, especially when you want to highlight staircases.
  • Turn on the iPhone camera's Grid option to have a guide for the rule of thirds. Put the main points of interest on the four intersection points to create balance, tension, and depth. In effect, you can draw the viewer's eye toward the most crucial parts of a scene.
  • Include essential features like doorways and flooring.
  • Declutter and rearrange decor or furniture for a clean shot.
  • The angle should be as if a person is walking across the room.
  • Look for parallel lines that can converge on the same point.

Shoot at the Correct Shooting Level

It's ideal to take real estate photos at around 4 or 5 feet, which mimics a person's eye level. Older iPhone units have a Compass app, which can help you calibrate the appropriate shooting level. Meanwhile, newer iPhones use the Measure app.

Don't Forget to Focus

You can trigger the iPhone camera's focus by tapping the screen. When shooting, direct the focus on the farthest point of the room to ensure the whole space is in sharp focus.

Be mindful as adjusting the focus point can change your exposure, especially when there are windows on the scene.

iPhone Apps for Real Estate Photography

The contrast between the interior and exterior view is usually too much in real estate images. Hence, even with built-in shooting modes, your iPhone might find it a bit challenging to take quality photos when the interior is too dark.

You can try using Photomatix Real Estate Camera or CameraPixels Pro App, which are highly-advanced iOS photography apps with features and shooting modes quite similar to DSLRs. They can also let you edit right away using presets.

Conclusion

High-quality images can help attract buyers and sell properties faster. You may not carry a professional DSLR daily, yet you might always bring an iPhone. As long as you apply the basics of real estate photography, you can still take stunning photos anywhere and anytime.

Vendors

Rela Logo
CS6 PSE Logo
HD Photo Hub Logo
FullFrame Logo

Learning Topics

.
magnifiercrossmenucross-circle