


In today’s competitive real estate market, static photos are no longer enough. Buyers expect dynamic, engaging content that brings properties to life. Enter Reptov, a powerful new platform that transforms ordinary listing photos into professional marke ...


As an Amazon Associate we earn from qualifying purchases.
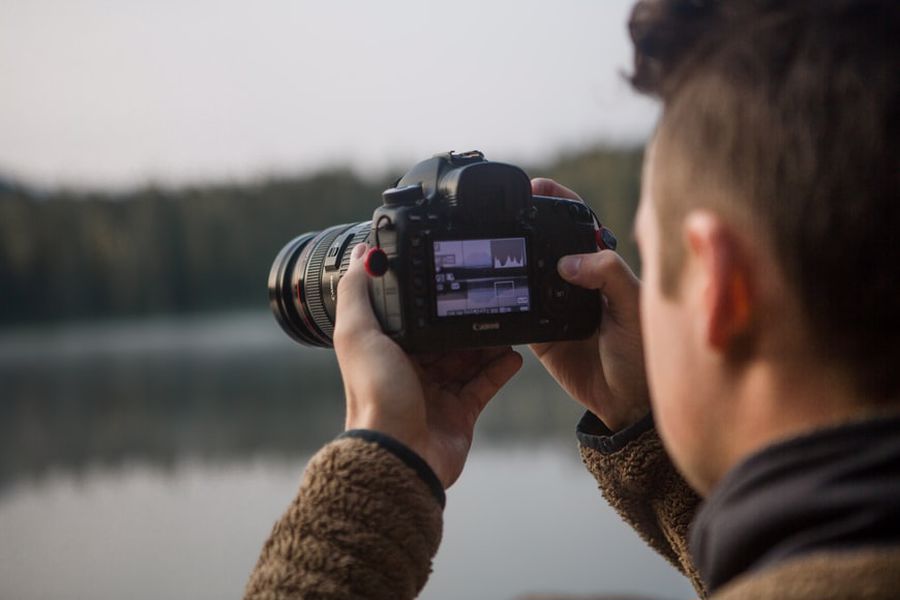
Every image is affected by the distribution of light, and the way to review that distribution is through looking at the image’s histogram. Most cameras can display a histogram for each photo that is stored in your camera's memory card. Every single image has its own histogram, which can be seen through your camera's LCD screen and through post-processing software.
You can always check on the image exposure by looking at your camera's LCD screen or by checking your image on a computer. However, a histogram can give you a more objective method of evaluating the image's detail. This is why it is important to know how to read a histogram, so you can have a clearer idea about how light or dark your image is.
Quick Navigation
To be able to read a histogram effectively, you first need to know what each part represents. The histogram represents the pixels in an image. The left side of the graph shows how many shadows or blacks are in an image, while the right side shows how many bright areas or highlights there are in an image. The middle part shows you the mid-tones of the image.


The peak of the histogram shows the number of pixels of a specific tone, and each peak corresponds to a different tonal value. At the peak of the graph on the right side shows a massive volume of bright pixels in a picture. In comparison, a peak at the left side of the graph shows a massive volume of dark pixels in a picture.
When you open the histogram of an image, the first thing that you need to do is to review the curve that you see on the graph. It will show you if the picture is overexposed, underexposed or if it is just right. There are three things you need to keep in mind:
If you see that the peaks are pressed up against the ends of the histogram, it means that there is a loss of information, and you are not seeing the full graph, or it is not loaded properly.
You need to check both ends of the graph so you can get the complete exposure data of the image. Check for any clipping, it could be a highlight clipping at the right side of the graph or a shadow clipping at the left side of the graph.
A histogram will tell you two things:
You will be able to know if a photo is well-exposed because it is balanced at the center of the frame, and there is no visible skew. Ideally, the graph is spread across the whole histogram, from one end to the other, without any peaks, which usually indicates that there is clipping. An ideal histogram is evenly distributed, and it is not upped on the sides. It beautifully stretches across the whole graph. This indicates that you don’t need to make any adjustments.
However, if the graph is peaking against the right end or if it is skewed to the right, it means that you need to reduce the exposure and retake the photo. You can reduce it by boosting your camera’s shutter speed. Meanwhile, if the graph is peaking against the left end, it means that you need to increase the exposure and take the photo once more. You need to decrease your shutter speed or increase your lens’ ISO.
Exposure in an image is the combination of different camera settings that are part of the exposure triangle. It is the brightness or the darkness of the image that you've captured. There is no exact correct exposure for a photo. However, most professional photographers want to capture an image that looks realistic. While it is sensible, it will not always provide good exposure, especially if you wish to get a great result.
The naturalistic approach is great for snapshots, and it works for photographers who do not intend to use editing software. However, if you want to spend a bit more time working on your pictures in post-edit, then a technique called "Expose to the Right" can provide the right exposure on your image that will result in an ideal histogram.
Most professional photographers aim for a balanced histogram that has a bell-shaped curve. The technique called “Expose to the Right” is adjusting the peaks of the graph of your image to the right side without clipping the highlights.
Then, while using an editing software, the image is processed in order to reduce its brightness, and this will result in an image that has just the right exposure and one that looks natural. In this way, you can take images as you see them without having to worry about exposure in real time, so you can just adjust it as you edit it.
Using the Exposing to the Right technique is beneficial because the further you adjust your graph to the right, the more distinct the tonal values are. This will produce a wider dynamic range. The dynamic range is your camera's ability to capture both the dark and the light regions of the scene and everything that is in between.
You can also easily review the claim that pictures exposed to the right have more detail compared to pictures exposed to the left. You can take two photos of the same scene, and using your camera's built-in exposure compensation dial, you can underexpose one of them. After, review the file sizes of both pictures. A properly exposed image will result in a larger file size. This shows that an image that is exposed to the right results in more data.
Since bright light has more energy compared to low light, it is easier for your camera's sensor to capture it. It will result in a signal-to-noise ratio that is higher than normal. This is because bright light creates a strong electrical signal via your camera’s sensor. It can overpower the weak electrical signals that are created by random electronic interference that is found in all devices.
Exposing the image to the right without clipping the highlights can result in an image that is less noisy, has a more dynamic range, has a higher signal-to-noise ratio, and has better colors.
Exposing to the Right involves adjusting the histogram to make your picture brighter. In order to do this in-camera, you will need to adjust the exposure triangle, which consists of the following:

Remember to not increase the ISO value because the increased grain will affect the benefits that you will get from using the Exposing to the Right technique. It is better to keep the ISO as low as possible and only make changes to the shutter speed or the aperture. Also, it is important to keep in mind that if you adjust your shutter speed, it may result in a camera shake. It would help if you prepared a tripod or a stabilizer to get better results.
Aside from adjusting the exposure triangle, the fastest way to brighten your image is by using your camera's exposure compensation dial. This will let you adjust the exposure in small increments. Just turn the dial to a positive number and take a picture. After, review the histogram of the image that you just took. If the graph is stacked up against the right side, you need to decrease the exposure compensation, and you need to take another shot to check if the adjustment was applied.
Histograms use a JPEG version of the photo, even if you are shooting in RAW only. Often, this results in the histogram warning you about highlight clipping, even if there is none. Despite this, the information lost in the JPEG version is still available in the RAW file. This is a reminder that the histogram is not the whole story.
In order to fix this dilemma, you can use exposure bracketing. It increases your chances of getting a picture that is well-exposed, even if the histogram is misleading. It also lets you take several pictures at different exposures. Three types of photos will be created automatically:
Most DSLR cameras will give you the option to view the histogram of an image right after you've captured it. You can use this feature to your advantage. You can check the histogram after every shot so you can see exactly how the image looks, especially when it comes to its luminosity.
Remember that the LDC of your camera does not always accurately represent the image, and the histogram may tell you a different story. Your settings need to be adjusted according to your image’s histogram instead of the image preview.
High-end DSLR cameras have a feature that lets you view the histogram of the image live. This is a feature that professional photographers rely heavily on, and even though the feature quickly drains your camera's battery, it can show you your image's exposure in real time, which results in beautiful images.
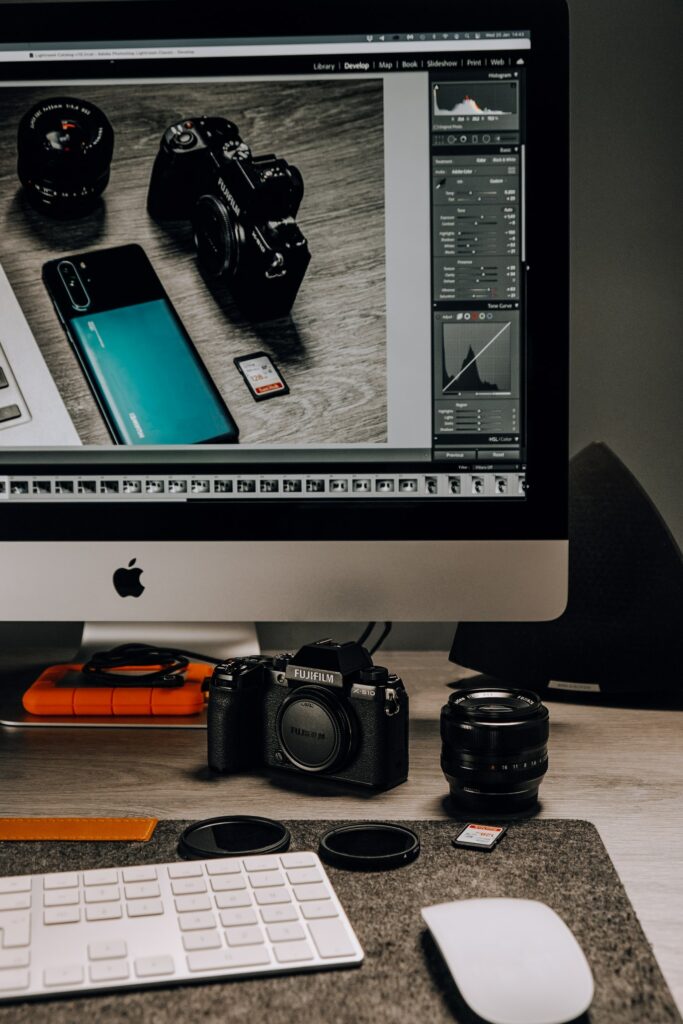
Reading your image's histogram in Lightroom can help guide you through the editing process because it gives you an idea of what adjustments should be made so you can get a properly exposed image.
Lightroom has tools for resolving your histogram issues. For example, if you want to view the clippings and shadows, you can use the Clipping Warnings feature that displays the clipping in your histogram in red.
Now that you know what an ideal histogram looks like and how you can use it to determine the right exposure for a scene, it is important to know the three common issues that you may run into.
A well-balanced and unskewed histogram is great for images that include a lot of midtones and are centered around the midtone detail.
However, certain images just do not look like this. For example, if you take a picture of a black rock in the evening, you may end up with a histogram with a skew, even if you have captured every single detail correctly. If you take a picture of a tree against snow, you will see skew because the scene is naturally lighter and not middle gray.
Before you review your photo’s histogram, check if your photo should average out to a middle gray or if it should have a natural skew. You need to use this information to guide your approach.
Sometimes, even though a picture is overexposed, underexposed, or clipped, it still looks good. If you are looking for a creative result, you do not need to worry about an ideal histogram as long as you know what you want.
For example, you may intentionally underexpose a subject for a moody shot or blow out the sky for an airy and light look, there are a lot of things that you can do. Remember to review the histogram of the image and aim for a specific and deliberate result.
Although it is ideal to avoid clipping, there will be times wherein you will run into scenes where clipping can’t be avoided, simply because the scene has both ultra-dark and ultra-light pixels.
In situations like this, you will need to use a graduated neutral density filter in order to reduce the strength of the bright pixels. You can also capture several bracketed shots that you will later blend together in an editing software like Lightroom and Photoshop. You can also work with the clipped exposure and end up with a creative result, though it would be better to bracket just to be safe.
Learning how to read a histogram is beneficial because it allows you to understand about image exposures and adjust them accordingly for better results. Correctly reading the histogram of an image lets you make the right decisions about adjusting the exposure while you are in the middle of a photoshoot, this will also help shorten the time that you spend in post-processing.
Exposing to the right, knowing when to bracket, and not learning how not to clip the highlights can result in better quality images. They will have a better dynamic range, better colors, and they will look more natural.


