PFRE-Logo-white-bg
Reading
blue-triangle-element

Articles

PFRE is the original online resource for real estate and interior photographers. Since 2006, it has been a community hub where like-minded professionals from around the world gather to share information with a common goal of improving their work and advancing their business. With thousands of articles, covering hundreds of topics, PFRE offers the most robust collection of educational material in our field. The history of real estate photography has been documented within these pages.
All Articles
blue-triangle-element

Latest

Image banner for the February 2024 PFRE Photographer of the Month Winner Art Ibewuike, with a featured image of his winning photo titled "Living Room or Family Room""

Congratulations to Art Ibewuike, February 2024 PFRE Photographer of the Month! The theme this month was "Living Room or Family Room". Art Ibewuike - #895 Paul-Dan Dragoman - #898 Peter Wingfield - #900 Here's what Art has to say: Thank you so much for ...

Contest
blue-triangle-element

OVERVIEW

For over a decade, photographers from around the world have participated in PFRE’s monthly photography contests, culminating in the year-end crowning of PFRE’s Photographer of the Year. With a new theme each month and commentary offered by some of the finest real estate & interior photographers anywhere, these contests offer a fun, competitive environment with rich learning opportunities. 

Contest Rules
blue-triangle-element

CURRENT CONTESTS

View / Submit
blue-triangle-element

PAST CONTESTS

View Archive
Resources
blue-triangle-element

Resources

PFRE prides itself on the depth and breadth of the information and professional development resources it makes available to our community. Our goal is to help real estate and interior photographers be successful while bringing the community together and elevating the industry as a whole.
blue-triangle-element

Conference News

No items found

How to Change Exposure on a Canon Camera

In: 
Published: 31/08/2021

As an Amazon Associate we earn from qualifying purchases.

Exposure is an essential element in photography because it affects the brightness or darkness of images. However, you may find it confusing to modify settings on your Canon camera. For this guide, I'm sharing tips on how to change the exposure on Canon cameras to capture quality real estate photos.

How to Change Exposure on Canon

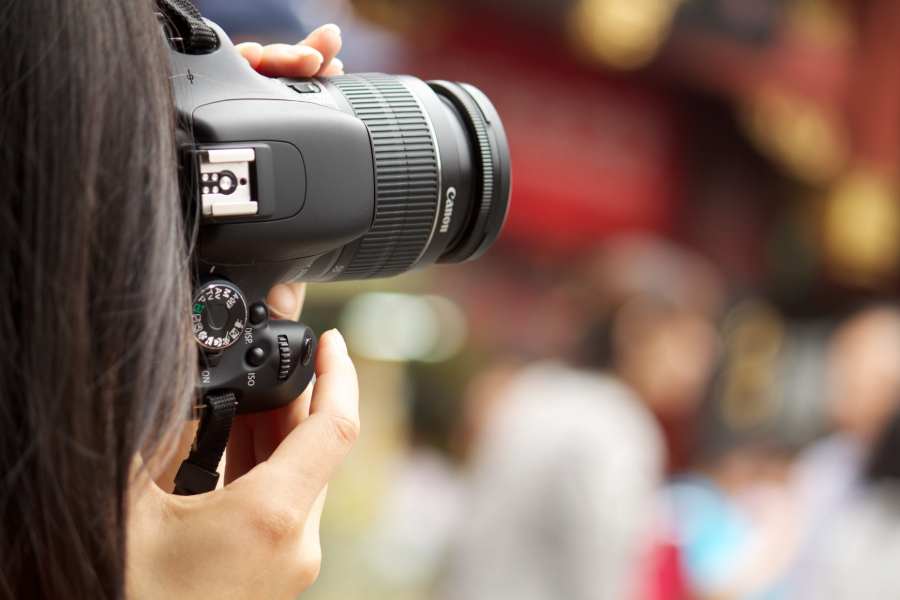
To change the exposure on a Canon camera, choose the shooting mode using the dial buttons on the body. Select Manual if you want to decide on the aperture, shutter speed, and ISO values manually. Another option is to use automatic modes such as Aperture Priority, Shutter Priority, or Program.

To ensure you can apply the correct exposure, whether for interiors or exteriors, let's start by having a deeper understanding of the various exposure elements. 

Understanding Exposure in Real Estate Photos

Exposure denotes the camera's measurements of the amount of light hitting the sensor to determine the overall brightness or darkness in a real estate photo. You can achieve this by choosing a shooting mode from a Canon camera's body.

Shallow focus of a person taking photos using Canon DSLR
  • Aperture: Aperture refers to the opening of a Canon camera's diaphragm to collect light. You can set the camera into Manual or Aperture Priority to set the value you want. For instance, choose f/5.6 or lower values to gather as much light as possible. This is especially handy if you don't a flash available.
  • Shutter speed: Shutter speed dictates how long the light can fall onto the sensor. Since real estate photography normally focuses on stationary subjects, you can use Shutter Priority and set the shutter speed anywhere between 1/60 or 1/2 of a second.
  • ISO: The ISO influences the sensor's light sensitivity. To prevent image noise, ISO 100 to 400 are usually enough for interior and exterior photos.
  • White balance: You can choose Auto or Daylight as a starting point since you can fix the white balance on Lightroom.

Changing Manual Exposure Settings on a Canon Camera

One of the best ways to control exposure for real estate photography is to choose Manual shooting mode. On the top side of your Canon camera body, look for the dial buttons with different symbols. You should see a capital letter M for Manual mode.

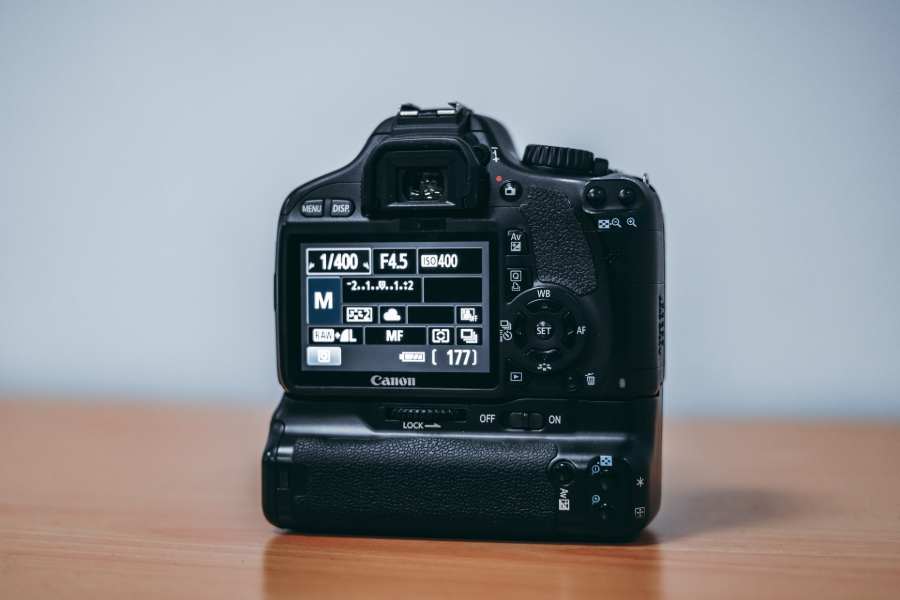
After setting Manual mode, you can easily follow these steps.

  • From the Control screen, decide which exposure elements you want to see. It's generally ideal to input a small aperture number first.
  • Follow with a shutter speed value that would prevent blurring.
  • Since you'll most likely photograph properties using a quality tripod, you can set the ISO to the lowest level, which is usually 100.
  • From time to time, check the exposure level indicator through the viewfinder. You can adjust it toward the negative (-) side for a darker effect or the positive (+) direction to get a brighter exposure.

The primary benefit of shooting in manual mode is that you gain complete control over the exposure values. You can fine-tune the settings until you find what works well according to your composition, lighting system, and stable tripod setup.

Applying Automatic Exposure Compensation on a Canon Camera 

About 43% of marketers say that consistency in creating visual content is the biggest challenge for them. Real estate photography requires consistency as you want properties to look as natural and beautiful as they are in real life.

To do this, you can also change the exposure on Canon using automatic settings. Much like what you'll do with Manual mode, you need to turn the dial button in the camera body then pick either Program (P), Shutter Priority (Tv), or Aperture Priority (Av).

  • Your first option is Program mode, which displays the camera's recommended aperture, shutter speed, and ISO. 
  • Meanwhile, rotating the dial button to Shutter Priority enables you to select the shutter speed and let the camera decide on the aperture. 
  • The last option is Aperture Priority, wherein you need to input the aperture value manually, then the camera will adjust the shutter speed accordingly.
  • Use the Quick Control screen to modify the exposure compensation setting beyond ±3 stops. 
  • Set the LOCK switch upward so the exposure settings won't change accidentally.

Sample Canon Exposure Settings for Real Estate Photography

About 74% of marketers include visual elements in over 70% of their content. You must be flexible in various shooting conditions to offer visual imagery services to realtors and agents. With that said, here are examples of changing exposure on a Canon camera.

Woman taking photos during daytime

Balancing Brightness for Indoors and Outdoors

Suppose you're using a full-frame Canon DSLR with a prime lens. If you need to include the bright scene when shooting indoors and a darker outdoor space in the same frame, you can select Manual exposure mode to work with contrasting light effects.

After that, you can apply f/3.5 for the aperture and 1/60 for the shutter speed, ISO 640, and Daylight white balance to further balance the exposure.

Ensuring Brightness for an Agent's Portrait

Let's say you're using a Canon EOS 80D with an EF lens. However, the challenge is that backlighting can turn the agent's face darker.

For such situations, you can still use Manual exposure mode to determine the aperture value according to the subject's face. Without the background affecting the subject, you can apply f/4 aperture, 1/125 shutter speed, ISO 100, and Daylight white balance.

Shooting Darker or Brighter on Purpose

Perhaps you're using a crop-sensor Canon camera with a standard zoom lens. You can also use Aperture Priority, Shutter Priority, or Program from the dial button if you need to shoot darker or brighter bracketed images for HDR editing.

Furthermore, you can change the settings depending on how bright or dark you want the real estate image to appear. However, you can start with an f/4 aperture, 1/20 shutter speed, ISO 100, and Auto white balance.

Conclusion

It's crucial that you choose the right dial button on a Canon camera body to select the appropriate exposure mode. Whether you pick Manual, Aperture Priority, Shutter Priority, or Program, it's important to apply the correct exposure values in the shot and continue making adjustments, if necessary.

Vendors

Rela Logo
CS6 PSE Logo
HD Photo Hub Logo
FullFrame Logo

Learning Topics

.
magnifiercrossmenucross-circle