


In today’s competitive real estate market, static photos are no longer enough. Buyers expect dynamic, engaging content that brings properties to life. Enter Reptov, a powerful new platform that transforms ordinary listing photos into professional marke ...


As an Amazon Associate we earn from qualifying purchases.
Photographers, especially beginners, are usually intimidated by the exposure triangle. However, the three components of the triangle, which are ISO, shutter speed, and aperture, are the key when learning about the composition and technique of a picture. Let’s talk about one of the main components of this triangle: what is aperture in
Quick Navigation
Aperture refers to the size of the camera lens' opening and how it can help you set the light and the depth that you need for amazing pictures. When your camera takes a picture, its shutter mechanism opens and natural light comes on to the sensor. Once it does, the shutter closes again.
Aperture controls the exposure of your images. It works like a massive window that lets light into a room. A wide aperture can brighten your picture. If your picture is not bright enough, you can widen the aperture so you can correct that.

However, aperture can do more than just control the lightness and darkness of a picture. It also lets you have creative control over how much of the picture is in focus and how much of it is blurry. You may have seen amazing portraits with blurry backgrounds and very sharp

The aperture blade is the one that determines how much light comes through the lens. To simply put, it controls the amount of light that comes through, which greatly affects your pictures. Obviously, when the opening is big, lots of light goes through at once. If the opening is small, it is the exact opposite. In
Inside your DSLR camera are numerous circular blades that expand and narrow when you change the aperture. The aperture of your camera’s lens is just like the human eye. It adjusts to light by changing the pupil’s size. Aperture also follows the same concept in that the opening adjusts to different types of light, yet only mechanically and not biologically.
When you use auto mode and take a picture, the mechanism inside your camera controls what happens to the aperture. In a very bright environment, the aperture of your lens gets narrow, yet in a dark environment, it widens.
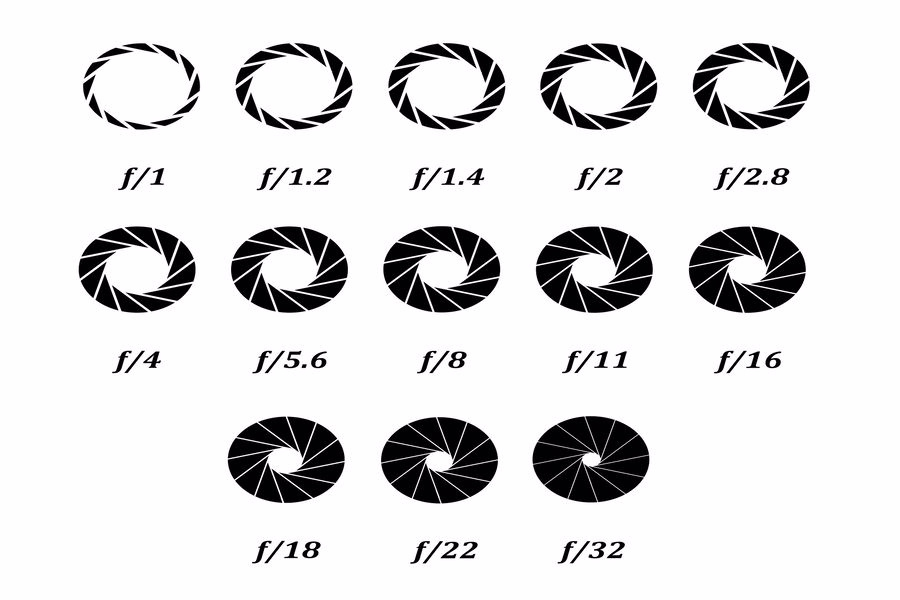
The aperture’s size changes depending on the f-stop, which is also called f-numbers. For example, a small number life f/1.2 means the aperture is wider, while a number like f/18 means that the aperture is narrow.
While determining the correct aperture can be challenging, photographers need to familiarize themselves with just one concept: if the f-stop number is small, then it means that the aperture is wide. If the number is large, then the aperture is narrow.
A wide aperture creates a beautifully blurry background, while a narrow aperture can keep your picture in focus. That is when the depth of field comes in. Depth of field pertains to the sharpness range of either side of a focus point.
Wide apertures result in a shallower depth of field, which means that the subject is sharper than the background. Meanwhile, a smaller aperture will result in a greater depth of field, which means everything in the picture is sharp and clear.
With a wide aperture, there is a massive difference between a blurry background and an object that is clear and sharp. With a narrow aperture, there is a slight difference between a sharp object and a sharp background.
Setting your lens' aperture gives you creative control over your photos. If there is something that you find very distracting in the background, then you can widen the aperture to blur out the distraction. If the entire scene is great, then a narrow aperture can keep the beauty sharp.
So how do you select the right aperture for your picture? You can use focus and depth of field to put attention to what is vital in a picture, and the lack of focus can be used to minimize distractions that can't be removed from the composition.
Although there are no rules, guidelines are still applicable in selecting the aperture for your images.
For portrait photography, you need to separate the subject from its surroundings via the selective focus feature.
Selecting a massive aperture creates a shallow depth of field, so the focus is only on the subject, or the focus is only on a portion of the subject. This can help switch the focus of your viewers to the subject.
When shooting portraits, the ideal aperture is around f/2.8 - f/5.6 so you can capture a shallow depth of field. The background will be beautifully blurred while the subject stands out better.
When selecting the lens to use for landscape photography, viewers want to view important details on the photo, like its background and its foreground.
To achieve the highest level of depth of field in a picture, photographers need to select a narrow aperture. The most popular aperture for landscape
While the depth of field can be achieved by adjusting the end of your aperture range, there are instances wherein you will need an intermediate one to limit the focus to a certain range within the whole picture.
One way that you can do this is by choosing a f/stop that is mid-range and shooting a test frame. You can use a magnifying function of your LCD screen to zoom in and review the depth of field, reshoot, and make adjustments if needed.
If your aim is to create a shallow depth of field, the aperture must be between f/1.4 to f/4. If you wish to create a deeper depth of field, the aperture must be between f/11 to f/22.

Aperture adds numerous touches to your images. One of the most vital factors is the brightness, also known as the exposure, of your pictures. When you adjust the aperture’s size, the amount of light that gets in and reaches the camera’s sensor also changes. This means that the brightness of your photos is affected.
A massive aperture allows a lot of light in, and this results in a brighter image. A small aperture does the exact opposite of it, as it makes your image darker. In a poorly lit area, you will need to choose a large aperture so you can get as much light as possible. This is the same as your pupils dilating when you enter a dark room.
To produce a shallow focus, you need to use a massive aperture. It will help the viewers focus their eyes on your subject instead of the foreground and background. If you've selected a narrow aperture, then you would not be able to separate the background and the subject.
One technique to remember is that a massive aperture results in a massive amount of background and foreground blur. This is usually great for portrait
On the other hand, a narrow aperture often results in a very small background blur, which is great for other genres of
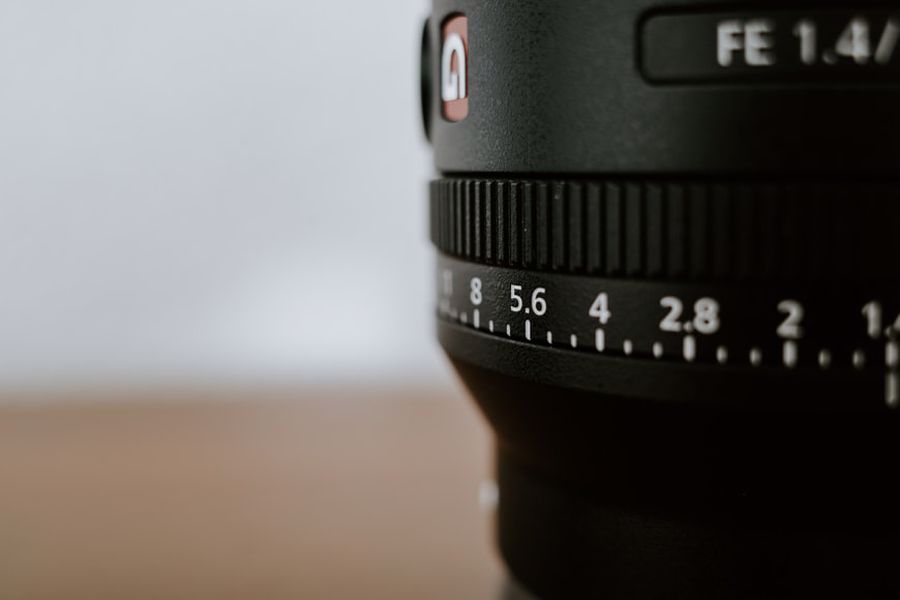
Aside from describing aperture as large and small, you can also describe it by numbers. The numbers are also called f-stop or f-numbers. The letter "f" is placed right before the aperture number, for example, f/2.
The f-stops are written on your camera. On your viewfinder or the LCD screen, the aperture will be the letter "f" and the numbers, like f/8.
Some cameras remove the slash and place the f-stops like this: f2 or f8. These are a way of describing the size of your lens' aperture for a picture.
When you are calculating an f-stop, you can think of it as a fraction. For example, f/12 is 1/12th. Since it is a fraction, it is already a given that a fraction like 1/6 is a lot smaller than 1/4. Because of this, an aperture of f/6 is narrower than the f/14.
If someone recommends a wide aperture for a certain picture, that means you need to use apertures like the following:
Meanwhile, if they tell you to use a small aperture for your picture, you need to use the following:
Choosing your desired aperture via the aperture-priority mode will make the camera select the shutter speed automatically. Meanwhile, when you choose manual mode, both the shutter speed and the aperture are chosen manually.
If you wish to select the aperture of your lens manually before you take a picture, there are two modes that you can use. The first one is the aperture-priority mode, and the second is the manual mode.
Aperture-priority mode is labeled as “A” on most cameras or “AV” on some of them. The manual mode is labeled as “M.”
Every camera lens has a limit on how massive or narrow an aperture can get. If you check out the specifications of your camera lens, it should show what the maximum aperture is and vice versa.
The maximum camera aperture is vital in
Meanwhile, the minimum aperture is not as vital because almost all new lenses on the market can give a minimum aperture of f/16. You rarely need a small one for your daily
With zoom lenses, on the other hand, the maximum aperture will depend on how you zoom in on your subject. For example, the Nikon 18-55mm has a maximum aperture of f/.56. Meanwhile, the Nikon 24-70mm has a maximum aperture of f/2.8. Prime lenses also have a wider aperture compared to zoom lenses, which is one of its advantages.
The lens’ maximum aperture is very important which is why it is added in the lens' name. Usually, it will be placed on the lens with a colon instead of a slash, yet it means the same thing.
Diffraction happens when the light waves interfere with each other. Every single time that a light wave passes through any opening, they interfere. Basically, it is an optical effect that limits the resolution of your images.
Even if your camera has high megapixels, the resolution that comes out is not as impressive. It happens when the light starts to diffract when it passes through an opening, like your aperture. The effect is not as visible sometimes because small apertures usually improve the sharpness of your image by minimizing chromatic aberrations.
However, for very small apertures, the effect becomes so visible that it is counterproductive, and that is when your camera becomes diffraction limited. When you know this limit, you can maximize the detail, and you can avoid high ISO speed or long exposure that can affect the quality of your picture.
Diffraction can't be avoided as it is connected to the physics of
Below are tips on how you can avoid diffraction if you use small apertures in order to make sure that your images remain clear and sharp.
Even though you can't do anything to change physics, there is one way to minimize the effect on your images. All you have to do is to use a larger aperture.
If you want to have sharp photos, it is the only way to remove diffraction. If you need to take a picture of a scene with a massive depth of field, you need to stack an aperture of at least f/5.6 because the diffraction is not as visible.
Also, if you use a small aperture, you can improve your picture's detail because it sharpens the corners during post-processing. It does not remove diffraction entirely, yet it is an effective way to improve pictures when using small apertures.
Basically, it is possible to do something about diffraction when your picture undergoes a sharpening procedure called deconvolution. This sharpening method is effective when one has a great lens model, including its optical characteristics.
Generic deconvolution does not minimize the effects of diffraction. However, it can help improve the sharpness of your photos. It is so effective that some camera manufacturers have a diffraction-reduction feature included. Yet, it does not eliminate the effect. It is just an unsharp mask added into the RAW file.
If you wish to use the feature, you can increase the slider in either Camera Raw or Lightroom. It will not be specific, yet it does make a difference. However, even though you can sharpen your pictures during post-processing, the ideal way to decrease the chances of diffraction is using a larger aperture.
The aperture and shutter speed of a camera lens controls the amount of light that comes into the camera's sensor, so it can avoid moiré patterns, and it determines what the outcome of your image would be. Meanwhile, the International Organization for Standardization or ISO affects the amount of light that is needed to create the right exposure for your images.
The three elements are part of the exposure triangle. You will need to have all three in order to control the exposure on your images as one would not suffice. For example, if you have a camera lens with a 600mm focal length and set the aperture at f/4 to gather as much light as possible, it will affect your depth of field and will blur out the background.
If you then set your shutter speed to 1/1000th of a second to prevent any motion blur, the result will be way too dark. Since you can't compromise your aperture or your shutter speed, you will need to use the ISO in order to complete the exposure triangle and produce a clear image. If you increase the ISO to 640, the image will be fixed and it won't be grainy. This is why all three need to work hand in hand for amazing results.
You can adjust the aperture on your camera or on the lens itself using two methods:
Older lenses are equipped with an aperture ring. You can use it to set the aperture on your camera. Canon has removed aperture rings from its models, while Nikon still offers elements of old and show school aperture rings in its D-series lenses. You just need to lock the aperture ring on the lens to the highest f-number, which results in the smallest aperture, then control the aperture from your DSLR camera.
The more advanced Nikon cameras allow you to enter the focal length and the maximum aperture into the menu. Entering the data allows the camera to meter and recognize the aperture that is set by the lens. It also controls the flash so much better.
As for in-camera, they apply to modern lenses that are not equipped with aperture rings. You can enter the camera's Manual or Aperture priority modes and dial in the aperture that you want. You can use one of the controls that are located in the front or at the back. You can also use the camera's Program Mode and change the aperture and shutter speed through the Program Shift.
Aperture is one of the most important settings in
Remember that a small aperture can darken your picture, increase diffraction, increase your depth of field, and decrease lens aberrations. As for large apertures, it does the exact opposite.


