PFRE-Logo-white-bg
Reading
blue-triangle-element

Articles

PFRE is the original online resource for real estate and interior photographers. Since 2006, it has been a community hub where like-minded professionals from around the world gather to share information with a common goal of improving their work and advancing their business. With thousands of articles, covering hundreds of topics, PFRE offers the most robust collection of educational material in our field. The history of real estate photography has been documented within these pages.
All Articles
blue-triangle-element

Latest

Image banner for the February 2024 PFRE Photographer of the Month Winner Art Ibewuike, with a featured image of his winning photo titled "Living Room or Family Room""

Congratulations to Art Ibewuike, February 2024 PFRE Photographer of the Month! The theme this month was "Living Room or Family Room". Art Ibewuike - #895 Paul-Dan Dragoman - #898 Peter Wingfield - #900 Here's what Art has to say: Thank you so much for ...

Contest
blue-triangle-element

OVERVIEW

For over a decade, photographers from around the world have participated in PFRE’s monthly photography contests, culminating in the year-end crowning of PFRE’s Photographer of the Year. With a new theme each month and commentary offered by some of the finest real estate & interior photographers anywhere, these contests offer a fun, competitive environment with rich learning opportunities. 

Contest Rules
blue-triangle-element

CURRENT CONTESTS

View / Submit
blue-triangle-element

PAST CONTESTS

View Archive
Resources
blue-triangle-element

Resources

PFRE prides itself on the depth and breadth of the information and professional development resources it makes available to our community. Our goal is to help real estate and interior photographers be successful while bringing the community together and elevating the industry as a whole.
blue-triangle-element

Conference News

No items found

How to Make a Timelapse in Lightroom

Published: 06/07/2022

As an Amazon Associate we earn from qualifying purchases.

Sometimes there is less activity around real estate properties, and you would need to shoot hours-long videos to capture any movement. Learning how to make a timelapse in Lightroom will help you capture stills and create a video with the much-needed movements.

How to Make a Timelapse in Lightroom

A timelapse is a series of photos of a specific subject that you stitch together to form a video. The creation of a timelapse starts by shooting a sequence of photos with a predefined interval between the shots, which you can capture for hours or the entire day.

An image of a woman teaching on how to make timelapse in Lightroom

You will then need to use photo manipulation software such as Lightroom to stitch them into a video. However, keeping in mind that Lightroom doesn’t come with video rendering features, you will need to use it with custom templates to create the timelapse.

Typically, Lightroom will help you organize your photos into the correct slideshow sequence and apply the necessary edits, and then the custom template will generate the actual video. You can use the following steps to create custom templates of varying video frame rates and then make a timelapse in Lightroom.

Create Custom Templates

The minimum display time for a slideshow photo in Lightroom is limited to 1 second. Keeping in mind that videos have a minimum of 24 frames per second, it means you can’t export the slideshow to a video in fractions of seconds.

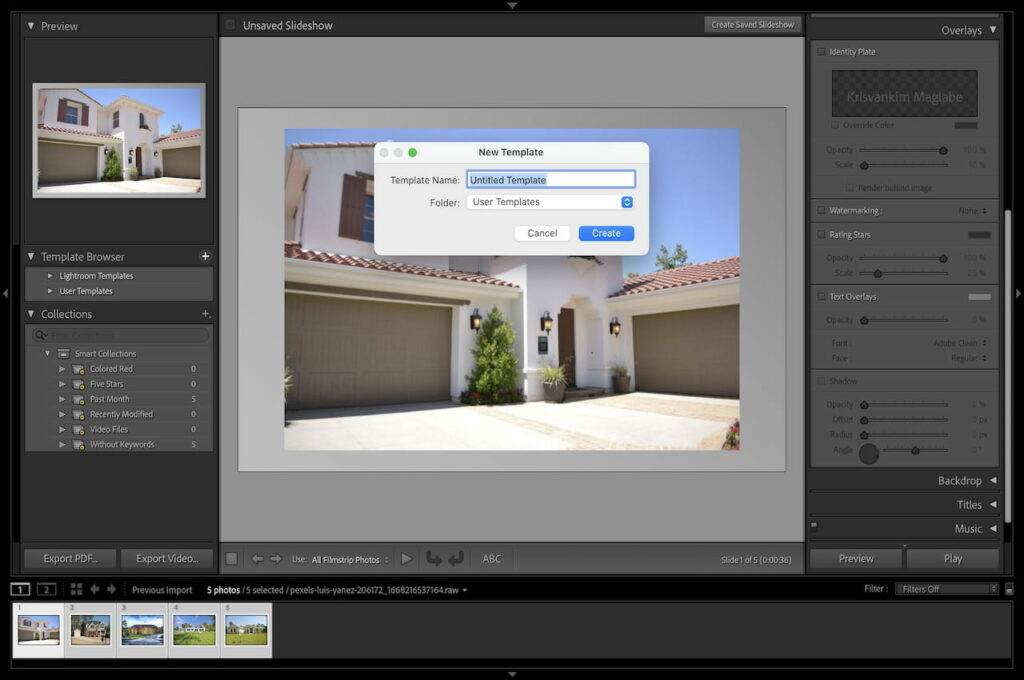
However, you can bypass this issue by creating a custom Lightroom preset that will help you render the slides in the frame rate of your choice. Typically, you can use the following steps to create several templates with the common video frame rates.

  1. Open Lightroom and then go to the Slideshow Module. Keeping in mind that you want a timelapse from still photos, uncheck all the boxes, except the Zoom to Fill Frame option.
  2. Besides the Template Browser, select the + sign to add a new template. Enter the name of the new template, choose the folder you want the template to be located in, and then click on the Create button.
  3. Usually, the created template will have a default slideshow length of 4 seconds. Keeping in mind that Lightroom won’t allow you to edit this length to less than 1 second, right-click on your template and then choose Show in Explorer if you are using a Windows PC or Show in Finder if using a mac.
  4. Once the Windows explorer or Mac finder pops up showing you the template in the folder, right-click the template and then choose Open with Notepad if you are using a Windows PC or TextEdit if using a mac.
  5. Scroll down the file until you see a line that begins with speed. In most cases, this will be line 178. Since the default speed is 4.0, the line should read speed=4. Typically, this is the number of seconds for each frame.
  6. Since you want around 24 frames per second, do the math 1 / 2 = 0.04166666666667. You can then delete the 4 and input the above resulting figure. Usually, this is the only thing you need to change when creating different video frame rates, such as 24fps, 30fps, and 60fps.
  7. Locate the line that begins with transition speed, which is mostly line 182, and adjust the value to 0. Keep in mind that you should not delete the comma next to the 0. Navigate to File on your text editor, choose Save and then close the Editor.

If you have created several video frame rates such as 24fps, 30fps and 60fps, it’s advisable to rename the templates based on the number of frames per second to avoid confusion when applying. Restart Lightroom after creating the templates for the changes to take effect.

Creating custom templates of beautifully captured images of real estate using Lightroom

Import the Photos in Lightroom

With the templates ready, you can import the photos you want to use for the timelapse. It’s advisable to create a timelapse with JPEGs so you can speed up the import and processing speed.

  1. Navigate to the Library Module and click on the Import button at the bottom. If you can’t see this panel, press the TAB key on your keyboard.
  2. Assuming you are importing from your computer’s hard drive, select the folder from the Source panel where the photos are located, and then choose Add. You can check the Include Subfolders option if the photos are in subfolders.
  3. It’s advisable to check the Don’t Import Suspected Duplicates option to avoid importing real estate photos with identical compositions, as the resulting timelapse will have no movements.
Importing beautifully captured images of real estate in Lightroom

Crop the Images

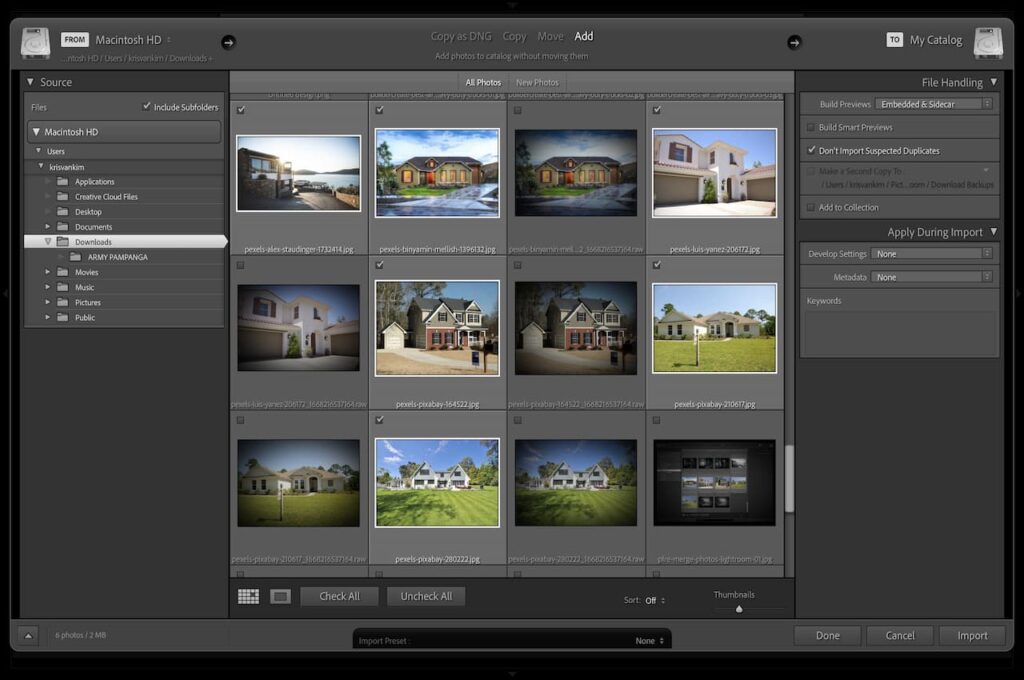
Keep in mind that the photos will be in different formats depending on the camera you are using, such as 2 x 3 format for aps-c and 4 x 3 format for micro-four-thirds. Typically, you can use the following steps to crop the images to the standard video aspect ratio of 16 x 9.

  1. Navigate to the Develop Module and then select all the images by hitting the keyboard shortcut keys Ctrl + A if you are using a Windows PC or Command + A if using a mac.
  2. Locate the Sync button at the bottom right-hand side of the interface and then flick the switch to change to Auto Sync.
  3. With the first photo selected, click on the crop tool on the top right-hand side where it says Original and then choose 16 x 9. Typically, this will help crop all images to the same plane and spot.
  4. Depending on your photo composition, you can move the cropping borders to crop the skyline without cropping the real estate buildings at the bottom and then click on Done.
Cropping an image of a concrete house with big driveway near a blue sea using Lightroom

Create the Timelapse

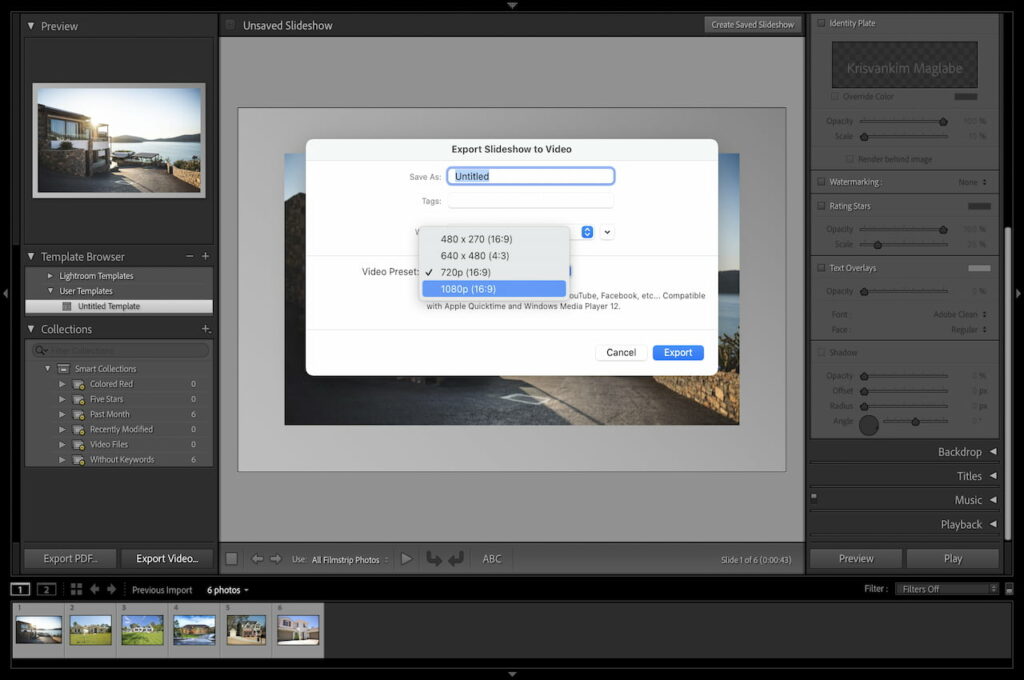
Finally, you will need to create a slideshow using the saved custom templates. Remember that the number of photos you will need for a 1-second video equals the frame rates. That means you will need 240 photos to create a 10-second timelapse at 24fps.

Usually, you will see the number of pictures you have at the bottom of the photo in view. However, Lightroom will round the exported timelapse to the nearest 1 second. For instance, if you have 238 images, the resulting video will be 9 seconds, not 10 seconds, because of the two images lacking.

  1. Navigate to the Template Browser panel on the right-hand side of the Slideshow Module, choose the preset with your desired frame rates, and then click on the Export Video option at the bottom.
  2. In the dialog box that pops up, choose the video preset of your choice, such as full HD at 1080 pixels.
  3. Enter the name of the timelapse and then click on Save. Keep in mind that the export process can take time depending on your computer properties, the length of the video, and the frame rates.
Exporting slideshow to video of beautiful real estate to create a creative timelapse using a Lightroom

Frequently Asked Questions

Should I Use JPEGs or RAW Files When Creating a Timelapse in Lightroom?

You can use JPEGs or RAW files to create a timelapse in Lightroom. However, even if RAW files are better when editing the image data, such as the white balance and exposure, they can significantly slow down the application, especially when working with a large collection of photos or even prematurely fill up your storage.

Can I Create a Timelapse in Lightroom Using Third-Party Plugins and Presets?

You can use third-party plugins, presets, and applications such as LRTimelapse to create the timelapse. Typically, Lightroom will help you organize your photos into the correct sequence and apply the necessary edits, and then the third-party plugins, presets, and applications will generate the timelapse.

Final Thoughts

Learning how to make a timelapse in Lightroom can help you capture and compress the activities in a real estate property into a single few seconds video. You only need to create a template with your desired video frame rate and then create a slideshow using the templates.

Vendors

Rela Logo
CS6 PSE Logo
HD Photo Hub Logo
FullFrame Logo

Learning Topics

.
magnifiercrossmenucross-circle