


In today’s competitive real estate market, static photos are no longer enough. Buyers expect dynamic, engaging content that brings properties to life. Enter Reptov, a powerful new platform that transforms ordinary listing photos into professional marke ...


As an Amazon Associate we earn from qualifying purchases.
Every real estate photographer wants to shoot crisp, bright and quality images free from digital noise. Understanding the photographic effects of low ISO vs high ISO can help you determine which ISO settings to use with specific shutter speed and aperture settings under certain lighting conditions.
Quick Navigation
The camera ISO is a handy setting that you can use to brighten up your real estate interior photos when shooting under low-light conditions. However, balancing the ISO to get these results is a major challenge, especially for beginners.
Typically, ISO is a camera setting that amplifies the light signal reaching the camera sensor. In most cases, you might want to increase it to maximally brighten the photo. However, the amplification of the light signal also causes an amplification in the digital background noise, making the photo grainy.


That means for bright, sharp and high-quality real estate interior photos, the right ISO balance is necessary. Let me exploit low ISO vs high ISO and balance ISO to improve your image quality.
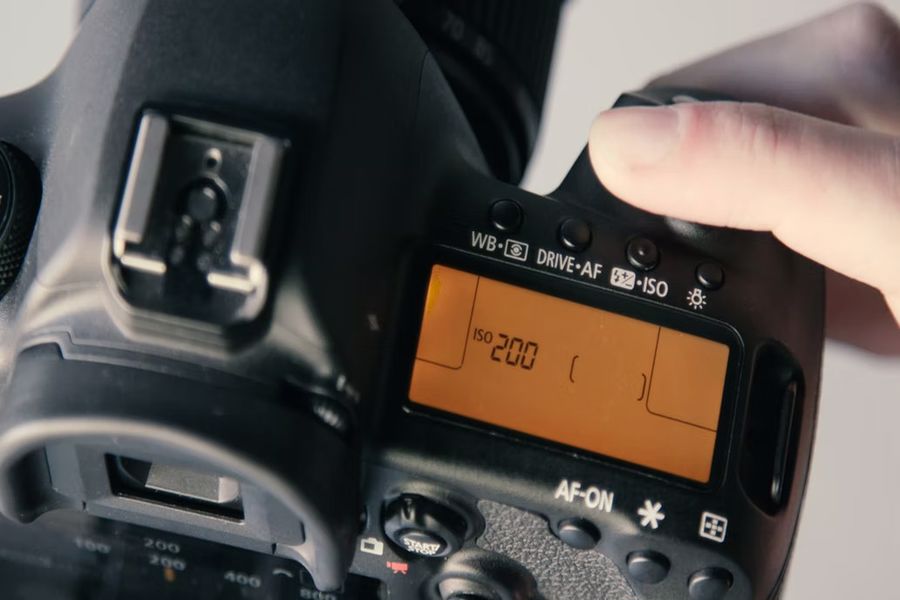
Since ISO is all about amplifying the light signal reaching the camera sensor, low ISO means minimal signal amplification. The lowest ISO setting means there is no signal amplification. This lowest ISO setting is the base ISO and is typically ISO 100.
Considering that there is no amplification, the electronic interferences don't increase, and the resulting image is free from digital noise. Typically, this makes the base ISO the best ISO setting for shooting high-quality outdoor photos under ambient lighting.
High ISO is a camera setting that significantly amplifies the light signal reaching the camera sensor. The amplification of the light signal when increasing the ISO is similar to the amplification of sound signal using the gain knob.
That means as the light signal scales up, the electronic interference with the signal also scales up. Although the resulting photos brighten up, they might appear grainy due to the increase in digital noise.
Considering that ISO is a part of the exposure triangle, understanding how low ISO and high ISO affect the image quality can help you determine the correct ISO settings depending on the shutter speed and aperture settings.
Since the technical difference between low ISO and high ISO is the level of signal amplification, they both impact the exposure and the resulting photo brightness and sharpness as follows.

Although many beginners believe the difference between low ISO and high ISO is all about increasing or decreasing the ISO settings to brighten or darken an image, the following differences can result in significant variations in image quality.
The camera ISO is one of the first settings that real estate photographers tweak when shooting large interior spaces in low-light conditions. Usually, you will want to amplify the available light signal and make the photo brighter.
Considering that ISO works like a gain knob, low ISO means the amplification of the available light signal is minimal, resulting in darker images. On the other hand, increasing the ISO means more light amplification, resulting in brighter photos.
For instance, if you have the camera shutter speed set at 1/50 and the aperture is wide open at f/2.8, you will capture brighter photos when using higher ISO than when using low ISO.
Digital noise is some form of a grainy veil that obscures the finer details in an image. The digital noise is almost similar to the background hiss sound you might hear on your video recordings when the room is quiet.
Usually, the digital noise results from electronic interference with the camera sensor. This background noise is not noticeable when the light signal is strong, and you have set the ISO low. As a result, images shot at low ISO are noise-free.
On the other hand, the background noise gets amplified if you increase the ISO to amplify the light signal. Depending on the level of amplification, the digital noise can be visible in the form of color and light speckles when shooting at high ISO.
The performance of high ISO is not consistent across camera sensors or brands but varies with the quality and size of the camera sensor. For instance, if you hold the shutter speed and aperture settings constant, you can get identical image quality across camera sensors when using low ISO.
If you start increasing the ISO to higher values, the image quality will start varying across camera sensor sizes and brands. Typically, larger and high-quality camera sensors will amplify the light signal with minimal noise.
The major distinguishing factor between low ISO and high ISO is the sensitivity to the light signal. The sensitivity of a camera sensor indicates how much the output changes for a given change in the light input signal.
When using low ISO, there is a minimal scaling up of the light signal, allowing you to use a wide aperture and slower shutter speeds without getting over-exposure. On the other hand, high ISO means a higher scale-up of the light signal, allowing you to use faster shutter speeds and narrower apertures.
Keeping in mind that ISO directly impacts the exposure, the following photographic situations require you to use a low ISO to capture sharp images without overexposure or noise.
When you are shooting portraits of real estate agents, you might want to use a shallow depth of field. However, you will need a wide aperture to get a beautiful and pleasing bokeh quality. Typically, this will mean more light entering into the camera.
When shooting with the aperture wide open, the scaling up of the light signal increases the chances of over-exposure, especially if the ambient light is good. You can prevent this problem by using a low or base ISO.
Since high ISO results in noisy images, you can avoid the noise by allowing more light into the camera instead of amplifying the light signal. Keeping in mind that the shutter speed regulates the amount of light entering the camera, you can prolong its opening time to allow more light to enter.
For instance, raising the ISO to 1000 to use a shutter speed of 1/500 might lead to a bright but noisy image. On the other hand, reducing the ISO to 200 and slowing down the shutter speed can lead to a noise-free and equivalently bright image.
However, this technique works best when shooting stationary subjects as any subject movement when using slower shutter speeds can lead to motion blur. It's also advisable to use a tripod to eliminate any camera shake when shooting.
Although many real estate photographers prefer using low ISO to capture crisp images, the following conditions might require using high ISO.
Sometimes, there is insufficient ambient light to capture bright images when capturing interior real estate photos. Even with the aperture wide open and the shutter speed slow, the light reaching the camera sensor might be inadequate and will need amplification.
The best option will be to raise the ISO to brighten up the image. Although the resulting image might be noisy and grainy, it's easier to reduce the noise using a third-party photo editing software such as Lightroom than to brighten darker images.
For better editing results, shoot the photos in RAW format to later use the editing application to balance the noise and brightness.
When you are shooting landscapes, you will need to use a deep depth of field to make both the foreground and background in focus. That means you will need to use a narrower aperture to get a deep depth of field.
The use of a narrower aperture means less light entering the camera, resulting in darker images. You can solve this issue by using high ISO to help brighten the images. If you are shooting in broad daylight, the noise level might be significantly low.
The main problem when capturing a moving subject is the motion blur. One of the best ways of preventing motion blur is to increase the shutter speed. At fast shutter speeds such as 1/1000, the shutter opens and closes before any significant subject movement.
This shutter speed can even allow you to shoot raindrops and freeze the falling droplets in your photo. However, the shutter closing time increase means less light will enter the camera, resulting in darker images.
You can solve this problem by using high ISO to brighten up the images. Again, it's easier to remove the digital noise using a photo editing application than to remove the motion blur.
The best ISO depends on the lighting conditions, the depth of field you desire and whether the subject is moving or stationary. In most cases, low ISO is better as the resulting images are crisp without any digital noise.
However, if you are shooting in low light conditions or you want to increase the shutter speed to capture a moving subject or narrow the aperture to get a deep depth of field, consider using high ISO to brighten the photos.
Knowing the effects of low ISO vs high ISO on the image quality can help you determine which ISO setting to use under certain lighting conditions, aperture and shutter speed settings. Photos shot at low ISO are sharp and noise-free while photos shot at high ISO are brighter.


