


In today’s competitive real estate market, static photos are no longer enough. Buyers expect dynamic, engaging content that brings properties to life. Enter Reptov, a powerful new platform that transforms ordinary listing photos into professional marke ...


As an Amazon Associate we earn from qualifying purchases.
Sometimes, even the most perfect shot seems a bit off due to an object that should have been placed elsewhere. The good news is that you can change the position of a person or object even after the shot has been taken. Learn how to move objects in Photoshop to place them in another position seamlessly.
Quick Navigation
Adobe Photoshop CC equips its users with exceptional editing capabilities. You can add ethereal effects to maximize the appeal of your images and manipulate them using a variety of tools. Among many editing features is the ability to move an object from one position to another in the picture.
Moving an object requires steps that ensure that the object is selected and moved to a different place, and the void left behind should be filled to make it match the rest of the background.

In the earlier versions of Photoshop, moving the object involved a lot of effort as the space left behind the object was supposed to be filled with matching pixels. It required filters, effects, and a lot of time to get the final result looking natural.
Now, features like the Content Aware tool have made the job super easy, quick, and efficient.
With every update, Photoshop keeps getting smarter. It gets better at providing editing solutions that look natural and seamless. You don’t need to be a Photoshop pro to change the position of an object in a flawless way.
Content Aware Move Tool is a very powerful editing tool in Photoshop. It enables the movement of objects while seamlessly blending them with the surrounding area with the background. It also fills the empty space left with matching pixels.
You need to select an area in your image that you want to relocate to the same or another image. The content aware move tool interprets the outline of the moved area, as well as the other section or image to which you will be moving the object. After that, it smoothly blends the pixels to give a seamless look.
First, select the object you intend to move. You can either make a selection with any of the selection tools available, like the Marquee tool, Quick Selection, Lasso, or Magic wand, and then use the Content Aware Move tool. Or, you can directly select the Content Aware Move tool from the toolbar as it is also a selection tool.
The selection method depends upon whether the area you are selecting has a complex background and requires precise selection. If it does, it is recommended to use the pen tool or magic wand tool as they offer close cropping with higher precision than the Content Aware Move tool.
After the selection, choose the Content Aware Move tool, which is found below the Patch tool, placed in a bundle with the Healing Brush tool in the toolbar. Toggle it on by right-clicking on the Healing Brush tool icon and selecting the Content Aware Move tool from the sub-menu.
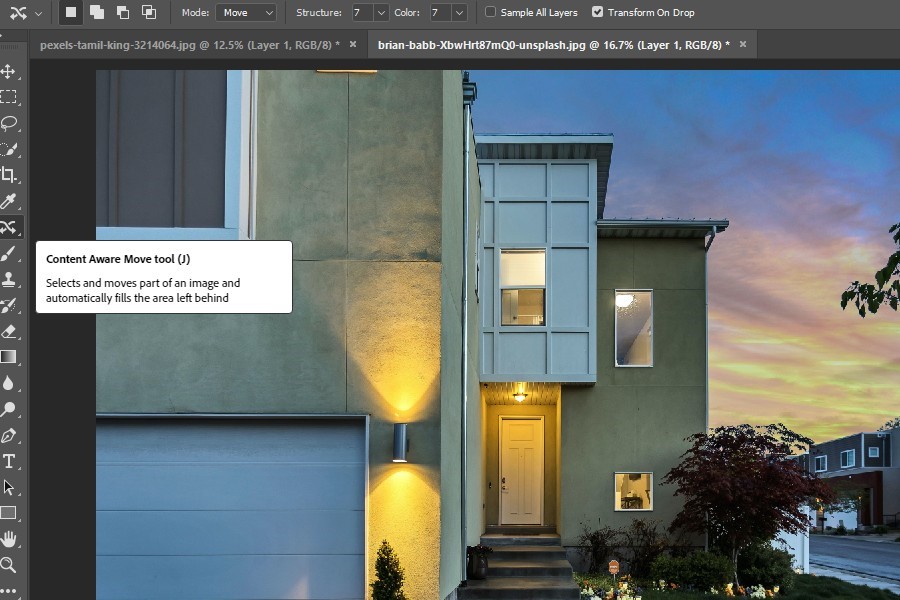
In the options area of the tool, you will first decide whether you are making a new selection, adding or subtracting from a selection, or intersecting the selection. You will also see the mode, structure, and color input values, and other options that determine how the tool will affect your selection and the outline.
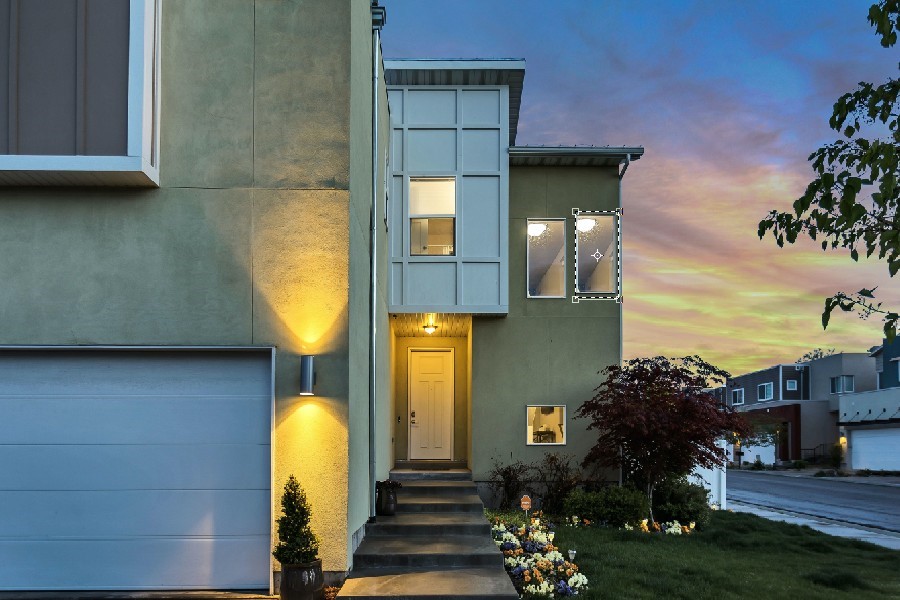
After selecting the object and choosing the settings of the tool, you can now move the object to the new place in the same image. Press the commit to transform icon on top. Photoshop will take a few seconds to blend the outline of the object with its surroundings and fill in the empty space with matching pixels.

If you enabled the transform on drop option, you can resize the object or flip and rotate it as required.

If you want to move an object from one image to another, you need to open the other image in a new tab. Duplicate the background layer in the destination image by pressing CTRL / CMD + J.
Drag the tab from the document area to place the source and destination image side by side.
Now select the object to be moved using the Content Aware Move tool as explained above.
Drag and drop the object on the new image. Photoshop will automatically blend the outline with the new background. If any adjustments are required, you can use the Erase tool for that.
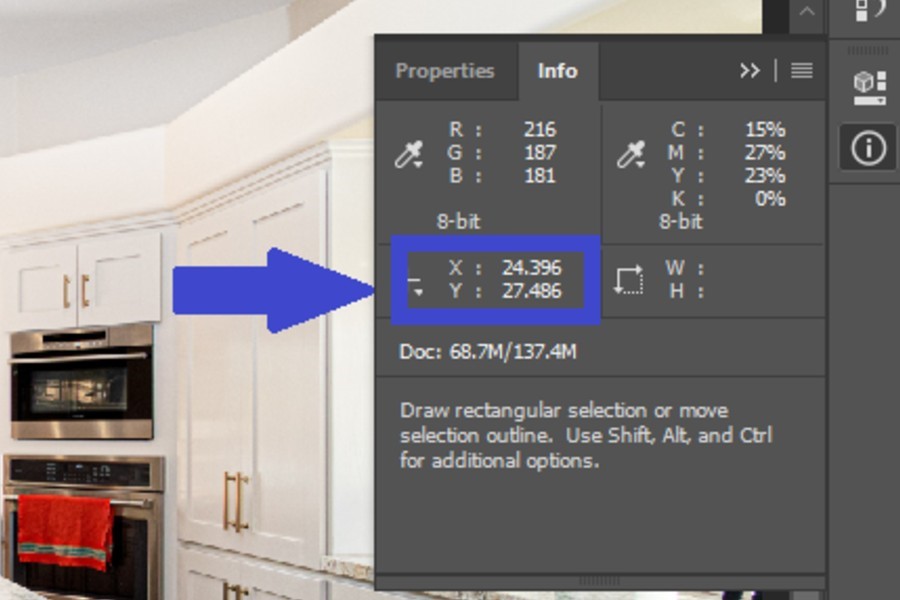
There is another smart way to move an object in an image based on pixel coordinate position. Each pixel in the Photoshop document is present at a specific position or address, determined by the X and Y coordinates. If you want to move an object to a particular location, this method works best for that.
In simple words, this technique is like finding the destination address where you wish to send a particular thing and then sending it by specifying the address.
Firstly, open the image in Photoshop, and duplicate the background layer by selecting it in the panel and hitting CTRL / CMD + J.
Determine the object and the position where you need to relocate it. Now you need to find the X and Y coordinates of that particular position so that you can put them in place of the object’s current position.
Go to the Windows menu on top, and select Info. A new window will appear, showing you the X and Y values of the place where your cursor is right now. Move your cursor to the place where you want to place the object and note the X and Y values.
Select the object using any of the selection tools in the toolbar. Press CTRL + T on Windows or CMD + T on Mac to enter the Free Transform mode. You will see that an options bar appears on top, where you can see the input sections for X and Y coordinates. Enter the values that you noted down a while ago.
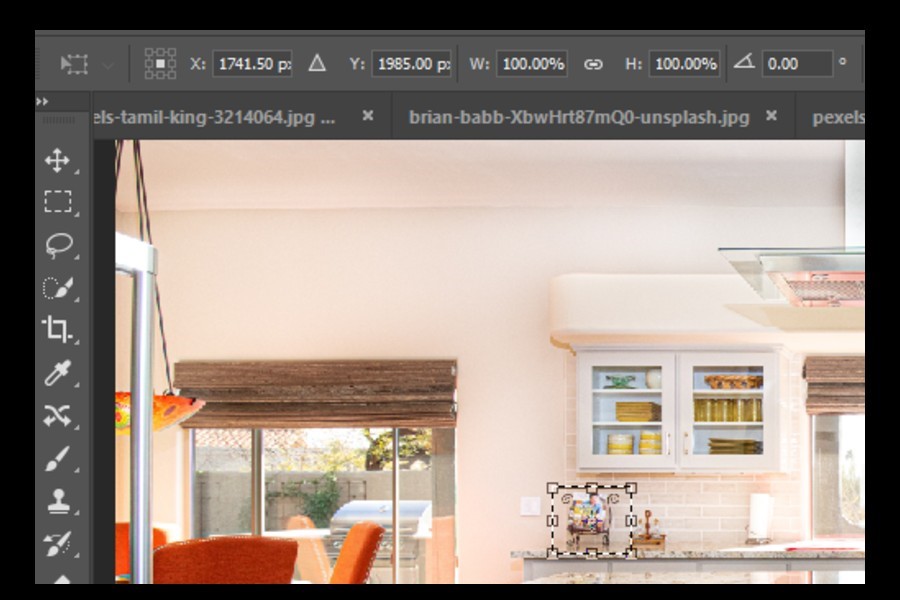
Your object will be moved to the specified location.
It is apparent from the above-mentioned methods that moving an object in Photoshop is extremely easy and quick. Depending upon the image requirements, you can pick any of the methods and bring a unique change to your images. With the highly advanced Photoshop tools, you can be assured that moving the object will be seamless and natural.


