


Congratulations Dave Koch, September 2025 PFRE Photographer of the Month! The theme this month was "Stairwell". Dave Koch - Entry 1099 Alyssa Huang - Entry 1095 Paul-Dan Dragoman - Entry 1098


As an Amazon Associate we earn from qualifying purchases.
The Lightroom 5 version of the Lightroom program is created specifically for professional photographers and editors. It provides a large variety of tools and features that focus on changing the color, texture, and appearance of images. I will provide you an insight into how to use Lightroom 5 to achieve your image editing goals in the best way possible.
Quick Navigation
Lightroom 5 is a fun, user-friendly, and straightforward image editing software. It allows you to transform your images whichever way you want. With its wide array of editing tools, you can produce amazing effects on your photos. Moreover, it allows you to sort, organize, manage, and share your images in just a few simple steps.
When you first start using Lightroom 5, you may find it overwhelming, complicated, and confusing. However, once you get the hang of it, this software will become your favorite to fulfill all your post-processing needs. I will outline the fundamental structure and workflow of Lightroom 5 in this article.

Before starting to work on Lightroom 5, it is best to first understand its interface. Getting familiar with the interface will make it really easy and simple to work on your images. So, let’s start with the layout of Lightroom 5.
Lightroom 5 is a module-based work environment. It consists of different modules, each of which serves different purposes. The main two sections of Lightroom 5 include the post-processing section and the organizational section. Therefore, Lightroom 5 does not only help you with image editing but also helps you keep your images well-managed.
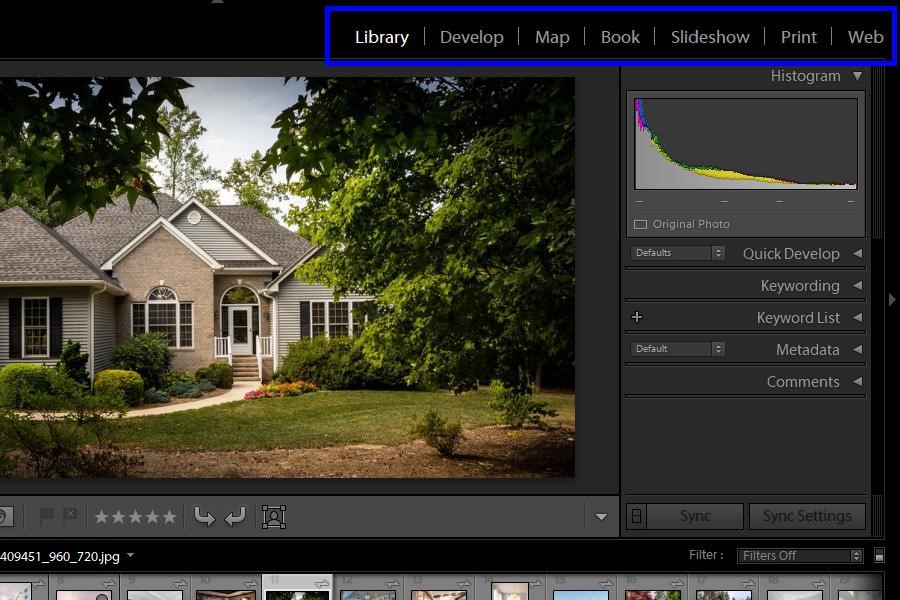
The organizational section of Lightroom 5 is called the ‘Library Module.’ It stores and maintains all your image files in the form of different collections. These collections help keep your images organized in different folders. This module also helps you look at all your images in one place.
The other section of Lightroom 5 is the post-processing section. It is called the ‘Develop Module.’ This module contains all the editing tools and functions. It contains an editing panel on the right side. This panel consists of various sliders for each parameter of your image. Using these sliders, you can modify each and every metric of your image.
The left side of the develop module contains a navigator. This panel allows you to navigate and go to different functions and areas of the Lightroom, such as the presets, your collections, and many more. In short, the develop module allows you to edit your images whichever way you want, easily and quickly.
Other than these two modules, there are also a few other modules in Lightroom 5. These include Map, Book, Slideshow, Print, and Web Modules. All of these modules serve unique purposes, as shown in their names. However, the Library and Develop modules are by far the most important and helpful ones in Lightroom 5.
Now you know how the interface of Lightroom 5 looks like. Let’s now look at the basic workflow of Lightroom 5 to see how to use it to accomplish your editing goals. Here are the fundamental steps involved in using Lightroom 5:
The first step of working on Lightroom 5 is to bring your images into it. In order to that, you can follow the steps below:
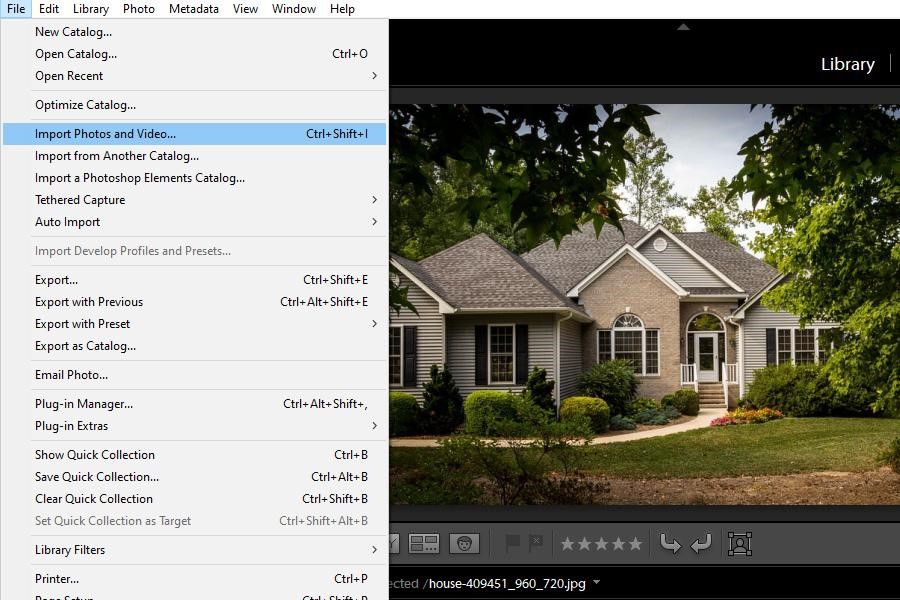
As soon as you import your images into Lightroom, you can start with the editing procedure. Here are the steps to follow:
Each of these sections can be used to apply different effects and alterations to your images. You can easily change the brightness, intensity, color, temperature, exposure, white balance, and many other metrics of your images.


Simply select any slider, depending on the aspect of your image that you want to change. Now, move this slider towards the left to reduce that particular aspect, or towards the right to increase it.
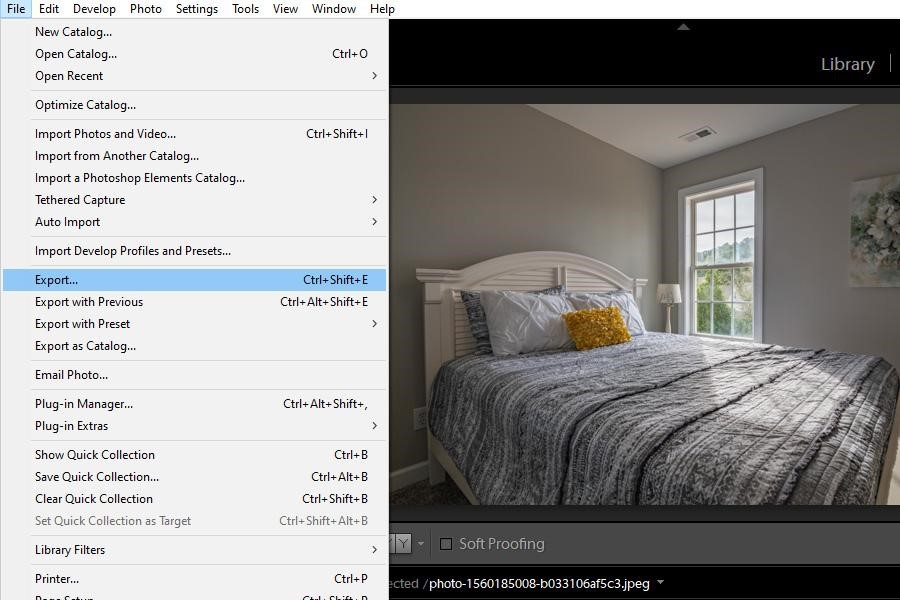
Once you are content with the editing you have done on your image, you will probably want to save your results so that you can share or reuse them later. However, Lightroom 5 works differently than other programs. Instead of saving your results, you have to export them.
When you work on Lightroom 5, your work is saved within the application. In order to save it, you will have to export it as follows:
That is the basic interface and functionality of Lightroom 5. However, this article is just to get you started. There is so much more that you can do with Lightroom 5. It provides you a complete end-to-end platform to achieve all your post-processing goals easily. Learning this amazing program will help you in more ways than you can imagine.


