


In today’s competitive real estate market, static photos are no longer enough. Buyers expect dynamic, engaging content that brings properties to life. Enter Reptov, a powerful new platform that transforms ordinary listing photos into professional marke ...


As an Amazon Associate we earn from qualifying purchases.
The most prominent feature that makes Photoshop unique and more effective than other applications is its layering feature. Each image opens up in a different layer, which is often locked for protection. You have to unlock the layer to work on it. Here I will learn multiple ways of how to unlock a layer in Photoshop.
Quick Navigation
Whenever you load an image in photoshop, it opens up in the background layer. This layer is always locked initially because of safety reasons. It keeps you from making any accidental alterations to the original image and keeps your picture protected at all times so that you can go back to it whenever you want.
Besides the background layer, you can also lock any other layers if you want. However, you would have to unlock it in order to be able to edit the image within that respective layer. Here, I will elaborate on a number of different methods through which you can easily unlock any layer.

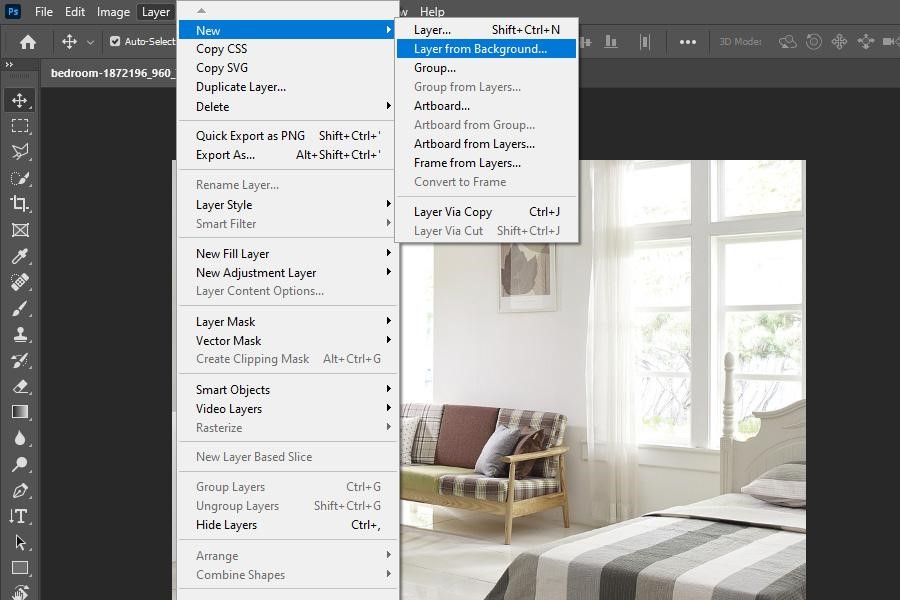
This technique of unlocking the layer is fairly simple and easy to do. It creates a new unlocked layer to replace the locked background layer.
This technique can help you unlock the layer with just a couple of clicks. Here, I will discuss three ways through which you can unlock the layer directly from the layers panel. However, before going to those methods, make sure that your layers panel is visible in the bottom right corner of your photoshop interface.
In case you are unable to find the layers panel, then follow these steps:
Once your Layers panel is visible, you can use any of the following methods to unlock your layer from there.
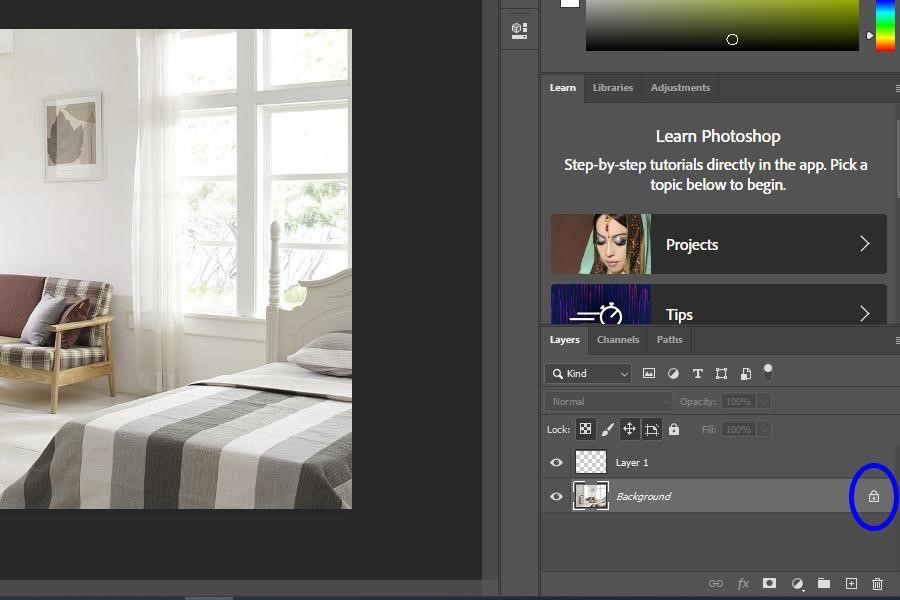
The locked state of a layer is represented by a lock icon beside the name of the layer. To unlock it, you simply have to click on the lock icon. This will make the lock icon disappear, enabling you to make any changes you want on the content within the layer.
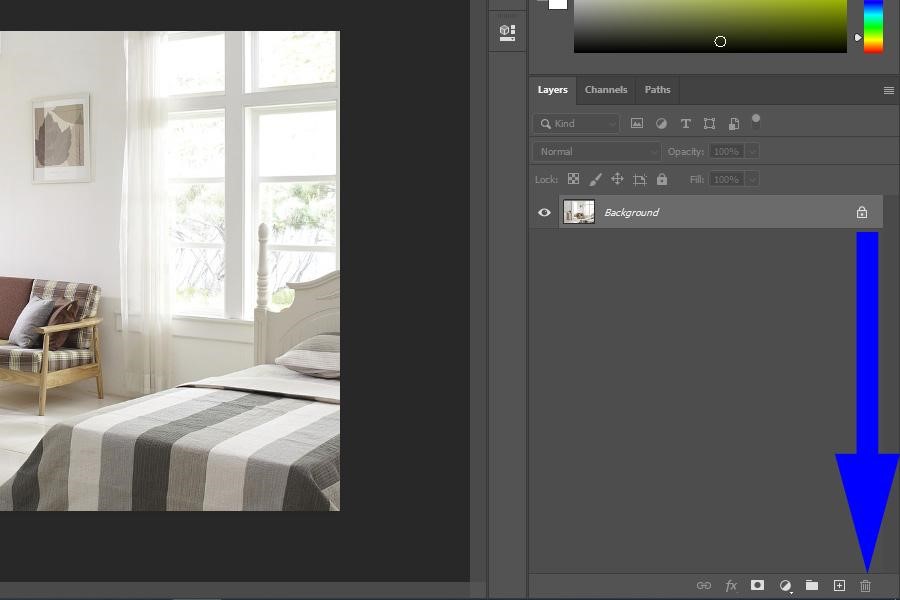
You now know that the lock icon beside a layer shows that it is locked. To unlock a layer means to remove that lock icon. Another way to remove that lock icon is to drop it into the trash can present at the bottom of your layers panel.
To do this, click on and hold your mouse button down on the lock icon beside the locked layer. While pressing down on the mouse button, drag the lock icon down to the trash can icon. This will remove the lock icon, and your layer would be unlocked so that you can edit your image freely.
You can see the layers panel menu is at the top of your layers. Make sure that the layer you want to unlock is selected, go to the lock menu within the layers panel, and click on the lock icon. You can also unlock the layer partially by only selecting the attributes you want to unlock.

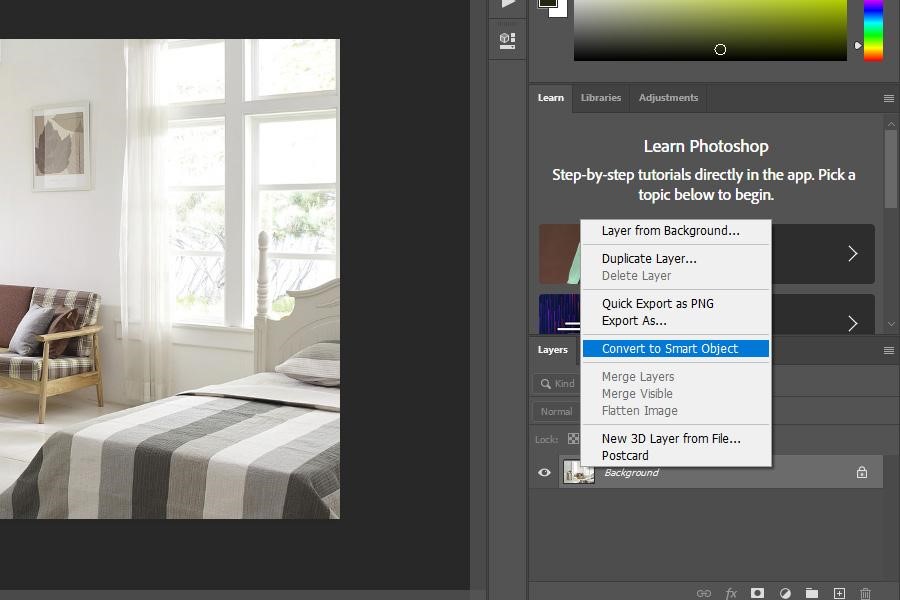
Another method of unlocking a layer in Photoshop is by converting it into a smart object. When your layer turns into a smart object, it gives you a much better layer control. To do this, follow the steps below:
All of the methods explained above do unlock the layer, but they all make changes to your original image. As a result, your original image is not retained, and you are unable to go back in case you want to. Thankfully, Photoshop also provides unlocking methods where your original image remains unaffected.

One way of keeping your original image intact in the background layer is by duplicating it. Here is what you need to do:

Locked layers may seem frustrating at first, but they ensure that your images remain well protected against unwanted changes. Also, you can unlock the layers quite easily and quickly by following any of the simple methods explained above. Just follow a few steps to unlock layers and continue your editing without any hassle.


