


Congratulations Dave Koch, September 2025 PFRE Photographer of the Month! The theme this month was "Stairwell". Dave Koch - Entry 1099 Alyssa Huang - Entry 1095 Paul-Dan Dragoman - Entry 1098


As an Amazon Associate we earn from qualifying purchases.
To save time and to streamline the editing process, Lightroom allows us to select multiple photos concurrently. Learning how to select multiple photos in Lightroom will speed up the process of comparing them, choose the best shot among them, or even apply the same Develop settings to a series of images.
Quick Navigation
You can select many photos at a time in Lightroom using three modules. The Library module, Develop module, and also the Map module.
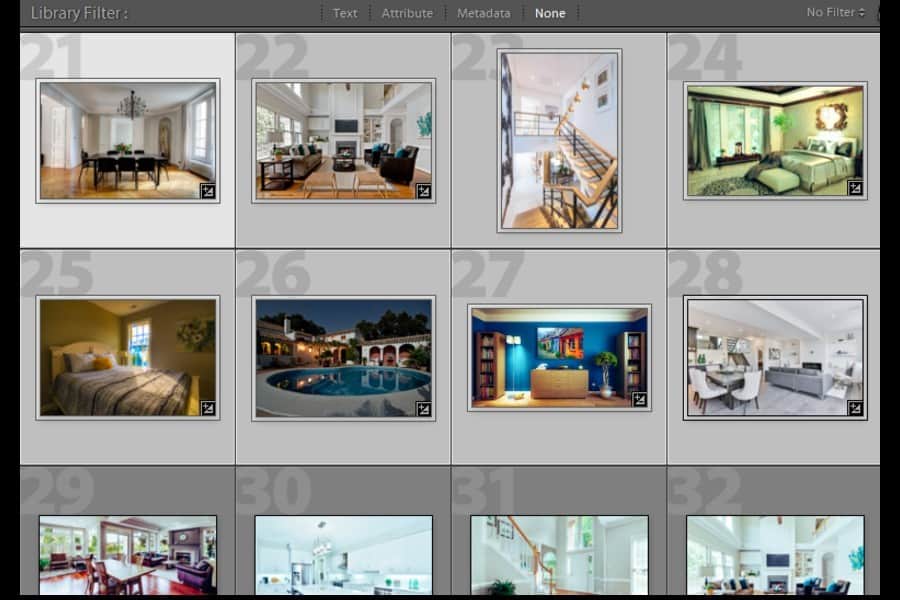
Once in the Library module, you have two photo viewing options. The Loupe view is where you get a full view of the selected photo. Whereas the Grid View lets you view the image thumbnails in a tiled arrangement.

The Grid view provides the best way to view and select multiple photos. Note that the Grid View is not available in any other modules besides Library in Lightroom.
To carry out the comparison of photos, importing, or exporting them, you need to be in the Library Module where the grid view is available.
You can sync metadata or add keywords to many photos via multiple selections in the Grid View. Suppose you have digitized old photos from family albums, and you want to add keywords to all of them for organizing purposes. It will be very easy to do it on the Grid View in Lightroom.
Let’s get down to the basics of multiple selections of photos in the Grid View. To see the grid view, either press G on your keyboard or go to View > Grid. You can increase the size of the thumbnails by pressing + and decrease it by pressing -.
Selecting sequenced photos in the grid view of the Library is very simple.
In some instances, selecting photos in a sequence is not what we want. We want to select multiple photos that are not placed side by side. For this, you will have to:
If you want to select all images in the Library for a specific purpose, hold the CMD+A together on a Mac or CTRL+A on windows. This will select all of your photos.
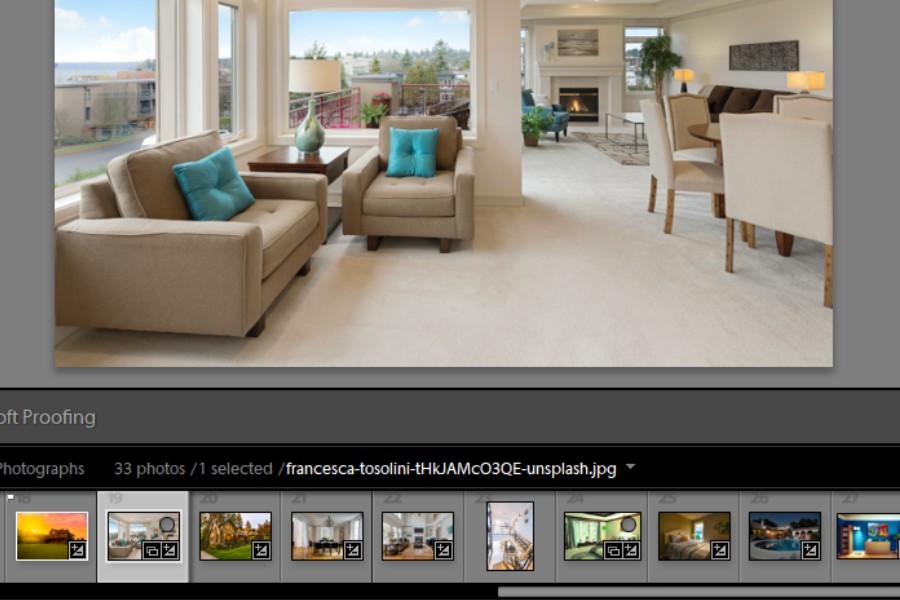
Whenever you select many photos at once, you will notice that one of them will appear brighter than the rest.

This is the active photo. If your purpose of multi-select is to apply the settings like metadata or develop options to all the images, the active image source will be used to apply on the rest.
It's up to you to select the active image from the entire selection.

As stated earlier, the multi-select option is a handy tool in the Develop module as well. Within minutes, you can apply the same effects on all the selected photos, saving a lot of time.
If you have taken a lot of time and effort in editing a photo in the Develop module, you can select other photos from the filmstrip below and apply the same editing effects on all of them. Plus, you can apply a preset to multiple photos in this module.
I don't have the facility of the grid view here in the Develop module. However, the film strip view, right below the working area in Lightroom, is there to help me. It shows the thumbnails of the images from where you can select multiple photos.
The selection method used in the filmstrip view is then the same as the grid view.
According to a survey, metadata from geotagged photos is helpful to provide meaningful insights about a place. In the Map module, the process of finding images with the same geo-location is eased with multiple selections.
In the Map module, your photos are stored with a geolocation tag. For selecting multiple photos having the same geotag, simply click on the desired location marker on the Map. Multiple photos from that tag will be selected.
When you are in the Library module, you will see the import button on the bottom left of your window.

Thanks to the option of selecting numerous images at a time, exporting them from Lightroom is easier than ever.

Multiple Selection in Lightroom differs slightly from a usual file browser. Although most of the multi-selection keyboard shortcuts are the same in Lightroom as on any finder window on Mac or explorer window on PC. However, you cannot click and drag your cursor around many images to select them as I do on the computer.
You might need to invert the multi-select in Lightroom to choose the photos you did not select instead. With all the photos selected that you want, you can go to the Edit tab and click on Invert Selection. This will select the non selected photos and deselect the chosen ones.
You can deselect all the photos that you have selected by pressing a combination of CTRL+D on your PC and CMD+D on Mac.
Mastering these basic Lightroom skills like the multi-select option will tremendously help you speed up your post-production work. With all the keyboard shortcuts and methods that I have described to you, you will be able to perform a similar function to a large number of photos at once, saving a lot of time and effort.


