


In today’s competitive real estate market, static photos are no longer enough. Buyers expect dynamic, engaging content that brings properties to life. Enter Reptov, a powerful new platform that transforms ordinary listing photos into professional marke ...


As an Amazon Associate we earn from qualifying purchases.
Combining multiple photos is a valuable skill for real estate photographers. Even though most want to get the photo right directly in the camera, there are specific scenarios where merging the pictures is proven valuable and necessary. Also, the image that you have in your mind is not always possible to create, especially when your subject is real estate. By merging the photos, you can bring your vision to life.
You can merge real estate images in different ways. The best method is the one that works well for you. There are also ways to automate photo merging in Photoshop so you can have more options and control.
Quick Navigation
To merge photos in Photoshop, you first must select two images you want to combine. They need to have the same focal length and ensure that the lighting in both images is the same. Also, make sure that the two images have the exact resolution.

Below is the step-by-step guide on how to merge the two pictures in Photoshop.
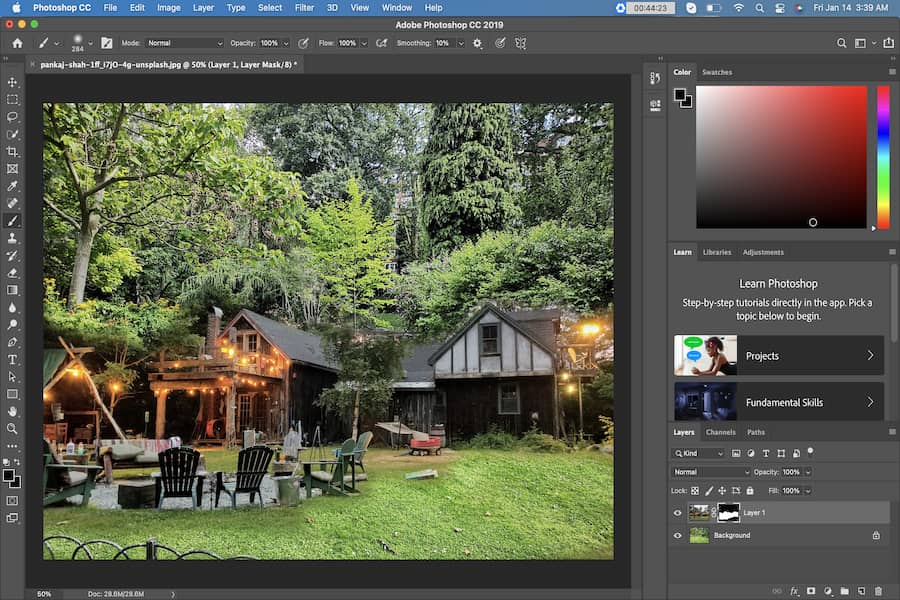
First, open the two images. If the main subject is a different size in each image, open the image where the subject is the smallest. This way, you can resize the second photo instead of upscaling it.
On the upper right side of the screen, click on the padlock icon so you can open the Layers Menu and unlock the background layer.

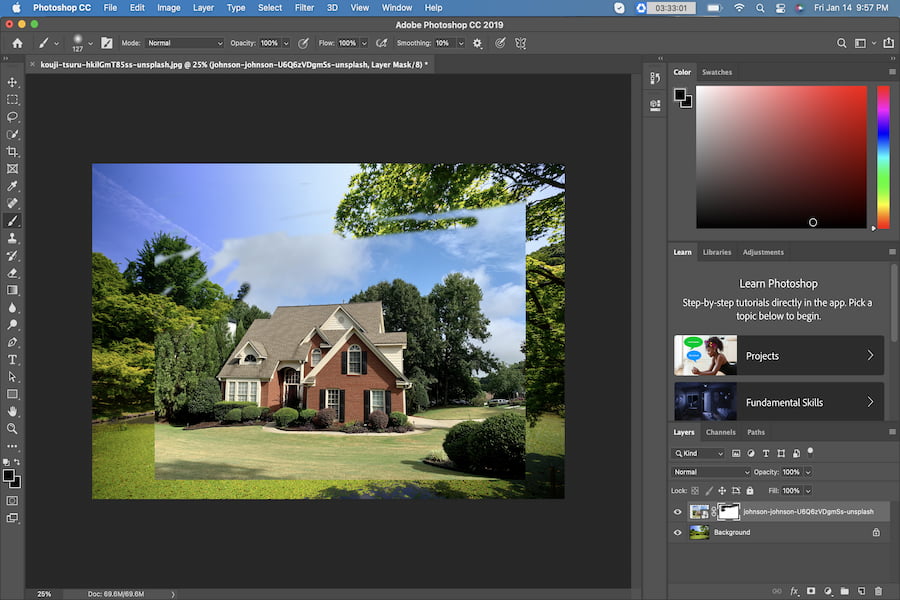
Choose the second picture from the computer's filing system and drag it on top of the first one to align them. There will be an "X" on the picture, and you will see a box with handles around the edges. It is better to resize the image.
Next, bring the second picture into Photoshop and include it as a Smart Object. This can help you resize the image better. Make sure you do not enlarge either of the images you are merging more than 30%. If you do, the overall clarity of the image will be different.

Set the top layer blend mode into Overlay so you can view the layer below. You can position the subject in the two images to match them correctly. Choose Edit, then select Free Transform from the drop-down menu. You can also do the following commands:
Using the Move tool, position the top picture so that the parts of the top layer you want to keep will look good. You will also need to resize the handles to enlarge or rotate the layer so the two match correctly.
If your subject moves just a little, you will find it challenging to match the two subjects. Once satisfied with the result, you can have the top layer positioned by pressing Enter. Make sure the blend mode of the top layer is on Normal mode.

After selecting the top layer, choose the Add Vector Mask icon at the bottom of the panel to add a layer mask. This will create a mask that you can use to remove the parts of the top image that you do not want to be there.
Choose the Brush tool and make sure that the color is set to black and the opacity is 100%. Start painting over the areas that you want to remove. If you make a mistake, switch the brush color to white and paint over the same area.

Make sure you start at the areas that are far from the place you want to keep and slowly move in. As you get closer, you will need to make the brush size of the eraser tool smaller and the opacity reduced. This can help the transition and smoothen the area that you are removing.
To help you see if there are more areas you need to work on, switch the layer visibility on and off several times in the Layers panel. Create a new layer, or use a separate layer between the existing layers. Fill it with a color that does not appear in the images you are working with, so you will see the parts that are not erased properly.
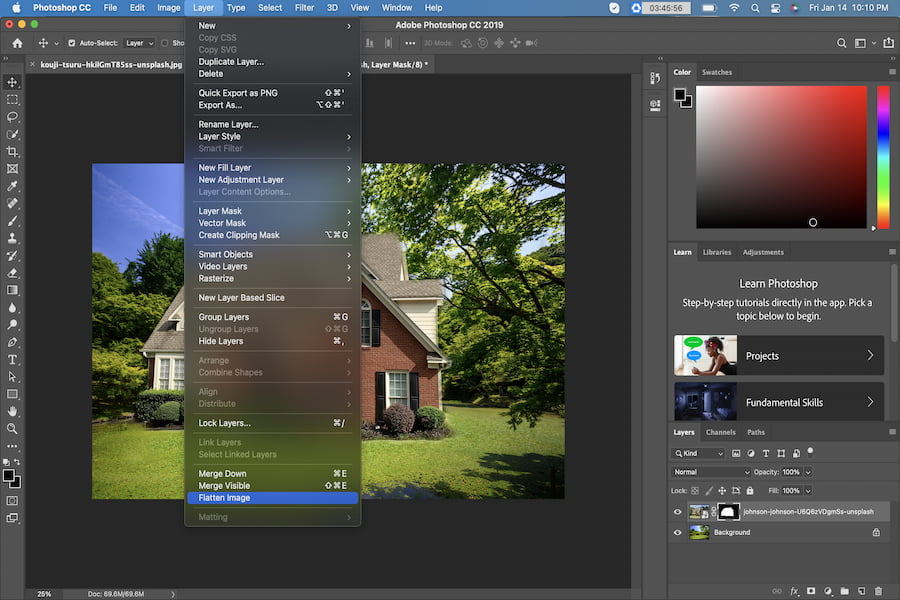
To ensure that both layers have the same tone value, you need to lighten or darken the top layer via the burn tools. If you created an intermediary color layer, you need to remove it. Now merge the two layers by selecting Flatten Image, and you will get a single merged image.
Merging several images in Photoshop is easy, and there are several methods that you can use to do it successfully. You can mix two or more methods to create something extraordinary. Learning how to combine images using Photoshop is a basic skill real estate photographers need to know about.
The steeper learning curve begins when you need to create eye-catching effects from the mix of photos. Photoshop is very powerful software, and there are many ways to edit images using it. You can begin with the most straightforward methods to combine images in under five minutes.
Most of the time, a real estate photo shoot can be enhanced by merging different images. This can make it easier for your clients to view the area as they can see what they look like side by side.
When merging from the same location, the lighting and the shooting settings are the same. If you wish to merge pictures taken from different locations, you must pair and blend the elements. You can burn edges so you can successfully blend them.

You can take the lasso tool that is available in Photoshop and draw around the subject if you want to add the base image to. You can also use the selection tool, or you can use the quick selection tool as well. If the colors and tones of the images are similar, you can use the lasso tool to choose the part of the picture you need.
Next, you need to paste the image into the area that belongs to the other image. You can do so by using the following:
You can also lower the opacity to see where the subject needs to be positioned. Once you are done, you can increase the opacity of the images again.
Adding a brand new background to your images is the most common use of the merging option in Photoshop. Changing the background on real estate images can change their overall feel and can add a certain aesthetic to them. The same steps apply to this merging as with the ones listed above.
If you are working with fur from the animals included in your real estate photo, or if you happen to capture the hair of someone, a tip is to pick backgrounds whose dark and light areas match the original background of the image. This will allow you not to go through the fine details, and you can leave them as is.
For example, if you had added a new background element where it matched the dark parts of the picture, it would allow you not to have to choose the fine fur details. This is very helpful, especially if you wish to include them in your images. Some real estate photographers capture images of pets around the house to show clients with pets that the house can cater to the needs of their furry friends.

If you are into real estate
You can take multiple photos of the real estate, from rooms to outdoors, and combine them through Photoshop's Photomerge feature. It is one of the tools that can stitch the images for you so you can squeeze in as many views of the property as you can, and it also makes for better viewing.
Real estate
With Photoshop's merge tool, you can let the clients see rooms and other areas without having to go through the pictures individually. You can merge images realistically that is basically taken in the same area, so there is no redundancy.


