


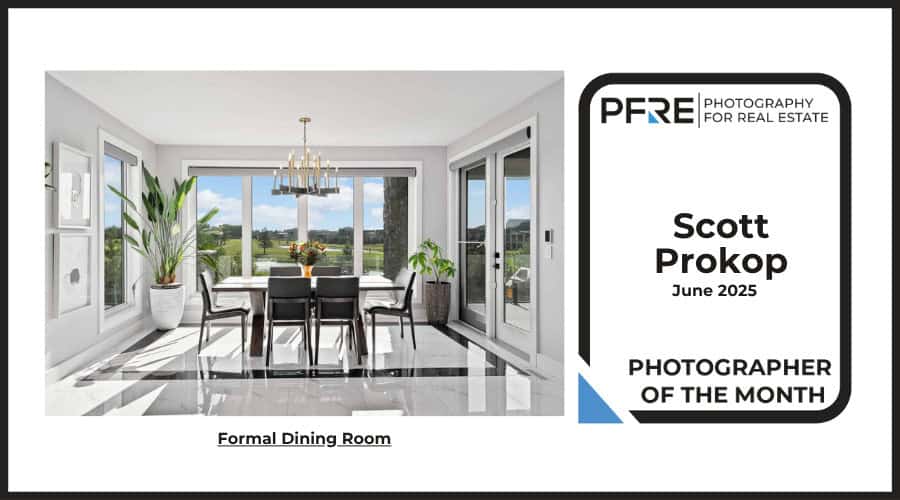
Congratulations Dave Koch, September 2025 PFRE Photographer of the Month! The theme this month was "Stairwell". Dave Koch - Entry 1099 Alyssa Huang - Entry 1095 Paul-Dan Dragoman - Entry 1098


As an Amazon Associate we earn from qualifying purchases.
While photographing for real estate, we often feel the need to get a 360-degree view. This is especially useful in interior
Quick Navigation
Knowing how to stitch photos is a great way to show the entire view of a property in a single image. The option to shoot a panoramic photo is available in digital cameras and even mobile phones these days. But a significantly better quality can be achieved using Lightroom Classic CC.
Adobe Photoshop Lightroom allows you to stitch various photos using the Merge option. You can create panoramas and HDR panoramas (for exposure bracketing) using this feature. What’s even better is that the editing process is extremely straightforward.

The panoramas created by Adobe Lightroom CC are in the RAW/DNG format, allowing you to edit them like you would edit any other image in Lightroom. Moreover, the resolution of the panorama is much higher, so that you can use it for bigger displays.
It’s advisable to use professional cameras as they have larger sensors than smartphones, which allows them to capture sharper images with better color reproduction. Use a tripod and set the camera's configurations to panoramic to maximize the merging quality.
Set the camera to manual mode so you can have complete control over shutter speed, ISO aperture and white balance. This helps ensure that the brightness and the colors of your images are consistent across the board.
Keep the focus distance consistent as it helps ensure the subject of your photos is in focus in all your images. Overlap your photos by at least one-third to assist the stitching software align the photos more easily. It is also advisable to ensure you capture your images vertically for seamless stitching.
Upload your images to Adobe Lightroom CC by inserting the camera's Memory card to your laptop or directly connecting your camera to your computer. Open Lightroom and click the Import button in the lower-left corner of the interface.
In the Import window, select the camera or card reader from the Source list and then specify how you want Lightroom to add the photos in the catalog. Highlight all the pictures you captured and then click on Import. This imports the selected photos to your catalog and adds them to the Library module.
The photos you uploaded will now be shown as thumbnails in your Lightroom catalog’s grid view. Highlight the thumbnails of the photos you want to stitch. If the photographs are in different file types other than RAW, develop them first.
It's advisable to keep the settings the same in all the photos so the photos remain consistent for seamless stitching. You can adjust the lens correction settings under the Lens Corrections Section using the following steps:
Sync these settings across all the pictures in your Lightroom catalog. Doing this will correct any common lens aberrations and vignettes in the photos.
Avoid making detailed adjustments to your pictures before stitching them because the adjustments won't appear on the final merge. However, the exposure settings of the resulting stitched panorama will appear pieced together.

Merging photos is the step where you will visually see your panoramas, as the resulting photos will feature more of a scene compared to the single photos. Simply use the following steps to merge the photos in Lightroom:

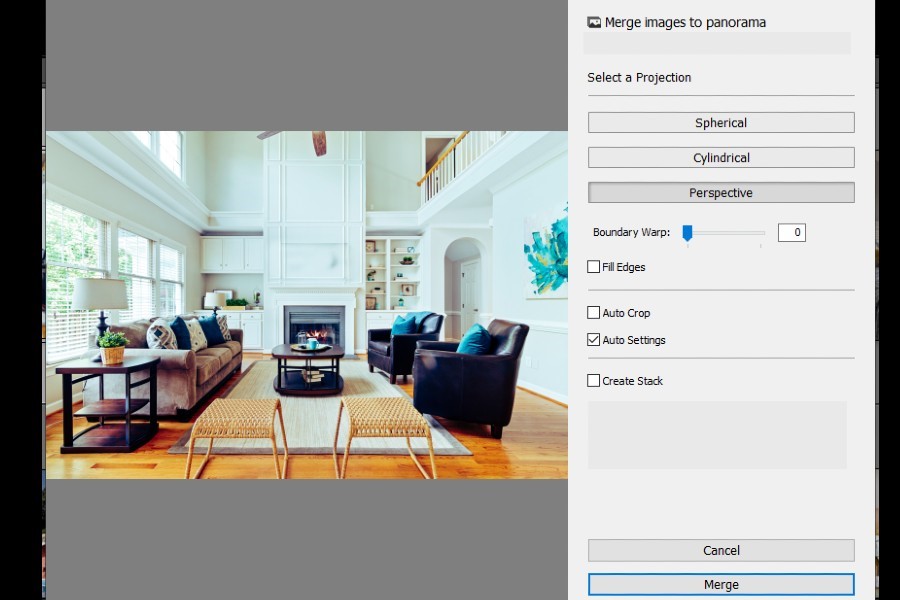
The projection of the panorama determines how to handle the photos and any distortion. Adobe Lightroom does a satisfactory job at choosing the projection for your panorama automatically so that you can check the Auto Select Projection. Otherwise, there are three ways you can choose to project the panoramic photo.
The spherical projection is the default projection for panoramas in Lightroom. It shows the photos as if they are exhibited on the inner side of a sphere. This projection is perfect for wide 360 degree panoramas and results in a photo that doesn’t seem unnaturally stretched.
This projection is ideal when you are looking to keep the vertical lines straight. It projects the photos as if they were laid out on the outer side of a cylinder. Cylindrical projection is not recommended for landscape photos as it can cause distortions especially at the edges.
The perspective projection uses the middle picture perspective to lay out the panorama. Usually, it creates a bow-tie like effect, emphasizing the middle of the final picture. It is ideal for architectural panoramas and not too wide photos.
However, it can sometimes stretch the photos towards the edges, and so you need to be careful while choosing it for pictures with short focal lengths.
It is advisable to check the Auto Crop option in Lightroom as it helps in getting rid of any white spaces that were created around the edges of the panorama. This in turn saves you time that you would put in to crop the stitched panoramic photo manually while making your photos visually appealing.
The Boundary Warp setting helps to give finishing touches to the panorama’s boundary, making your pictures more realistic and immersive. It also helps reduce the distortion that can occur when you stitch multiple images together to create a panorama.
You can adjust the slider between 1-100 to check which level works best for the particular panorama that you are creating.
If you choose to Fill Edges, Lightroom will automatically fill in the edges in the panorama that may be missing or distorted. Like cloning in Photoshop, Lightroom automatically fills in the missing or distorted areas by copying pixels from other areas of the photo and pasting them into the missing or distorted areas.
After choosing your favorite panorama option, it’s now time to hit the Merge button. Lightroom will take some time to create your panorama. Once it is created, you can see it in your catalog besides the source photos.
After creating your panoramic photo, you can now make the adjustment you want in the final image, such as adjusting brightness, saturation and applying filters. Usually, these adjustments are consistent across the panoramic image.
Note that the stitched Lightroom image will still be in a DNG or RAW format, which are the best formats when making edits and adjustments. However, you can export the photo in a compressed dormant such as JPEG for sharing.
Besides knowing how to stitch photos to create panoramas, Lightroom Classic CC also gives an option to generate HDR for exposure bracketing.
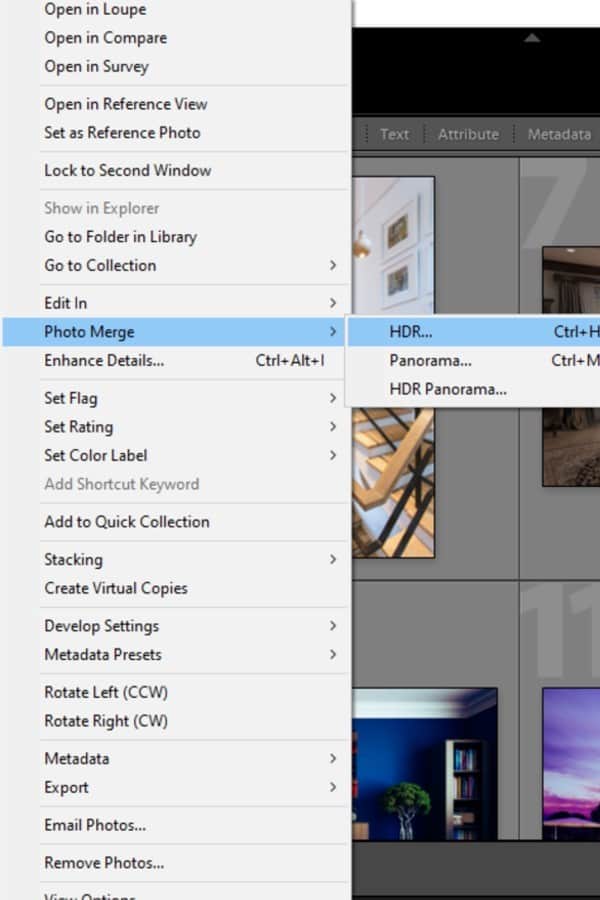
Remember that the images you select for HDR must have the Exposure metadata in them. All of them must have different exposure values.
Although Lightroom's panorama stitching feature is good for creating basic panoramas, it does not offer as much editing control. For instance, you can use Lightroom panorama stitching in the following situations.
Lightroom is a popular photo editing software program that allows you to import, edit, and export photos in a variety of file formats. Although the file formats Lightroom can import and export depend on the version you are using, Adobe Lightroom CC generally supports the following file formats.
Note that RAW files are not yet processed, so their file extension depends on the camera manufacturer. For instance, .NEF is a RAW file for Nikon, .CR2 for Canon, and .ARW for Sony
RAW files produce the ideal result in panoramas as they provide complete information to Lightroom about the lens profile. The panorama in Lightroom created with RAW images is much more detailed, plus Lightroom offers a lot more editing versatility with it. Besides RAW, Lightroom can stitch photos in JPEG, DNG, TIFF, PNG, and PSD formats.
The Merge panorama option is available in Lightroom Classic CC’s version 6 and above. Hence, it is advisable to update your software to the latest version in order to use this feature.
If you receive an error that Lightroom is unable to merge your panorama in Lightroom photos, it means that the individual photos you have selected don’t have overlapping details or have mismatched perspectives. Another issue may be that your images differ in sizes or focal lengths.
You can edit panoramas in Lightroom. Like any other process in Lightroom, Merge is also a non-destructive editing process. It saves the panorama in RAW or DNG format, giving you complete access to edit it in the Develop module. Avoid editing individual images before you stitch them to avoid messing up the exposure in the final result.
Lightroom offers a user-friendly way to do so with its intuitive Merge option when it comes to stitching photos. All you need is a basic understanding of the image requirements for merging them via the software. We hope that the above tutorial will be helpful for you to create exceptional panoramas with your real estate photos.


