


In today’s competitive real estate market, static photos are no longer enough. Buyers expect dynamic, engaging content that brings properties to life. Enter Reptov, a powerful new platform that transforms ordinary listing photos into professional marke ...


As an Amazon Associate we earn from qualifying purchases.
Each element that you add to a document is a separate layer, which is why layers are considered the building blocks in Photoshop. Learning to use and manipulate layers equips you with a better level of creativity. One of the most useful things you can learn how to bring layers to the front in Photoshop for added design capability.
Quick Navigation
Photoshop's workflow is all about reversible and non-destructive editing, often involving the management of several design elements simultaneously. Each document consists of Layers, the word Photoshop uses for elements that make up an edited photo or graphic. I often need to rearrange the position of these objects while working with complex edits requiring multiple layers and masks.
In the layers panel of Photoshop, all the objects are listed as layers. An element that is higher in the list will be in front of the element that is lower in the list on the panel. This type of arrangement of layers is known as the stacking order, which you can shuffle as per the design requirements.

The stacking order of layers determines which object will be viewed on the front and which one will stay behind the others. In order to make certain parts appear in front of the image, you can change the stacking order by easily bringing those layers to the front.
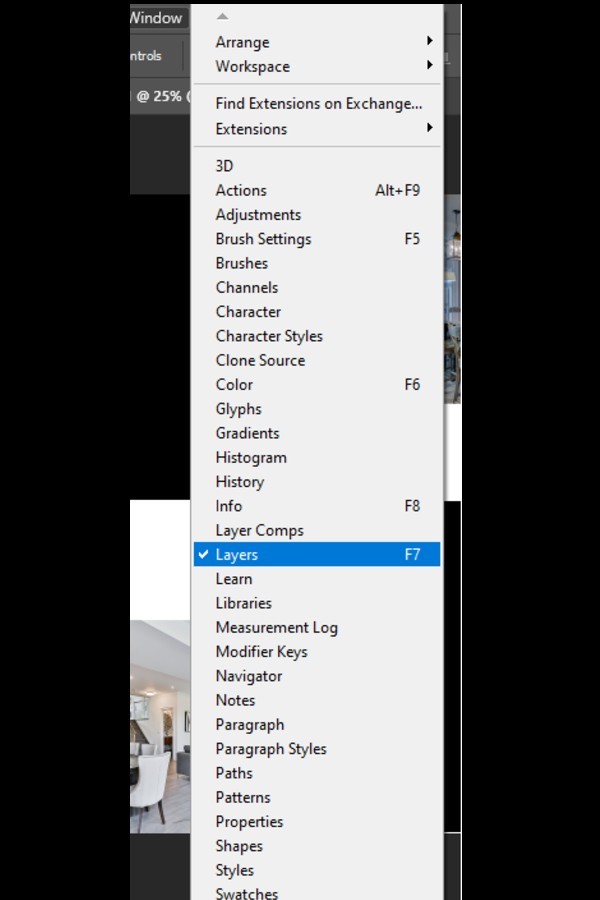
In Photoshop, all the panels can be enabled or disabled from the Window menu on top of the screen. The Layers panel might be hidden, or you may have closed it earlier. If you want to open the Layers panel, go to the Windows menu to view it.
In the Windows menu, you will find the layers option among the list of panels. Any option with a checkmark beside it means that the panel is open and active on the Photoshop interface. If the Layers panel doesn’t have a checkmark beside it, click on it. Or, you can press F7 to view the panel.
Next, you can open a document that has multiple layers which need to be rearranged. To do so, go to File, and select Open. Choose the file from the destination folder, and it will open in Photoshop.
You can also create a new document from scratch with multiple layers in it. Any image, shape, custom shape, or text that you add will be a separate layer, listed in the Layers panel. The stacking order shows the most recently added layer on top, technically the front-most layer.
All the layers in your document are termed normal layers, except for the first layer that you opened, which is known as the background layer. By default, the background layer is locked, which means that you can’t apply the functions on it as you can on normal layers.
There are three ways to bring a normal layer to the front.
Select a layer that you wish to bring forward. If you are a Windows user, press CTRL + ] to move the layer up or CTRL + [ to move it down in the panel. To move a layer jump on the top of the stack, use the keys CTRL + SHIFT + ], or CTRL + SHIFT + [ if you need to move it to the bottom of the stack.
On Mac, the keyboard shortcut Command + ] will bring the selected layer up, or Command + [ will move it down. Similarly, pressing Command + SHIFT + ] will move the selected layer on the top of the layer stack, while Command + SHIFT + [ will bring it to the bottom.
The easiest, quickest way to change the order of layers is to drag a specific layer and drop it on the desired position. When you drag a layer, a hand icon will appear to help you determine the right dropping position. Release the mouse button when a line that is highlighted appears on the desired layer position.

You can also move Layer groups in the same way as you move individual layers using the drag and drop option.

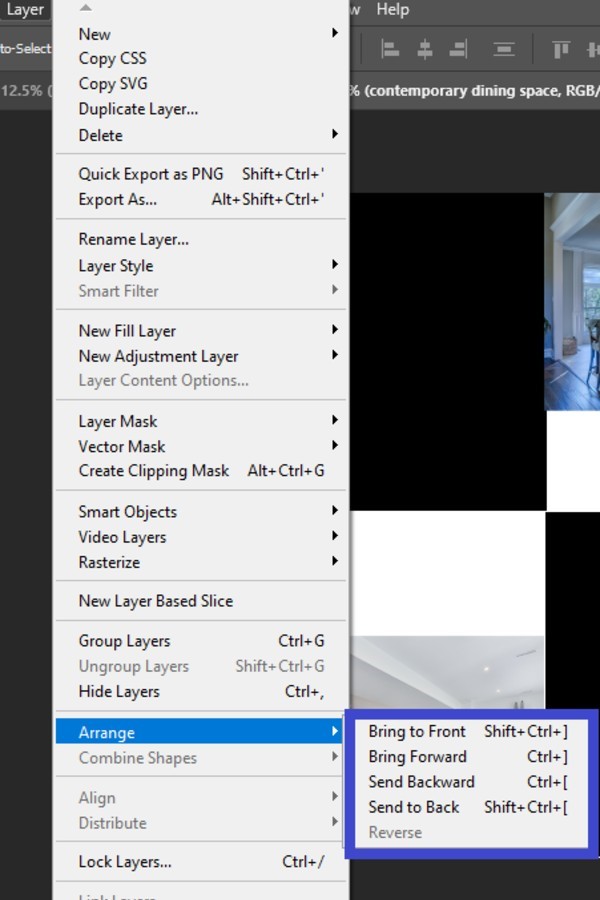
Another way to rearrange the layer panel order for design flexibility is by using the Layers menu on top. Select the layer in the layers panel and go to the Layers panel. In the submenu of Arrange, you will find the following options:
As mentioned earlier, the bottom layer, also known as the Background layer, cannot be moved as it is locked by default. Any layer that you add after it will be on top of the background layer. Unless you convert it to a normal layer, moving it to the top to bring it to the front is not possible.
If you try to move the contents of the background layer, a dialog box will pop, warning you that this is the background layer and it cannot be moved unless you convert it into a normal layer. Or, if you try to bring another layer below it, you will see a prohibited sign which means that this function is not allowed for the background layer.
In Photoshop, converting a background layer to a normal layer is very easy. Just beside its name in the layers panel, you will find a lock icon. Simply click on it to convert the background layer into a normal layer. It will be named Layer 0 instead of Background.
Another way to do so is to click on the option “Convert into normal layer” when the dialog box appears while you are moving the background layer.

If you have no prior experience working with layers and layer groups, you may face an issue while predicting whether your layer will drop into a layer group or outside it. The right way to drag and drop a layer without adding it into a group is to place your cursor below the baseline of the layer group and then release the mouse button.
You can also close the layer group before bringing another layer to the front of it.
The ability to move layers in Photoshop provides added functionality to create amazing visuals. You can bring any layer to the front or send it back to achieve the design that you conceived in your mind. I hope that our tutorial will clarify the process of bringing layers to the front in Photoshop or you.


