As an Amazon Associate we earn from qualifying purchases.
Straightening images, also known as correcting perspectives, is done to give them a balance. Straight photos are much more pleasing to the eye, unlike crooked images, which feel disturbing when I look at them. To avoid lessening the appeal of your images, learn how to straighten photos in Photoshop using multiple methods.
How to Straighten Photos in Photoshop Using Four Techniques
Straightening an image requires aligning its vertical and horizontal lines correctly. This results in a professional looking photo. There are multiple tools and features in Photoshop to help you achieve a straighter image.
Unlike other image editors, using Photoshop to straighten photos gives you higher control over your images. It also helps you achieve a balance while avoiding unnecessary cropping. Especially with the Content Aware feature, you can preserve maximum details in your photos.
When I talk about real estate photography, achieving a perfectly aligned photo is very important to show compelling visuals of the exterior and interior views of a property. Mostly, real estate photographers shoot with a wide-angle lens. This results in barrelling or lens distortion, which can be rectified easily during post-production in Photoshop.
Straighten Photos Using Auto Transform in Camera Raw Filters
The first method that will straighten your image in the least amount of time is through the Transform option in Camera Raw Filter.
Image Opening and Duplication
- Open the distorted image in Adobe Photoshop CC through File > Open.
- If you want to preserve the background layer, make a duplicate layer of it by selecting the layer in the layer panel, and press CTRL + J on Windows or CMD + J on Mac.
- If you are not worried about destructive editing, just unlock the background layer by clicking on the padlock icon.
Select Transform Option From Camera Raw Filters
- Go to the Filter menu and select the option Camera Raw Filters.
- This command opens up a feature-packed window. Select the Transform tool from it (present on the top left).
Use Auto Option to Straighten Perspectives
- After you select the transform tool, click on the auto button (A).
- The auto feature of the tool will analyze the vertical and horizontal lines and straighten the image in a few seconds. The option will work on most photos with a slight distortion.
However, if your image was shot with an extra wide angle, the chances are that you may have to resort to any of the following techniques to make your photos straight.
Straighten Photos Using the Crop Tool
In Photoshop, the crop tool does way more than getting rid of unnecessary parts in a photo. When I are looking to get the vertical and horizontal perspectives right, the crop tool will do that very efficiently, and that too without losing essential details.
Import the Image and Activate the Crop Tool
- Import your image that needs straightening in Photoshop.
- From the toolbar on the left, pick the crop tool. You can also launch the tool by pressing the C key.
Set the Crop Tool Options
- In the options bar for the Crop tool, firstly, ensure that the Delete Cropped Pixels box is unchecked. This will prevent the permanent deletion of the pixels, which end up not being a part of the straightened image.
- Check the Content Aware box to help Photoshop fill the areas that are created due to the excess canvas.
- Now click on the Straighten icon in the options bar.
Straighten the Image
- Drag a horizontal or vertical line on the area of the image, which should have been straight.
- As soon as you draw the line, Photoshop will automatically rotate the image using the line that you created as a guide. You now have a straight photo, but the process caused the creation of some excess areas which must be filled. Click on the checkmark above to commit the cropping action.
- If you chose to select the Content Aware earlier, Photoshop will now do its work to fill the extra areas with matching pixels surrounding it.
Straighten Photos Using Guides and Perspective
Let’s take a look at another method to straighten your image. The technique works perfectly for specific barreling lines or tilted areas that should be straight.
Open and Duplicate the Image
- After importing your image in Photoshop, assess it carefully for any crooked vertical or horizontal lines. Make sure you also look for bent lines that can be easily corrected.
- Unlock the background layer, or make a duplicate layer by pressing CTRL + J on Windows or CMD + J on Mac.
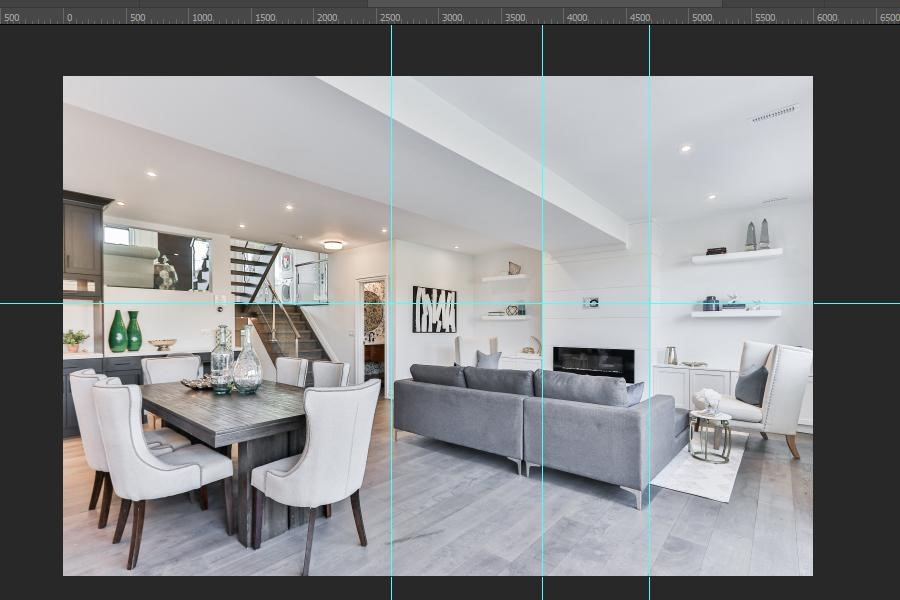
Drag a Few Guides Using the Ruler
- You now need some straight vertical or horizontal lines or a grid to be a guiding source for image straightening.
- Activate the Ruler tool by pressing CTRL + R on Windows or CMD + R on Mac. Two rulers, one vertical and one horizontal will appear in the document area.
- Drag a few vertical or horizontal guides from these rulers and place them near the crooked regions.
Transform Using Perspective Feature
- Now go to the Edit menu (Windows) or Photoshop menu (Mac), and click on Free Transform.
- Go to the Edit / Photoshop menu again. Hover on the Transform option, and select Perspective from the submenu.
- Make adjustments to align the image with the guides that you dragged earlier. This may leave some areas with a blank canvas.
- Go to the View menu, and select Clear Guides.
Fill Excess Areas Using Content Aware
- Select the excess areas that are created due to this process using the Polygonal Lasso tool.
- Launch the Fill dialog by pressing keyboard shortcut SHIFT + F5, or go to the Edit / Photoshop menu and click on Fill.
- Choose Content Aware from the Contents drop-down menu, and click on OK. The areas will be filled with matching content automatically.
Straighten Photos Using the Ruler Tool and Arbitrary Image Rotation Command
Here is another technique to straighten a photo using the Ruler tool. Unlike the method explained above, this one doesn’t involve manual adjustment. Open the distorted image in Adobe Photoshop CC.
Choose the Ruler Tool
- Grab the Ruler Tool from the toolbar on the left. It is hidden in the Eyedropper Tool Flyout.
- You will be using this tool to give a clue to Photoshop about a tilted area that should have been straight.
Drag a Line Which Should Be Straightened
- After carefully analyzing your image, draw a line with the ruler tool on an element that needs to be straight.
- This line will let Photoshop know the angle which is required to straighten the whole image. The angle that is measured can be seen on the options bar on top.
Choose Image Rotation-Arbitrary Feature
- Your work to guide Photoshop about the level of crookedness ends here.
- Now go up to the Image menu, and select the Image Rotation option.
- In the submenu of Image rotation, select Arbitrary.
- The Rotate Canvas Dialog opens, where you can see that Photoshop intuitively decides the angle and the type of rotation (Clockwise, Counter Clockwise).
- Click on OK.
Straightening the image is one of the most essential edits in real estate images. There are some additional methods described by Photoshop experts that can be used for image straightening. However, I have focused on the strongest ones to equip you with professional-level editing skills and make sure that the job is done accurately.
Conclusion
Some of my images are bound to turn a bit crooked. Thanks to Photoshop, you can easily rectify these in post production. The methods described above provide accurate image straightening without any guesswork involved. Once you start straightening your images and see how better they look, you will be using these features repeatedly during editing.