


In today’s competitive real estate market, static photos are no longer enough. Buyers expect dynamic, engaging content that brings properties to life. Enter Reptov, a powerful new platform that transforms ordinary listing photos into professional marke ...


As an Amazon Associate we earn from qualifying purchases.
One of the most trusted ways of transforming images is to use Look-Up Tables. They help you retouch your photos and change their entire look. In Photoshop, you can easily boost the quality of your images with this amazing feature. So, let’s learn how to use LUTS in Photoshop to create stunning pictures.
Quick Navigation
Photoshop comes with various LUTS loaded into its system. Moreover, besides these preset files, you can also add external LUTS files, or even create your own. This tutorial will explain different methods of using LUTS in Photoshop - default, external, and customized.
Before proceeding with the guideline on using them, you must know what LUTS is and how it can help you while using Photoshop. So, first, let’s understand the basics of a Look-Up Table, LUT, and why it is such a useful tool.

A Look-Up Table, also known as LUTS, is a color grading method for images, graphics, and videos. Even though it has been used in video editing for quite a long time, not many people know that it is a great technique for retouching images in Photoshop.
Basically, LUTS are instruction files. They tell how to map colors onto other colors in an image or video. With LUTS, you can easily apply a whole color grading process with just one click. Using this remarkable feature in Photoshop helps you create amazing colors in any image.
Now, let’s look at different types of LUTS that you can use in Photoshop. I will look at how to add each of these types to Photoshop, and then how to use them.
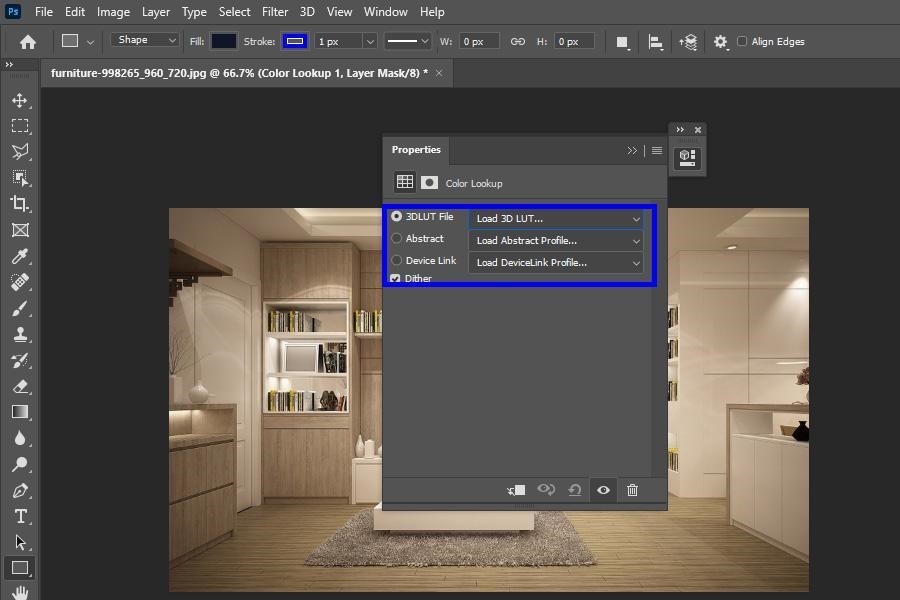
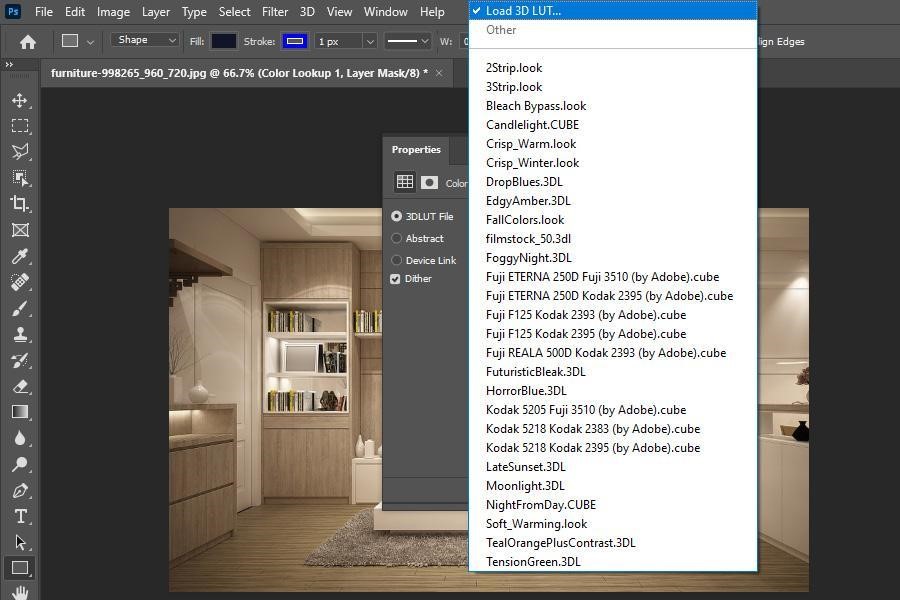
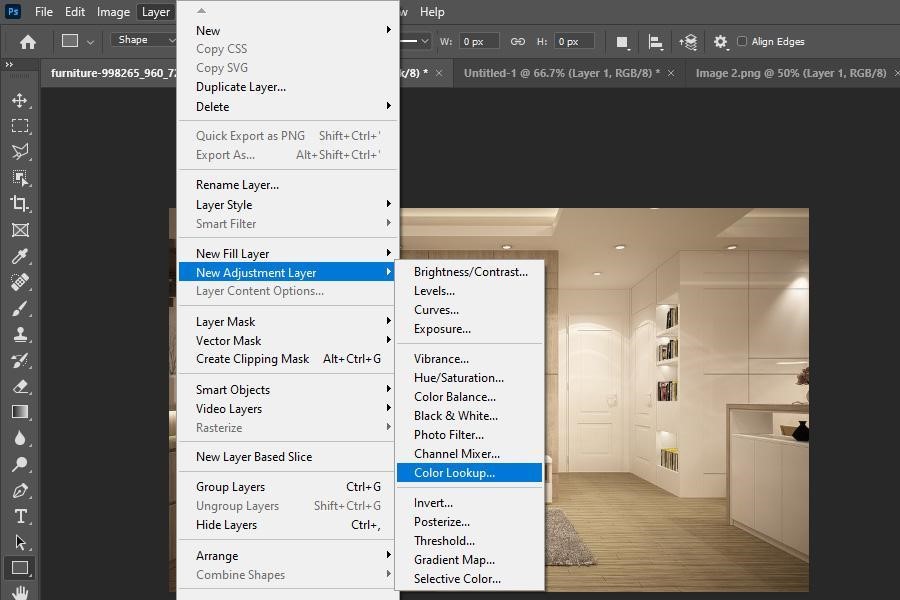
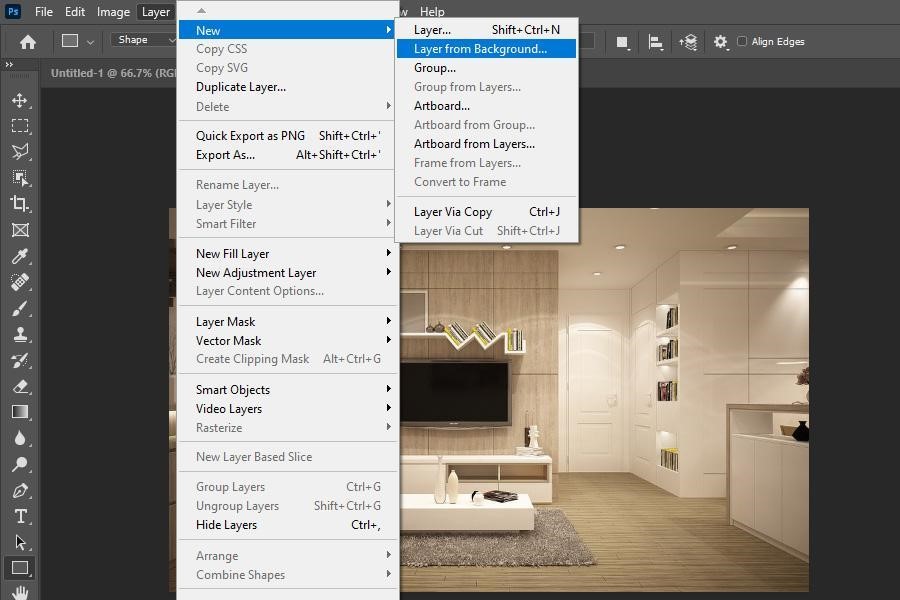
Photoshop comes loaded with several remarkable default LUTS. To use them on your image, follow the steps below:
5. By default, you will find just under 30 predefined LUTS over here.
Although you will find various great default LUTS in Photoshop, there is also a huge variety of LUTS available online. Photoshop also allows you to use these external LUTS on your image within Photoshop.
In order to use external LUTS in your Photoshop, the first thing to do is to get some external LUTS. You can easily find and download many free and paid options online. All you need to do is search the internet to look for the ones that meet your requirements.
Once you have access to LUTS, follow the steps below to add them to any specific project on Photoshop.
C:\Program Files\Adobe\Adobe Photoshop *version*\Presets\3DLUTS
If you are using Mac, you will find the LUTS folder at:

Applications/Adobe Photoshop *version*/Presets/3DLUTS'
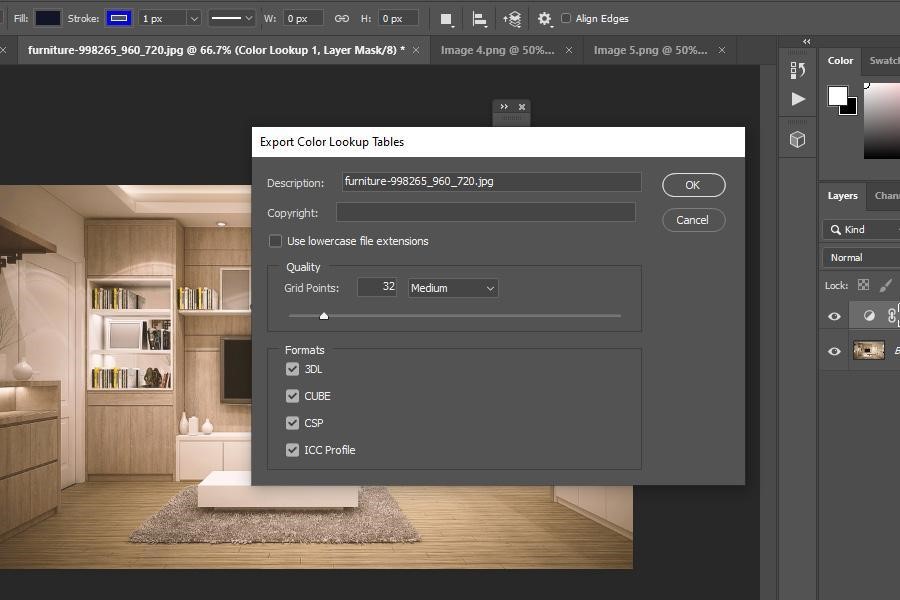
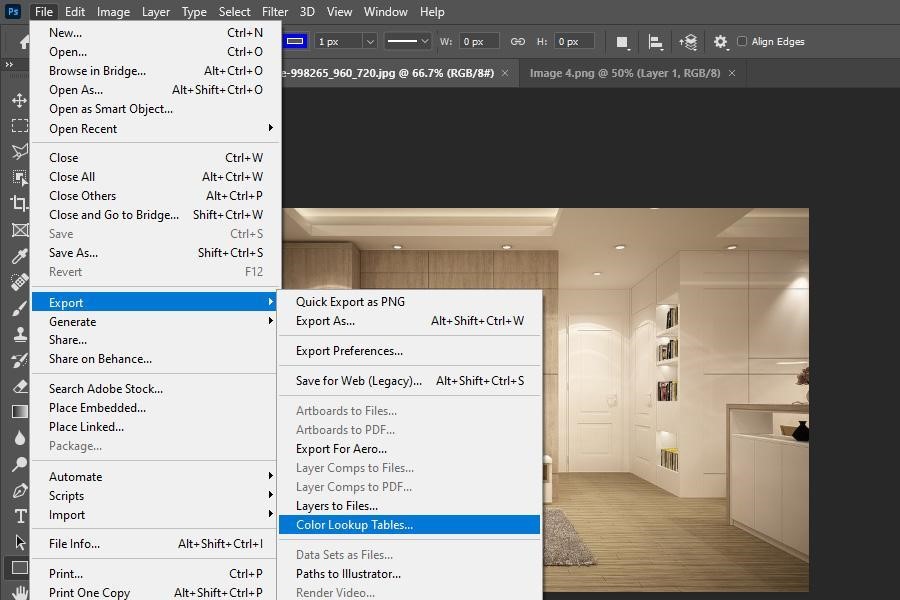
Photoshop does provide various options of LUTS, allowing you to create highly impressive and unique images and graphics. Yet, what could be better than creating your own LUTS customized according to your unique requirements? Thankfully, you can do that too in Photoshop.
You can easily convert a collection of adjustment layers into a LUTfile. Customize this file as per your own needs and then use it with just one click in the future. To do this, follow these steps:
Using LUTS is a highly effective method of photo retouching. I have explained various methods of using LUTS in Photoshop. So, either you want to customize your own gradient, use the preset versions, or get hold of other LUTS created by experts, you can do it all in Photoshop.


