PFRE is the original online resource for real estate and interior photographers. Since 2006, it has been a community hub where like-minded professionals from around the world gather to share information with a common goal of improving their work and advancing their business. With thousands of articles, covering hundreds of topics, PFRE offers the most robust collection of educational material in our field. The history of real estate photography has been documented within these pages.
In today’s competitive real estate market, static photos are no longer enough. Buyers expect dynamic, engaging content that brings properties to life. Enter Reptov, a powerful new platform that transforms ordinary listing photos into professional marke ...
For over a decade, photographers from around the world have participated in PFRE’s monthly photography contests, culminating in the year-end crowning of PFRE’s Photographer of the Year. With a new theme each month and commentary offered by some of the finest real estate & interior photographers anywhere, these contests offer a fun, competitive environment with rich learning opportunities.
PFRE prides itself on the depth and breadth of the information and professional development resources it makes available to our community. Our goal is to help real estate and interior photographers be successful while bringing the community together and elevating the industry as a whole.
As an Amazon Associate we earn from qualifying purchases.
The layering tools by Photoshop allow me to create a natural fading effect in my photos. Here, I provide you with a complete breakdown of how to fade an image in Photoshop in three different ways: to fade a section of an image, to fade an image into the background, and to fade two images together.
There are many scenarios that may require you to fade a photo. Fading a photo allows you to display a smooth transition between images. It also enables you to blend two images together or into a background. Moreover, the fading feature allows you to remove unwanted parts of a photo, such as removing shadows and removing a specific color, without breaking the picture.
Adobe Photoshop is a remarkable application that allows you to do all that and more. It offers a comprehensive set of tools and features to create a natural blend between images. So, let’s look at the multiple ways through which you can fade an image in Photoshop.
How to Fade One Section of an Image
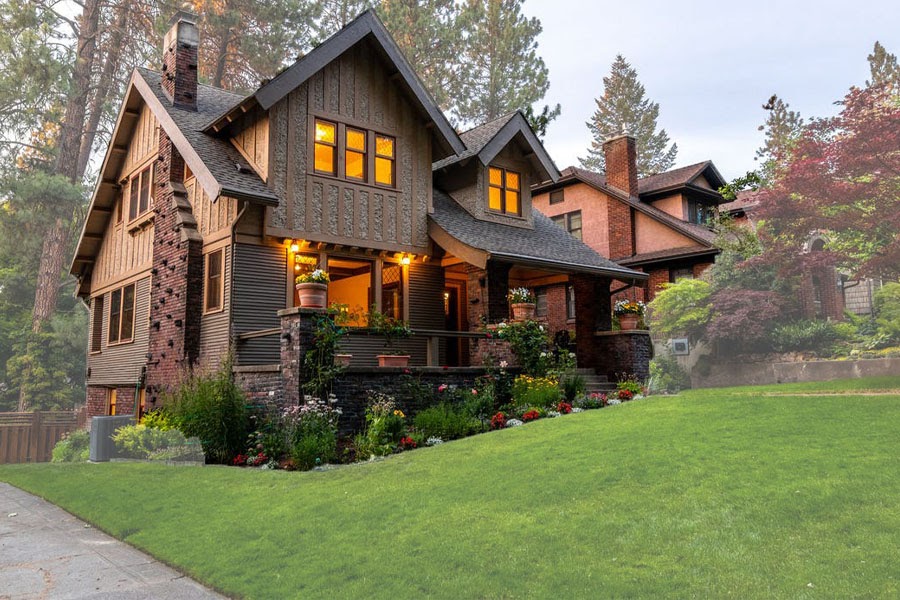
Either you want to make one section of your image more prominent than the others or want some areas to not catch the viewer’s eye, then this is one of the many useful features of Photoshop that can help you. It produces a fading effect to pull the focus on just the selected area.
Choose an image you want to apply the fading effect on and load it on Adobe Photoshop. In order to do this, click on open and select the required picture.
Now, you will find the toolbar in the far-left corner. From here, pick the quick selection tool. This tool looks like a paintbrush making a dotted line.
Tip: If you want to select an irregular section of the photo, pick the Lasso toolbar. It will allow you to draw freehand around the area you want to choose.
Now, select the area that you wish to fade.
Once you have selected the area, go to the Layer tab at the top of the window. You will see a drop-down menu. From this menu, go to New >> Layer Via Cut. This will form a new layer for the area you selected.
As soon as you click on the Layer Via Cut option, a “Layers” tab should appear at the bottom right of the window.
In the newly appeared Layers window, you will see an Opacity slider. When you decrease the value of the slider, the selected area will become more transparent. Set the slider where you like.
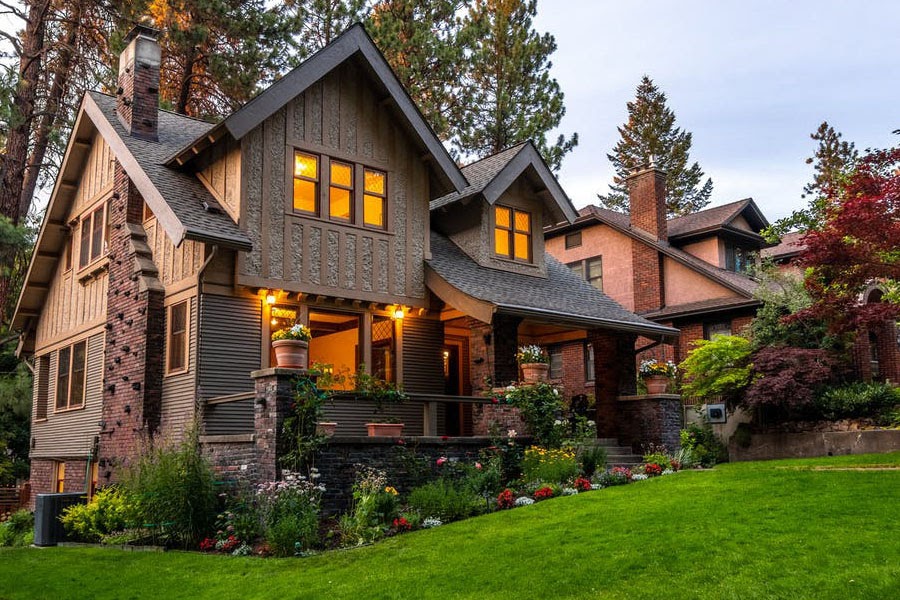
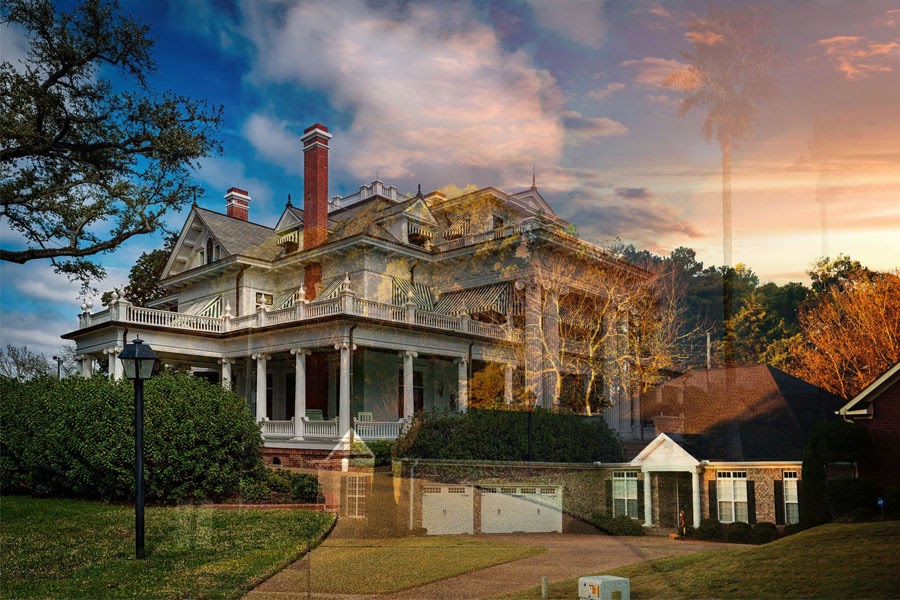
I have faded all the surrounding areas of the house, so the resulting image looks like this:
Make sure that you save this faded image for later use. To save your image, go to File, click Save, enter a name for the new file, select save location, and click OK. Your newly created faded image will be saved in the location you chose.
Now, create a new layer. You can do this by clicking the “New Layer” icon on the bottom of the Layers panel.
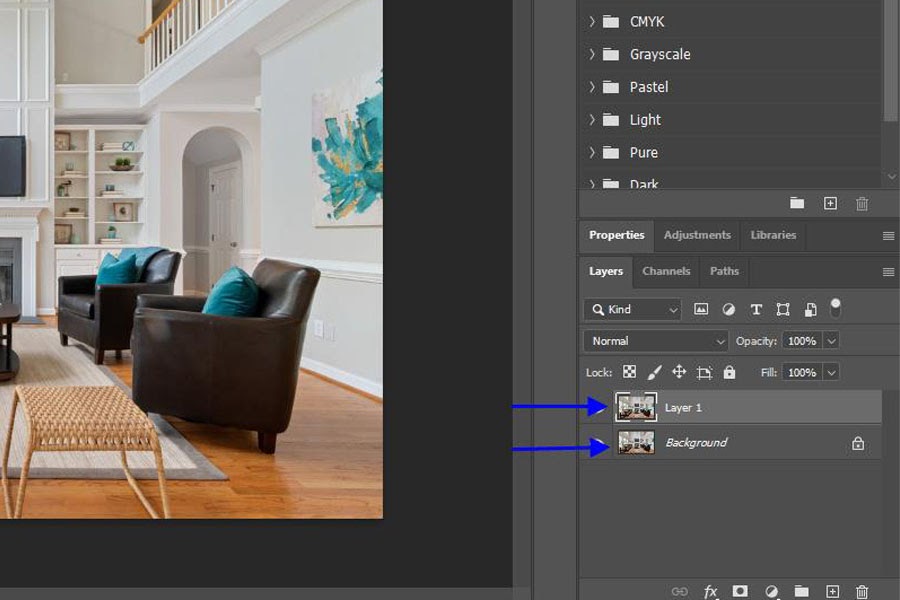
Then, copy the image from the background layer and paste it on the newly created Layer. You can do this by selecting the image in the background layer and copying it onto the newly created Layer
Once the image is copied, the Layer panel should look like this:
Now, you have to create a new background to fill the new layer. Click on the “New Adjustment Layer” on the base of the Layers panel. This icon looks like a half-filled circle.
As you click on the “New Adjustment Layer” icon, a menu will pop up. Select the “Solid color” fill type from this menu. It is best to go with a color that blends well with the image you are working on.
In the final step, pick the gradient tool from the toolbar.
Make sure that you choose the gradient tool in black and white settings.
Now, press down on the Shift key and drag the tool across the whole area that you want to fade.
How to Fade Two Images Together
Here, I will learn two different methods of fading two images together in Photoshop. In both of these methods, I will be using the same two images.
Method 1: The Layer Opacity Method
The first technique that I will look at for blending two images together uses the layer opacity option by Photoshop.
First, to load both images as layers in Photoshop, go to the File menu, choose scripts, and then click on Load Files into Stack.
Now, click the Browse button and navigate and select the picture you want to use. Once the images are selected, click OK.
Now you should see each of your selected images having its own layer in the Layers panel.
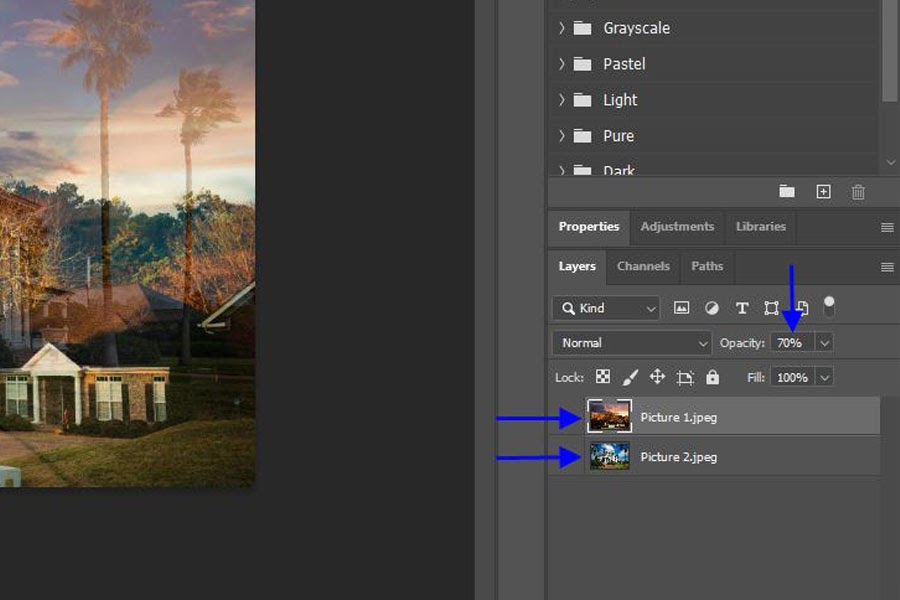
On the upper right corner of the Layer panel, you will find the Opacity option. At this instant, it is set to 100%, making one of the images invisible.
The value of opacity shows the level of transparency. As you will decrease this value, one layer becomes more transparent than the other. This results in the two images producing a natural fading effect.
Method 2: The Layer Mask Method
This is the most popular method of fading two photos together in Photoshop.
Again, I will add both the photos on a separate layer, which can be seen on the Layers panel.
Do make sure to select the top layer, and then click on the Add Layer Mask icon present at the base of the Layers panel. It looks like an empty circle within a filled rectangle.
You should now see a layer mask thumbnail appear next to the previous thumbnail of the respective layer.
Now, pick the gradient tool from the toolbar in the left corner.
After picking the gradient tool, go to the Options bar at the top and click on the down arrow beside the gradient swatch. Here, make sure that you choose the Black and white gradient.
Make sure that the layer mask you created is selected and not the image itself. You can verify this by the presence of a border around the layer mask.
Then, click on the image and draw a black-to-white gradient while pressing down the Shift key.
Look at the amazing blended effect in the resulting image:
Conclusion
I had used different tools of Photoshop, each of which produces different results. Now you know how to fade a certain area of an image, how to fade an image into the background, and how to fade two images together. All these methods help give a nice transition instead of making an image isolated from the rest of the document.