PFRE-Logo-white-bg
Reading
blue-triangle-element

Articles

PFRE is the original online resource for real estate and interior photographers. Since 2006, it has been a community hub where like-minded professionals from around the world gather to share information with a common goal of improving their work and advancing their business. With thousands of articles, covering hundreds of topics, PFRE offers the most robust collection of educational material in our field. The history of real estate photography has been documented within these pages.
All Articles
blue-triangle-element

Latest

Image banner for the March 2024 PFRE Photographer of the Month Winner Alex Vincent, with a featured image of his winning photo titled "Kitchen."

Congratulations Alex Vincent, March 2024 PFRE Photographer of the Month! The theme this month was "Kitchen". Alex Vincent - #906 Yvonne Raaijmakers - #909 Peter Wingfield - #902 Here's what Alex has to say: Thank you for the award of Photographer of th ...

Contest
blue-triangle-element

OVERVIEW

For over a decade, photographers from around the world have participated in PFRE’s monthly photography contests, culminating in the year-end crowning of PFRE’s Photographer of the Year. With a new theme each month and commentary offered by some of the finest real estate & interior photographers anywhere, these contests offer a fun, competitive environment with rich learning opportunities. 

Contest Rules
blue-triangle-element

CURRENT CONTESTS

View / Submit
blue-triangle-element

PAST CONTESTS

View Archive
Resources
blue-triangle-element

Resources

PFRE prides itself on the depth and breadth of the information and professional development resources it makes available to our community. Our goal is to help real estate and interior photographers be successful while bringing the community together and elevating the industry as a whole.
blue-triangle-element

Conference News

No items found

How to Dodge and Burn in Lightroom

Published: 01/06/2023

As an Amazon Associate we earn from qualifying purchases.

There are various ways in Lightroom to create the proper exposure by brightening and darkening certain parts of a picture. Here is a step-by-step guide on how to dodge and burn in Lightroom to bring more life to your real estate photos and attract a potential buyer's attention to the subject.

How to Dodge and Burn in Lightroom

To dodge and burn in Lightroom, the simplest way is to work on a Mask adjustment, use the Adjustment Brush tool, and paint over the image until you achieve the necessary exposure or effect. Another way is to combine Radial and Linear filters to make targeted adjustments.

Dodging and burning lets you adjust a real estate photo's exposure while maintaining details in the shadows and highlights. Dodge and burn is quite a simple process in Lightroom as long as you follow these steps.

An interior photo of a bedroom with white bed and brown aesthetics

Method 1: Using the Adjustment Brush Tool

Dodging and burning are powerful ways to control lighting when post-processing real estate photos in Lightroom. In addition, you'll need the Adjustment Brush tool to intensify or reduce light selectively.

A Lightroom Catalog importing an image of an interior photo

Step 1: Import the Image

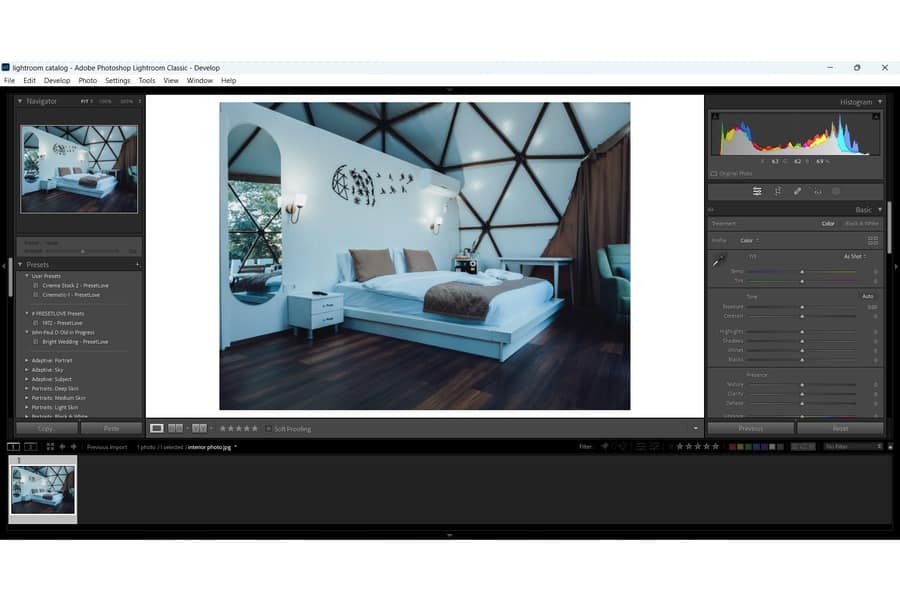
First, go to the Library Module and click the Import button. Next, select the hard drive and folder of the photo you want to import. Once you have the image, switch to the Develop Module.

A Lightroom catalog using an Adjustment Brush Tool

Step 2: Use the Adjustment Brush Tool

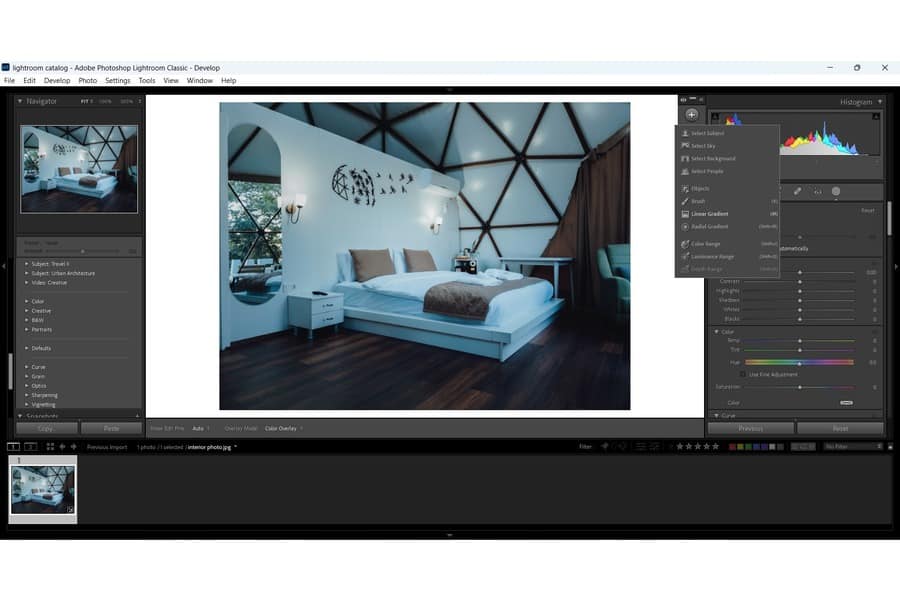
The next step is to click on the masking icon between the Histogram and the Basic tabs on the right side of Lightroom.

  1. When the masking panel opens, choose the Brush from the available masks.
  2. Click on the Adjustment Brush to paint adjustments into the picture. A Mask window should show the various masks you add to the photo.
A Lightroom Catalog modifying the brush settings

Step 3: Modify Brush Settings

For this part, you're going to control the Brush's output. In this way, the initial strokes will look barely noticeable, enabling you to build them up over the same area multiple times.

  1. Go to the Brush settings at the top.
  2. Set the Feather value as high as possible to let the dodged and burned parts blend seamlessly with the rest of the photo.
  3. Put the Flow and Density levels at 50%.
A Lightroom catalog painting over the image with color red

Step 4: Paint Over the Image

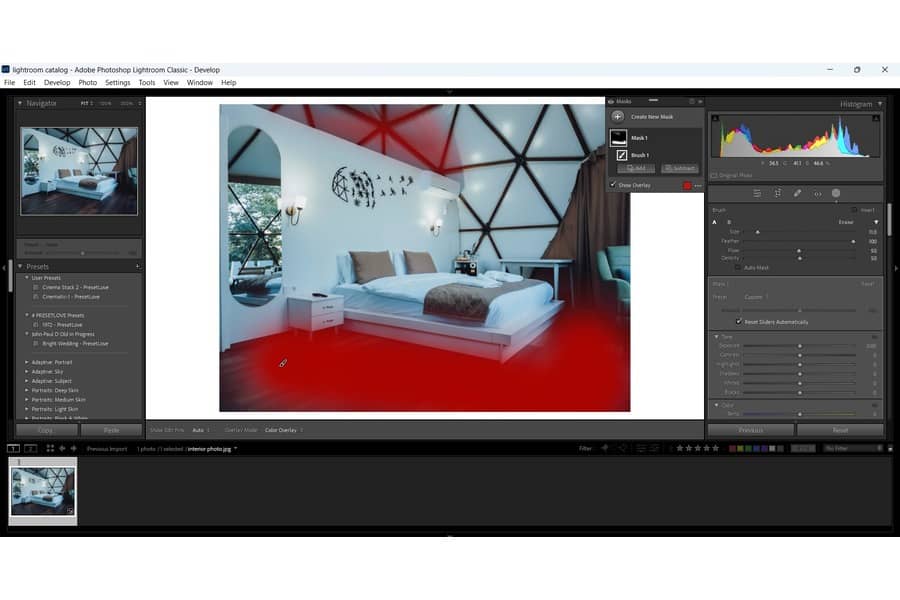
This is where you may need to adjust the Brush Size as you work, especially if the subject has uneven edges or odd angles.

  1. Tick the Show Overlay option in the Mask window. Then, in the box on the right, set the overlay's color to red. The slight red tint represents the Adjustment Brush strokes that create faint adjustments on the image. This results in an increased exposure in that area.
  2. Apply a couple of strokes over the entire area. It's ideal to begin at the center of the part you're adjusting and work outward in even, circular motions.
A Lightroom catalog adjusting exposure and other settings

Step 5: Adjust Exposure and Other Settings

In real estate photography, it's crucial to achieve proper exposure to show details in the highlights and shadows. There shouldn't be too many light or dark areas that will prevent people from seeing important details.

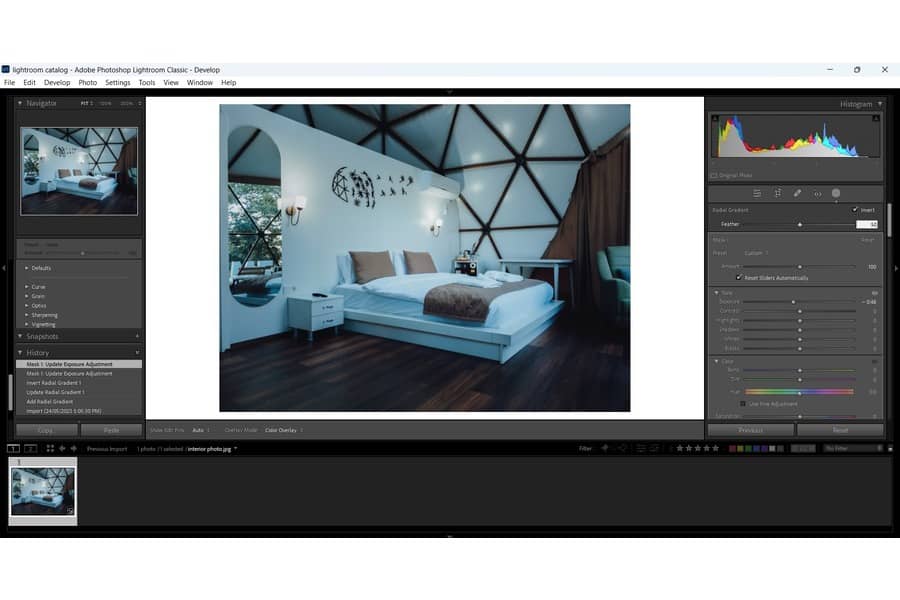
Drag the Exposure slider to the right to dodge or increase exposure. Move the slider to the left to burn or decrease exposure. Increase the Exposure value if you want to dodge or lighten the shadows.

You can also make other image adjustments on the right-side panel. For example, depending on your desired effect, you may adjust the Temp, Tint, Texture, Hue, Saturation, Color, and Sharpness values.

A Lightroom catalog creating a new mask

Step 6: Create a New Mask

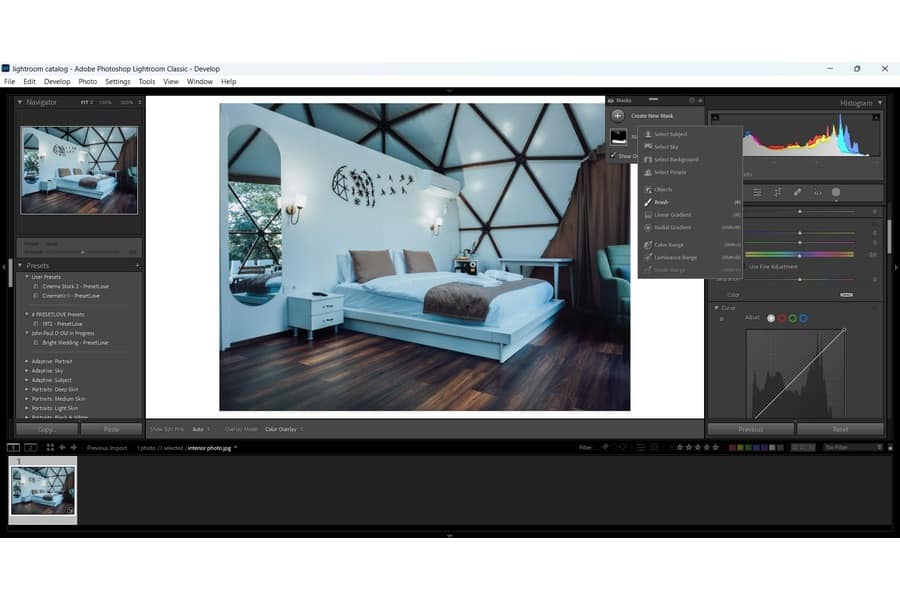
You must create a new mask to burn the photo or darken some portions.

  1. Click on the Create New Mask option in the Mask window.
  2. Choose Brush and wait for New Mask to appear in the Mask window.
  3. You may bring the Exposure slider slightly to darken the area.
  4. If you need to continue adjusting the exposure, select the correct mask before moving the Exposure slider.
  5. There may be parts where you want to remove the dodging or burning effect. Hold the Alt (Windows) or Option (Mac) key to turn the Brush into an eraser. Rub the bits you want to remove.
The final product using the Lightroom creating more contrast between the subject and the rest of the picture

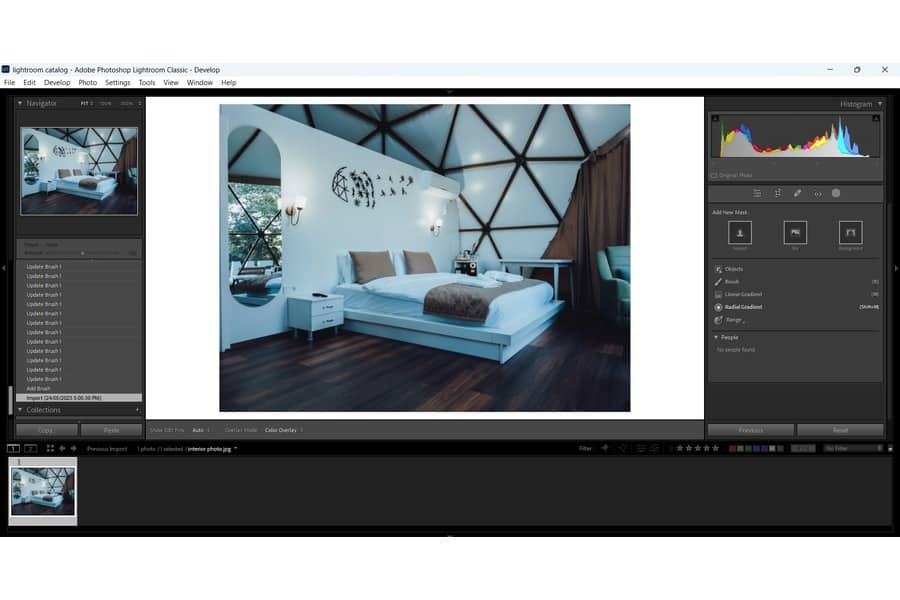
Compared to the original, the results should create more contrast between the subject and the rest of the picture. This is how you can make certain parts of a real estate photo pop more.

Method 2: Using the Radial and Linear Filters

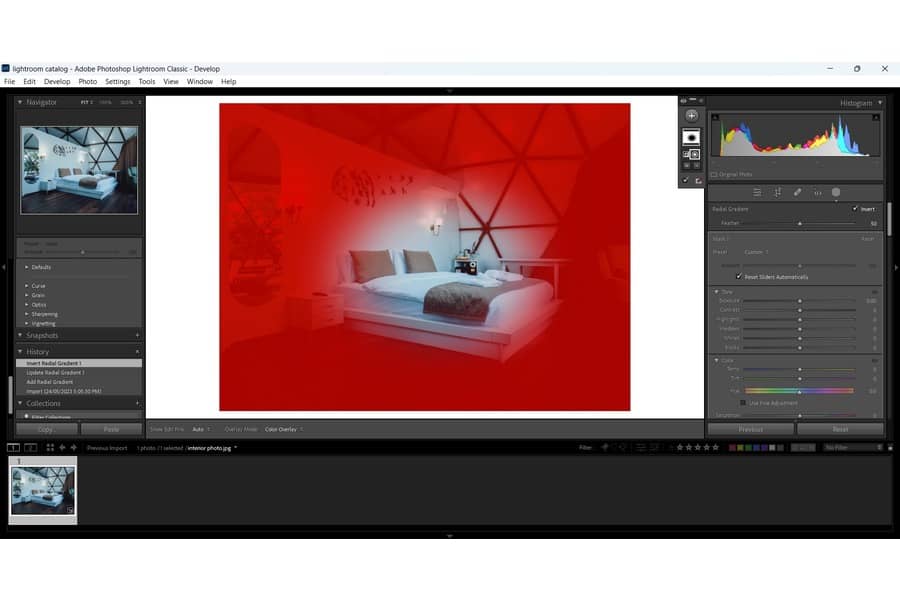
Using the Radial and Linear filters is another way to dodge and burn certain parts of a real estate image.

Using the Radial and Linear Filters burn the subject

Step 1: Burn the Subject

Using the Radial and Linear Filters enables you to edit a photo's isolated area

The Radial Filter enables you to edit a photo's isolated area and highlight certain using an elliptical mask.

Tick the Invert box to apply the mask inside the Radial Filter
  1. Press Shift + M to toggle to the Radial Filter.
  2. Put the Radial Filter over the subject's center.
  3. Tick the Invert box to apply the mask inside the Radial Filter.
  4. Move the Exposure slider to the left.
  5. Adjust the Feather slider to 50 to control the transition's smoothness.
Adjust the Feather slider to 50 to control the transition's smoothness

Step 2: Make Local Adjustments

Make local adjustments

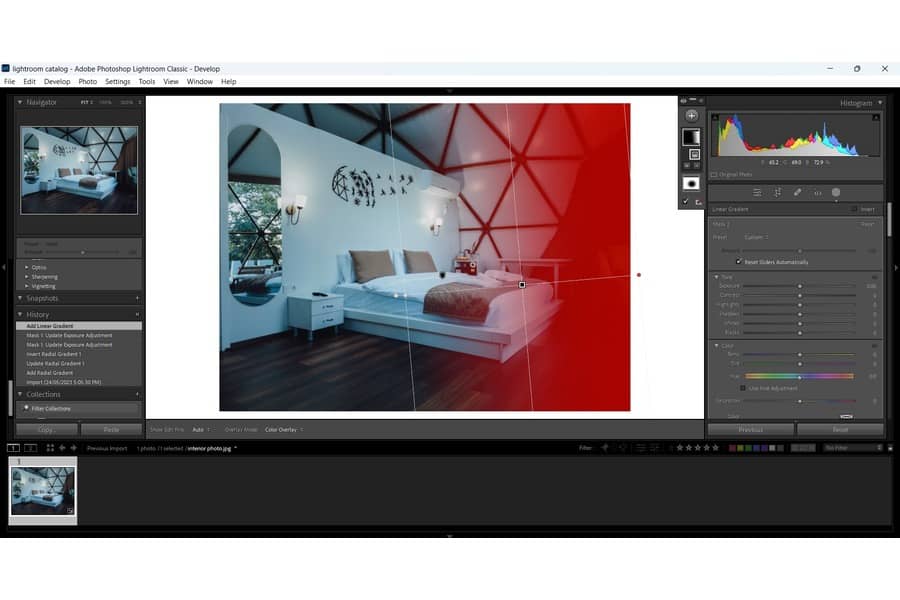
Instead of the Adjustment Brush tool, use the Linear Filter to apply local adjustments, especially for the contrast, highlights, and shadows.

Apply local adjustments for contrast, highlights, and shadows
  1. Press Shift + M to toggle to the Linear Filter.
  2. Position the cursor on the part where you want to apply the even gradient.
Update exposure adjustment

Why Should You Dodge and Burn Real Estate Photos?

The main goal of dodging and burning real estate photos in Lightroom is to improve the image composition in different ways.

  • Create leading lines: In real estate photography, leading lines guide a viewer's attention to a picture's focal point. These lines allow you to frame the subject using differences in shadows and highlights.
  • Make the subject stand out: The subject can either be lighter or darker than the rest of the image. Dodging and burning the subject can help you separate it from the background while adding depth and texture to the picture.
  • Enhance tonal contrast: Tonal contrast refers to the brightness of a photo's elements. High contrast has significantly bright and dark areas. You can increase tonal contrast when you dodge or lighten highlights and burn or deepen shadows.
  • Contour faces: You can also use the dodge and burn technique to edit headshots of real estate agents. Dodging and burning certain parts of an image lets you reduce eye bags, double chin, and wrinkles. Adding light and shade can slim a subject's face and enhance bone structure.
The final product of a white and brown bed with brown aesthetics

Related Questions

How Do You Know Which Parts of a Picture to Dodge and Burn?

To know where to dodge and burn, look at the parts of the image you want to brighten or darken. When burning, target the areas that are further away from the light. When dodging, look for portions that may be quite underexposed.

How to Make the Dodge and Burn Effect Weaker or Stronger?

Hold the Option/Alt key and click on the black button in the tool's center to increase or decrease the strength of the dodge and burn effect. Then, drag the mouse to the left to reduce or to the right to increase the strength.

What Are Dodge and Burn Traps to Avoid When Editing in Lightroom?

Among the common dodging and burning mistakes to avoid is underexposing or overexposing parts of a photo. You may end up with washed-out highlights, muddy shadows, or dull colors when you don't check the before and after. This is why using a soft brush and low opacity is vital when dodging and burning.

Conclusion

To dodge and burn real estate images in Lightroom, you'll need to work on masks, then use the Adjustment Brush tool or the Linear and Radial filters. These steps can help increase tonal contrast, improve composition, and make subjects stand out more in real estate photography edits.

Vendors

Rela Logo
CS6 PSE Logo
HD Photo Hub Logo
FullFrame Logo

Learning Topics

.
magnifiercrossmenucross-circle