


In today’s competitive real estate market, static photos are no longer enough. Buyers expect dynamic, engaging content that brings properties to life. Enter Reptov, a powerful new platform that transforms ordinary listing photos into professional marke ...


As an Amazon Associate we earn from qualifying purchases.
If you are a real estate photographer, knowing how to add bokeh in Photoshop can help you emphasize the main focus of your interior photos. The photos will look professional with the background blurred, and the viewers will only focus on the main subject.
Quick Navigation
Whether you are using an APC camera or your lens can't achieve a shallow depth of field, knowing how to add bokeh in Photoshop can help you improve the looks of your image. You can even achieve the same quality as the photos shot using full-frame cameras and fast lenses.
Typically, bokeh refers to the effects of the camera lens rendering the background out of focus. However, not all camera lenses can reproduce this effect, especially if the lens doesn't have a fast aperture. Fortunately, you can use Photoshop to edit your photo and add the bokeh effect.

Unlike bokeh lenses, where you have minimal control over the quality of the bokeh effect, you can use Photoshop to adjust various elements in the bokeh quality. Let me exploit the procedure and the various Photoshop features, tools, and effects you can use to add bokeh to an image.
Photoshop layers allow you to stack photos on top of each other, carry out adjustments, add effects and then combine them to form one final picture. After opening the image that you want to add the bokeh effects, the first layer will be the background layer.
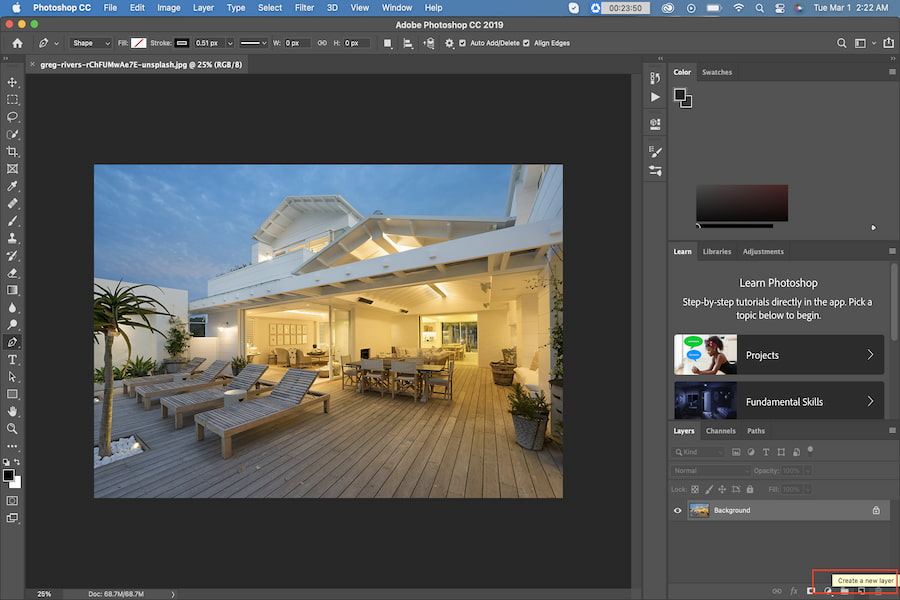
Look for the layers panel, and if you can't find one, click on the Windows menu and select layers. Create a new layer on top of the background layer by choosing the Create a New Layer option. You can use a keyboard shortcut of Command+J for the Mac and Ctrl+J for the Windows PC.
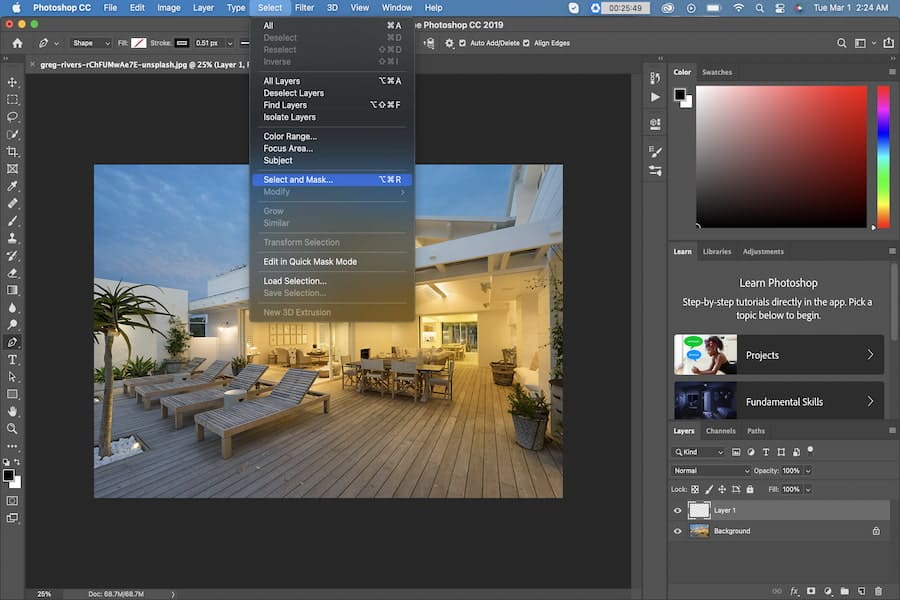
Use this procedure to create two layers with copies of the photo, one layer for the background and the other for the subject. Creating these layers will help separate the background from the subject.
This step aims to remove the background of the subject. However, this feature is only supported by Photoshop version 2015.5 and later. Choose the Select and then Select and Mask option or hit command + option + R if you're using a Mac, or Ctrl + Alt + R if you're using a Windows PC.
Photoshop comes with several selection tools such as Lasso, Magic Wand, and Quick Selection. After choosing the selection tool of your choice, click the Select and Mask option. If you are unfamiliar with the selection tools, it is advisable to use the Quick Selection Tool and click on Select Subject.
The Quick Selection Tool will automatically detect and select the main and most prominent subject in your photo. On the other hand, you can improve precision by using the Lasso Tool to draw selection borders.
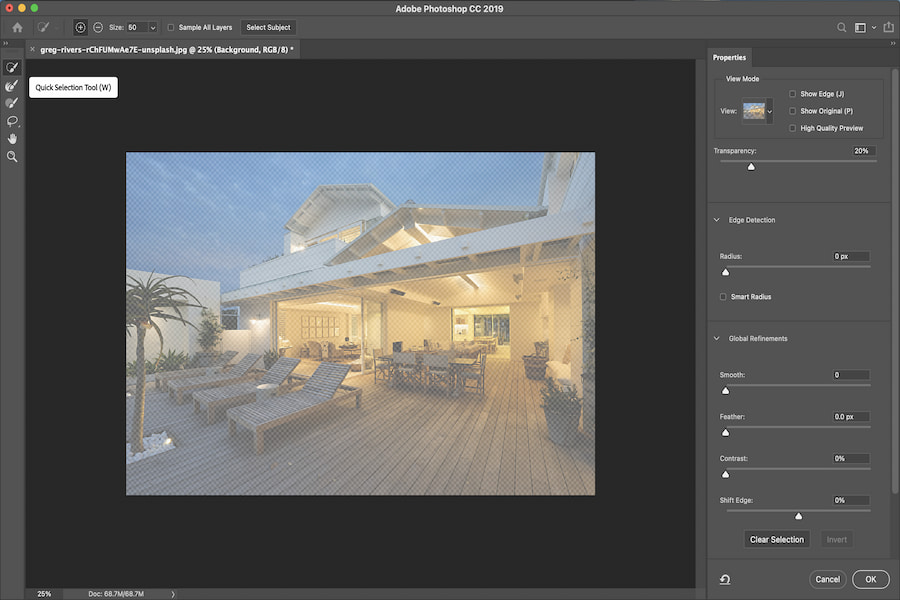
Photoshop comes with different selection View Modes such as Onion Skin, Overlay, On Layers, Marching Ants, Black & White, On White, and On Black. Change the Opacity by bringing the Opacity slider to the middle and then alter the View to On White. Paint the subject using the Quick Selection Tool.
If the subject has parts that look hairy, you can use the Refine Edge Brush to paint. Select Output To to Layer Mask and then confirm by clicking OK. You should see a thumbnail of white layer mask appear.
The Photoshop content-aware fill helps eliminate unwanted areas from an image. Usually, Photoshop replaces the pixels depending on the consistency of the textures and colors. Use the lasso tool to select the subject in the background layer.

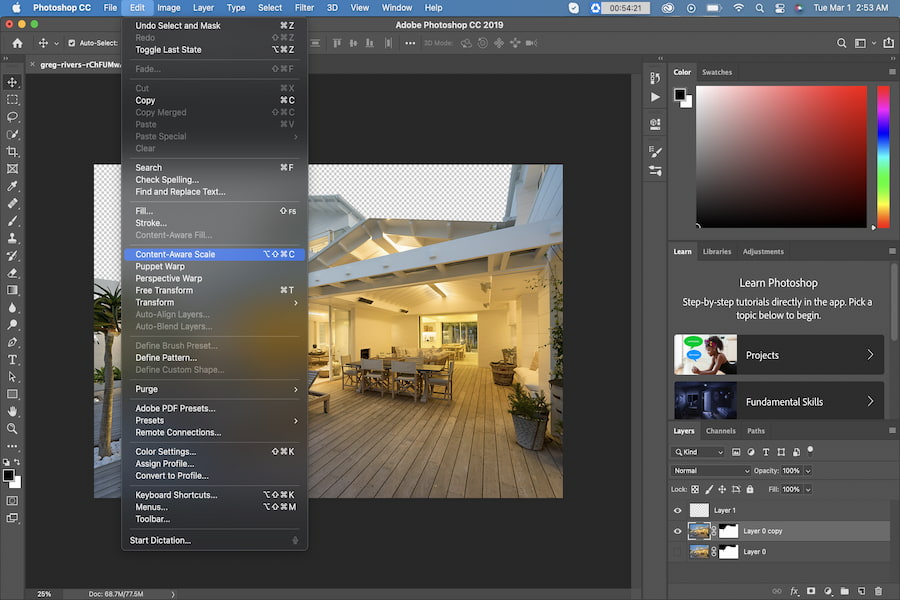
However, you should leave some space around the subject area when selecting. Open the content-aware fill by navigating to Edit, Content-Aware Fill and then cut out the entire subject. If the content-aware fill is grayed out, it means your selection is not right.
Once done, deselect the layer, and the area should now be filled. You can use the Command + D keyboard shortcut to deselect the layer if you use a Mac or Ctrl + D if it is a Windows PC.
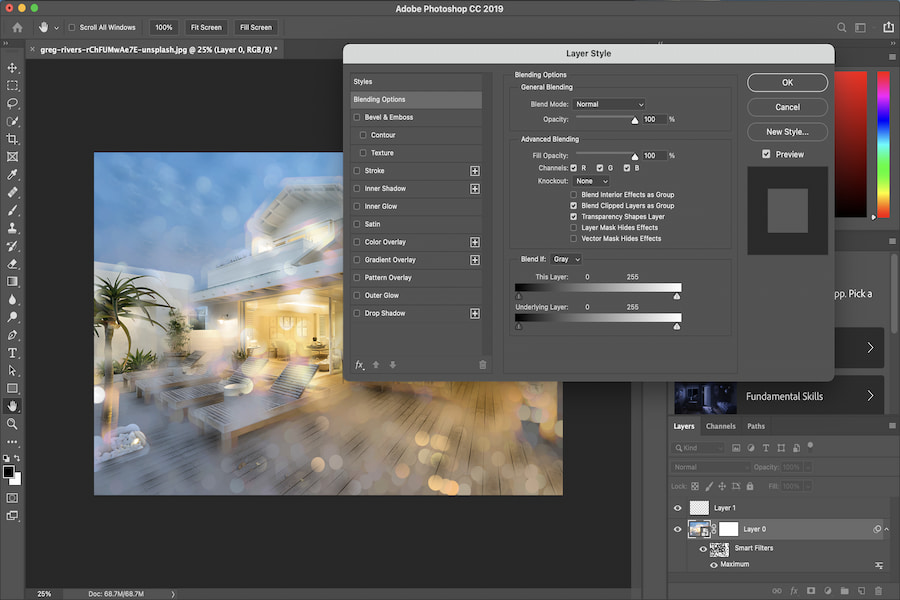
The Photoshop maximum filter helps to chock the Black and spread the white. In turn, the highlights expand to create the bokeh effect. The maximum Filter comes with two options: the reserve and radius, basically squareness and roundness.

Although you can use any option, roundness suits real estate photos best. However, changing the background into a smart object is advisable if you would like to adjust the filter values later.
Although you'll be having some form of a bokeh effect by now, some points might appear unnatural, and you will need to improve them. Improve the bokeh quality by painting on areas that you want the bokeh effect to appear and erase the effect from areas that look unnatural

Blend the layers using the Blend If option. Generally, the Blend If option works almost the same as the Luminosity masks, helping you to mask out some layer areas depending on pixel luminosity. Pop up the blending options by double-clicking the upper layer's right-hand side.
Choose the Blend If option at the bottom of the dialog. Press and hold the Option key on Mac or the Alt key on Windows PC, and then click on the triangle to split the slider into two.
Typically, the slider's left-half helps to smoothen the selection while the slider's right-half marks where the masked out region starts. Adjust these sliders until you achieve your desired result.
Many real estate photographers are equipping themselves with high-end full-frame cameras and fast prime lenses to improve the bokeh quality in their shots. Some of the benefits you can get when using shallow depth of field include:
Beautiful bokeh does not have sharp or hard edges in the background. That means there should be no color or sharpness effect distracting the viewer from the main subject. The circles of light making the effect should also be round and smooth.
You can capture bokeh by using fast prime lenses, especially with full-frame cameras. Typically, the ideal aperture for capturing bokeh ranges from f/1.2 to f/1.4. You can also improve the bokeh quality by moving closer to the subject and increasing the subject's distance to the background.
Yes, the noise of the image can affect how you will add the bokeh effect in Photoshop. For instance, a grainy image with a smooth bokeh will look unnatural. Fortunately, you can use Photoshop to add the corresponding noise to the bokeh.
If you are a real estate photographer, adding bokeh to your photos is the best way to make them visually appealing and ensure the viewers focus on the main product. After knowing how to add bokeh in Photoshop, you don't have to worry even if your lens can't capture bokeh.


