


Congratulations Dave Koch, September 2025 PFRE Photographer of the Month! The theme this month was "Stairwell". Dave Koch - Entry 1099 Alyssa Huang - Entry 1095 Paul-Dan Dragoman - Entry 1098


As an Amazon Associate we earn from qualifying purchases.
Some real estate
Quick Navigation
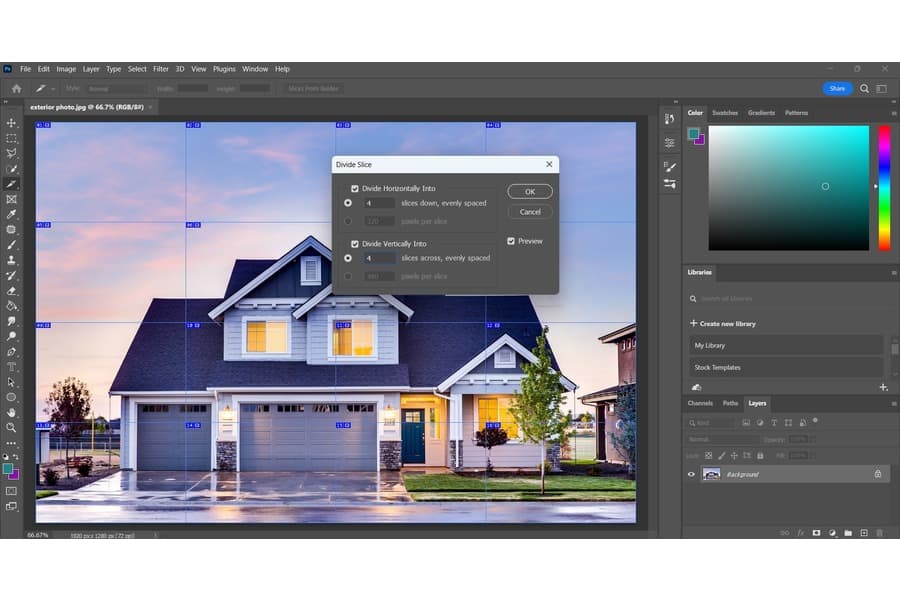
To print a large image on multiple pages in Photoshop, you can use the Slice tool to divide the pictures into individual prints. You may also manually copy selections to print a large image in multiple sheets if you're using an older Photoshop version.
You can only print a small image poster size using the regular way of printing. You need to take care of a few things to ensure good quality when you print large images.

This tool allows you to cut an image into different sections, which you can then export as individual image files. That means you can use this tool to divide up a large photo into smaller slices, then cut and paste the portions into different pages.
Go to the top menu bar and click on File. From the drop-down menu that appears, select New to open the New Document dialog box. Alternatively, you can open the window by hitting on Control + N on a Windows computer or Command + N on a Mac.
Define the dimensions of your canvas by selecting from the predefined sizes or inputing custom dimensions. You can use the following steps to determine the canvas size you need.
The tool lets you cut and print large photos in a non-destructive way. Generally, this tool allows you to save parts of the large photo separately using the following steps.

The next step is to save the photo so you can make edits such as combining with other photo layers, changing blending modes in relation to the layers underneath or applying effects on the individual photos.


When you update the software to the latest version, you can use this technique to print a photo on several sheets.
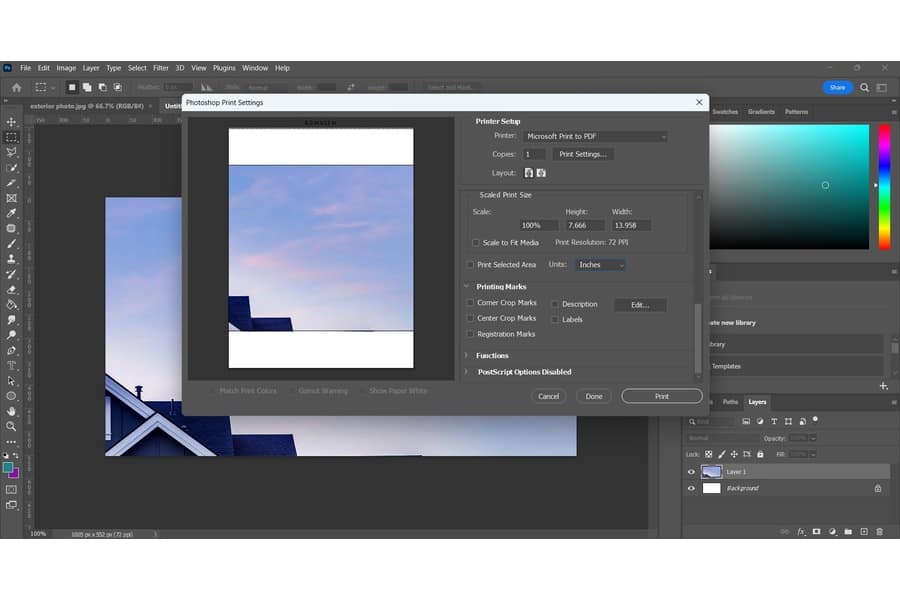
After opening the image in Adobe Photoshop, assess the maximum print dimensions for images in your printer.

Copy the photo selection that you made. Go to the Edit menu on the Photoshop top menu bar and click Copy. Again, go back to the Edit menu and click New to open a new workspace. Paste the selection on the new document without changing other settings such as sizing settings.
Photoshop automatically fits the photo according to the segment that you copied. Click on OK to commit the changes for that selection. Repeat the same procedure for your created sections by pasting them into new files.

Since you will be working with different files, you can use the normal Photoshop printing procedure to reproduce the files individually. This method retains the highest photo quality when you print the sheets.

Note: Some of the Photoshop settings depend on the printers connected to the computer. For instance, higher-end photo printers may support very high resolutions, while everyday office printers might have a lower DPI.
You can print multiple images on a single page in Photoshop using the built-in Contact Sheet II feature. Choose Automate from the main menu and then select Contact Sheet II. Choose the folder with the images you want in your contact sheet, set the page size, resolution, mode and bit depth. Define the image arrangement and then print.
The best large-format photo resolution in Photoshop depends on the viewing distance and the print medium. For instance, 300 ppi is suitable for prints that will be viewed up close, such as framed prints, photo books, or magazines while 100 to 240 ppi is great for banners, posters, large framed photos, or signage that will be viewed from a distance
A PDF file and TIFF are among the best digital formats for printed images on several sheets. While these are typically heavy, they avoid conversion issues concerning color and sizing, ensuring clarity on a printed photo. However, Photoshop allows you to print high-quality photos without having to export to PDF first.
You can use the Slice tool or manually copy selections to print using Photoshop. Learning how to do this properly lets you print large images without sacrificing quality and resolution. Simply divide the photo into different portions, save them as individual photos and then use the normal Photoshop printing procedure.


