


Congratulations Alex Vincent, March 2024 PFRE Photographer of the Month! The theme this month was "Kitchen". Alex Vincent - #906 Yvonne Raaijmakers - #909 Peter Wingfield - #902 Here's what Alex has to say: Thank you for the award of Photographer of th ...

As an Amazon Associate we earn from qualifying purchases.
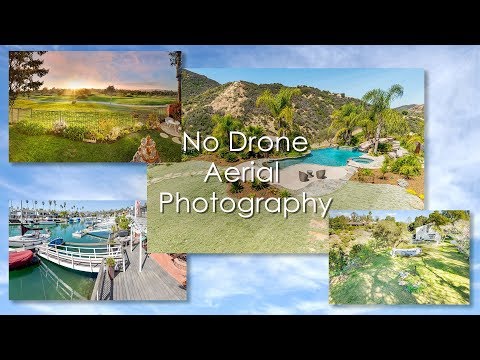
the years, I've pointed out how important it is to be able to shoot at an elevated point of view when shooting the front exterior shot. Before the advent of drones, the standard way to get your camera elevated was a pole. You could either put your main camera on the pole or use a smaller lighter camera.
Then several tripod manufacturers started to make large tripods that would support an extension tube that could reach 15' to 20'.
Drones like Skydio 2 initially provided a great way of getting that elevated front exterior shot but as drone regulations have evolved to be more complicated and neighbors paranoia about being watched or photographed has gotten worse, using a drone for real estate to get a few front exterior shots has become a pain.
Nathan Cool illustrates that it's still pretty easy to just use a big tripod. Even with just using a drone alternative, you can still get some pretty great elevated shots without much hassle. You can try taking up some drone training for great shots. Sure, there are some properties that will benefit from a drone but most properties don't need a drone.


I noticed that they are labeld "super high" and "super giant". When I looked at B&H it looks like they are the same model number @ $ 409.00-- I remember them as being more money. Can anyone give insight to the model number, material, price?
I have a 45ft (about 6ft collapsed) mast that mounts a trailer hitch. It is heavy and cumbersome but it works. I used this long before drones were a thing. I have used it more and more over the last year. I also have a Passport Hover Drone that is small enough not to require registration and shoots in 4K however you must shoot in near zero wind. I am also on my 3rd Hover Drone. One landed in a pine tree (it's still there one year later) and one lost a connection and flew over a Home Depot in Auburn, Al never to be seen again.
Of course I did have someone call the police just a few days ago because they had young daughters and I had a drone. I completely understood.
I am still using my painters pole which gives 8-18 ft elevation. Even at 8 ft it can provide an more engaging angle. Interestingly, going higher is not always better. On single story homes, showing more roof is not always attractive and the back yard power lines can become more visible. On the other hand, two story homes look better with a 18 ft elevation, putting the viewer's eye more on a level with the middle height of the home.
I really don't see the need for a big tripod, as I can use the pole faster. And since there is lots of light outdoors, fast shutter speeds keep the pole wobbles from affecting the photo. Admittedly, my 3-1/2 lbs of 5D mkII is at the limit of what I can raise on the 18 ft setting of the pole. To go higher I would need a way of bracing the end on the ground as I walk the pole up. I often use the curb in this way for the 18 ft setting.
@Steven - This is the tripod Nathan is using on Amazon (https://amzn.to/2CKYiNL) They call it a "Manfrotto 269HDBU 24-feet Super High Aluminium Stand with Leveling Leg" - $409.88. It is all Aluminium.
The single biggest advantage that camera-on-pole has over drone is the ability to back the camera right into the trees.
I use an a6000 on a painter’s pole for all homes 2-stories it more. Very often there are tree me soeckling the front yard. Often they are positioned right where the camera ness to be positioned. With my setup, this is not a problem. Just back the camera into the tree until you see leaves bunching into the frame. Then move the camera slightly forward till the leaves vanish from the frame. Take the shot.
This would be impossible with a drone. It would be foolish to try to get a drone even CLOSE to that position. The slightest whiff of winds put the props into the branches and then put the drone out of commission.
I have an inexpensive Amazon Arca-style clamp on the top of the pole so I can put the camera on/off the pole in a flash. I will usually put it on the pole and take the man front shots, pull it off and shoot one-handed for the grounds shots toting the pole in my left hand. Wander around back and shoot all ground level shots then re-attach to the pole and take elevated exteriors of the house. It’s easy-peeezy.
The tripod that Nathan shows (with the adjustable legs) is $800 at B&H. There is also the collapsed size to deal with if you aren't driving a pickup or SUV. My 15' painters pole just fits cross-wise in my Honda Accord with the rear seat down and getting something bigger in the trunk might not be possible. I've found my pole to be very adequate for the bulk of raised images. I will be adding a drone early this year to be able to cover large properties, waterfront homes, hillside shots, etc. I'm not convinced that the 15'-24' range is better covered from a ground mounted mast when factoring in having to haul the big tripod around all of the time (and needing a bigger car to move it with). Drones are also all the buzz, so it's getting to be de rigor to have one.
@Brian Kurtz, Poles can be used inside too where a drone might be a bit too dangerous. I use mine frequently to photograph upstairs landings and second story family rooms. It lets me move back and use a longer focal length. Getting around trees is great. I use the tree sometimes to border the image and agents love it. I think I'd be going through lots of propellers trying that with a drone. Poles can also be much faster. I can have the camera mounted on mine and taking photos in 5 minutes or less. Properly, a UAS operator should be going through a checklist that would take longer than that before flying.
I built a pole for less than $50. The big savings was finding a 21' (3 sections x7') on closeout at Home Depot making the Manfrotto plate the most expensive item. I have since switched my entir system over to Arca Swiss where compatibles are much cheaper. Most technical design challenge was connecting the top mount system to the threads on the painter's pole as those threads are unique. Then dawned on me - painters roller and twist/remove the metal, leaving just the handle. NOTE: Make sure has metal ring on handle as original build with pure plastic handle cracked! Additional design feature modeled after an option on a commercial unit, created a platform (cut some scrap 1/4 MDF had laying around and painted black for professional look) extending just beyond my lens. Get 2 large "L" brackets, drill 2 holes straight through the handle and attach to both sides with 2 bolts. Now simply bolt the top platform to the "L" bracket. The camera mount attaches to the platfom with standard 1/4 20 hex screw. Arca-Swiss was straight to the platform, but with Manfrotto had to put an additional piece of wood, raising it higher to accommodate the drop down latch.
A 7', a little too tall to frame/focus when attached to the pole, so before attaching to a pole always pre-frame at ground level as remote can't adjust the zoom and do a tap focus, then attach and raise the pole.
Years ago I used to shoot with a 21' wonderpole. At the time I didn't have a wireless trigger, so I was limited by how far I could stretch with a cable release. In the end it wasn't worth the effort. Fortunately I've still got the pole.
Now that I have a CamRanger in my kit, am thinking I should bring it back out. Does any one have any suggestions or videos of how to then mount my phone to the bottom so I can control the shutter with one hand while holding the pole with other.
I'm also thinking of getting the least expensive and lightest camera to put up there, instead of my 5D. Any suggestions there would be great.
@Kevin - Take a look at this product: https://youtu.be/ZWiBSF5cobU. As for which camera to use, I would use a Sony A6000, A6300 or A6500... CamRanger will support Sony cameras soon although they don't support Sony now. There are other ways to control the A6000 from a smartphone - see: https://youtu.be/BFmzoZbcrqM
Whoa! That looks awesome. My first through was, "how do I dispose of my old pole???" 🙂
I saw that the new CamRanger will support some Sony cameras, but love the idea of using my phone. Will definitely check that out.
Thanks for the help!